
Actually I always think about this one... but it always distructed by other activity just like blogwalking or something, till I forgot what the blogs are for... Realize that I'm not so good on English, so briefly I describe it all with image that I hope quitely powerfull...
Just like i told you before, I really wanna sharing this on so badly... header! When some friends of mine ask me bout that, directly this post came up... Please be seated... watch the show go on... if anyone knows about what should we do easiely, let me know with encript that on comment below... Gosh... I'm good!!! Lol!!!
Make a Header
* Coffee with some appropriate milkshake... hot or cold is whatever you want. Do not forget about Samsu or Marlboro please!
* Stabil connection on your computer...
* A paincake or something... pop corn what ever!
* Open then the Sotosop, open new blank document with appropriate size for header.
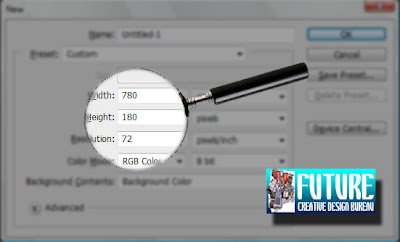
You should check your blog template for GOD's sake! Here you need to be patient. I use 780 x 180 px.
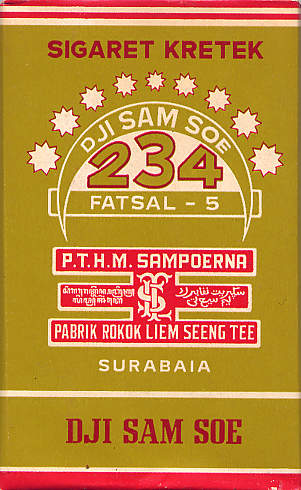
* Image material you use to do. Remember that this image will appear for a long time on your blog, not on mine... so choose wisely what theme do you want to use concern about your blog content.. I use a technology theme here for my header... so.. it will be fullfill with computer gadget or something...
Making image header with Shotoshop
Open first your photoshop, then get a new blank document... Go to menu File > New. On dialog New box, fill this width=780 px and on the height=180. Do not forget the 72 px/inc resolution. Click OK if done!
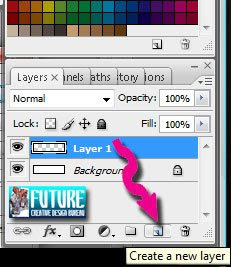
Make a New Layer by hitting the icon New Layer from the bottom of the palette box... and the next... watch the screenshot i gave you... it's more attractive than my words, Lol!!!
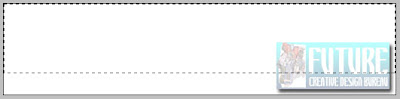
 Click Marquee Tool (M)
  to make a selection in the area we wanna select...
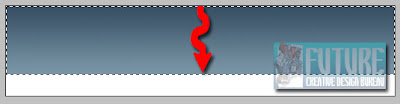
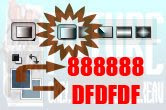
Hit Paint Bucket Tool (G), on Paint Bucket Tool, choose Linear Gradient just like the image shown below...

Choose Magic Wand Tool (W) to select the white area of image... (remember, it's aon Layer BG). Drag the mouse up to down just like we practice on How create a Logo... Done?
Again for the color selection.. it's up to you guys... Lol...

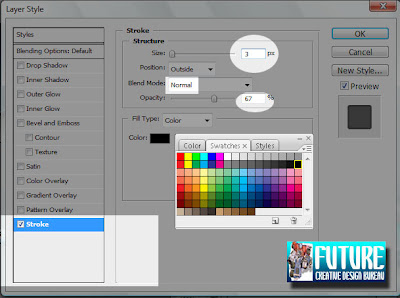
Pick Line Tool (U) :

Set the parameter just like this:

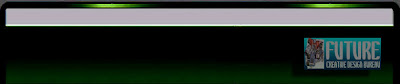
Drag the Line Tool (3px) blue with white... then we make a new Layer, repeat that step (dragging the Line Tool). Go to Fill with #000000 then the next with #FFFFFF... Got it???
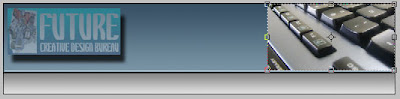
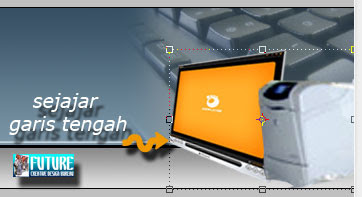
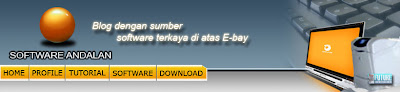
Now feel free to add any kind of image to orn your blue and white header... here's mine!


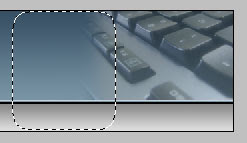
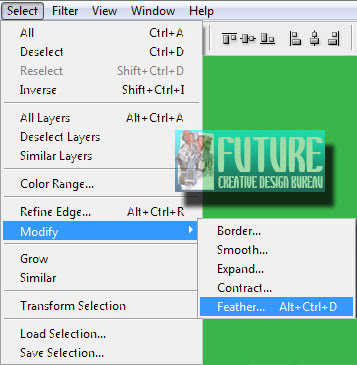
Actually, there's a lot of tuts that show this effect, it could be with a Mask Layer... or something... but for brief act, I prefer use Marquee Tool... check the feather box like the image above! And you can see the result like this :
Well... good job!!! add some more image on it... confuse about the image? find in internet, there's lot of 'em... Viola!

Don't go around!! Finish that stuff with a Logo or something... Hey we've talked about it before right?? Remember this! Click Marquee Tool (M), pick the Elliptical one...

Again choose Elliptical Marquee (M), after that logo appear on our document, set the parameter just like this :
 Next time we'll do is making a Shadow of that ball... that's why I ordering you to make a new circle below the ball like this :
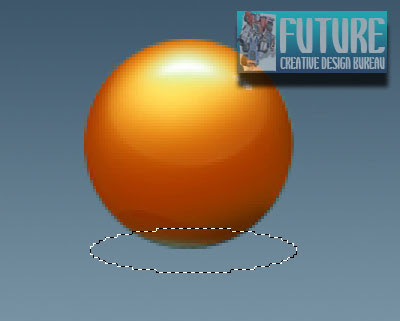
Check this out :
 oooooo GOSH what are you gonna do Mister??? Really is that it??? Where's the theme for Heaven's sake??? Type anything you wanna appear on that header that represent your blog... Right hand click on the palette layer :

Gotta headache??? Stomacache??? Tootache??? Same to me.. Lol!!! Sir... do this step.. last but not least.. Go to Menu Layer > Flatten Image to merge all the layer becoming One New Layer Background!!!

Save the image, go to Menu File > Save in .JPEG/JPG or .GIF or .TIFF or .PNG or SOMETHING YOU LIKE SIR!!!
After you've done all that steps... here's the final cut!!! Upload your work into host you like... confuse??? Check this out about hosting image! Go to your page element. Or get the code from the host like Ripway, Uploadhouse, Photobucket or others.
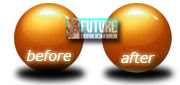
Other samples :
 Click thumbnail to Enlarge!
View Indonesian Version Here and get the E-Book of it!!!
Related Topics :
Air Brush Style Dancing Text Animation Vektor with Photoshop Menu Navigation Abstract Background Rain Effect Matrix Effect Firing Text Retouching Image Transparent Image
Just like i told you before, I really wanna sharing this on so badly... header! When some friends of mine ask me bout that, directly this post came up... Please be seated... watch the show go on... if anyone knows about what should we do easiely, let me know with encript that on comment below... Gosh... I'm good!!! Lol!!!
Make a Header
* Coffee with some appropriate milkshake... hot or cold is whatever you want. Do not forget about Samsu or Marlboro please!
* Stabil connection on your computer...
* A paincake or something... pop corn what ever!
* Open then the Sotosop, open new blank document with appropriate size for header.
You should check your blog template for GOD's sake! Here you need to be patient. I use 780 x 180 px.

Please... it's you to figure out the size of your blog template header...
* Image material you use to do. Remember that this image will appear for a long time on your blog, not on mine... so choose wisely what theme do you want to use concern about your blog content.. I use a technology theme here for my header... so.. it will be fullfill with computer gadget or something...
Making image header with Shotoshop
Open first your photoshop, then get a new blank document... Go to menu File > New. On dialog New box, fill this width=780 px and on the height=180. Do not forget the 72 px/inc resolution. Click OK if done!
Make a New Layer by hitting the icon New Layer from the bottom of the palette box... and the next... watch the screenshot i gave you... it's more attractive than my words, Lol!!!
 Click Marquee Tool (M)
  to make a selection in the area we wanna select...
Hit Paint Bucket Tool (G), on Paint Bucket Tool, choose Linear Gradient just like the image shown below...


Choose Magic Wand Tool (W)
 to select the white area of image... (remember, it's aon Layer BG). Drag the mouse up to down just like we practice on How create a Logo... Done?
Again for the color selection.. it's up to you guys... Lol...

Voila!

Pick Line Tool (U) :

Set the parameter just like this:

Drag the Line Tool (3px) blue with white... then we make a new Layer, repeat that step (dragging the Line Tool). Go to Fill with #000000 then the next with #FFFFFF... Got it???
Now feel free to add any kind of image to orn your blue and white header... here's mine!

Don't get lost... Click (M)...

Set like the image told you :

Actually, there's a lot of tuts that show this effect, it could be with a Mask Layer... or something... but for brief act, I prefer use Marquee Tool... check the feather box like the image above! And you can see the result like this :

Well... good job!!! add some more image on it... confuse about the image? find in internet, there's lot of 'em... Viola!

Jeng jeeeeeeeeengggg...!!!

Don't go around!! Finish that stuff with a Logo or something... Hey we've talked about it before right?? Remember this! Click Marquee Tool (M), pick the Elliptical one...

Again choose Elliptical Marquee (M), after that logo appear on our document, set the parameter just like this :
 Next time we'll do is making a Shadow of that ball... that's why I ordering you to make a new circle below the ball like this :
Check this out :
 oooooo GOSH what are you gonna do Mister??? Really is that it??? Where's the theme for Heaven's sake??? Type anything you wanna appear on that header that represent your blog... Right hand click on the palette layer :
Eng ing eeeeennnnnggg :) how's it??? Don't go anywhere fellas...!!!

Add some words like this : (text effect... whatever! Lmao!)
Gotta headache??? Stomacache??? Tootache??? Same to me.. Lol!!! Sir... do this step.. last but not least.. Go to Menu Layer > Flatten Image to merge all the layer becoming One New Layer Background!!!
Here you go... how about you guys?? You gotta better than this, right...???
heheheheh... Cheer Up!!!

Save the image, go to Menu File > Save in .JPEG/JPG or .GIF or .TIFF or .PNG or SOMETHING YOU LIKE SIR!!!
After you've done all that steps... here's the final cut!!! Upload your work into host you like... confuse??? Check this out about hosting image! Go to your page element. Or get the code from the host like Ripway, Uploadhouse, Photobucket or others.
Other samples :


 Click thumbnail to Enlarge!
Perhatikan size image, semakin besar size image tersebut, maka proses loading dari page kita pun berdampak kurang baik, ya entah buat kita sendiri ataupun buat para blogger yang hanya ingin menorehkan sepatah dua patah kata di shoutmix... pertimbangkan itu kawand!!
Terimakasih kepada mba'... bulan dan bintang, karena akhirnya berhasil menggugah hati saya untuk kembali ng-Blog!
View Indonesian Version Here and get the E-Book of it!!!
Related Topics :


Smile for U :-)
ReplyDeletehmmm... nice tut...
ReplyDeletehttp://www.pucciom.com/
@ Sedona : smile to you too :)
ReplyDelete@ Anonymous : ???
This is outrageous!!! TFS!!!
ReplyDeletethis is the greatest :) t'ank's
ReplyDeleteWaddow...english qw pas² an euy!! Jdi gak tapi ngerti,hehe..^_^
ReplyDeletekang..nanya leh gak?tempat dunlud font n brush yg bgus buat PS cs4 dmn?
font bsa gugling dengan kiwot '1001 font' trus buat brushnya, silahkan di tengok di koleksinya Brush King. saiia banyak ngesave punya mereka :)
ReplyDeletehappy hunting!