
The fire effect is a popular computer-based visual effect often animated in real time. D'ya guys wanna have that ability? It's easy... I got this on neighbor when i was tired from Blogwalking... Credit goes to them ofcourse, salutados!
OK we start it up now...

1. Get the coffee and smoke just like usual... Open the Sotosop...
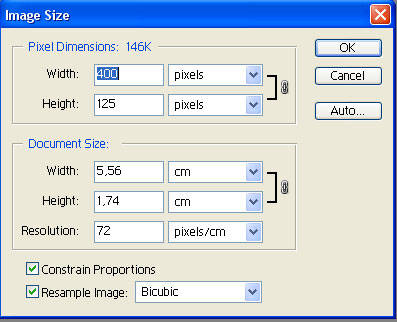
2. Click File > New, the parimeter is up to you guys! Take Widht 400 px for pixel dimension... just like the pic below..
3. Click the Bucket Paint Bucket Tool (G),
fill Black (#000000) for the foreground (it's up to you actually, :>)
4. Choose Text Tool (T), the icon-text on Tool Box opened, click right hand the small arrow icon on the corner of the T Icon...
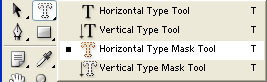
choose Horizontal Type Mask Tool
5. Get your beautiful awesome cigarette.... dji sam soe or marlboro or... what ever!
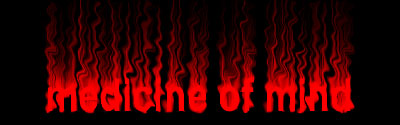
6. I get this type:

Your screen is getting red? Hahahahhah... Let it be! Don't be panic at de disko!!!
7. Set your Foreground Color into Red = #FF0000...

8. Click on the outside area of your work 'till you get this on that Layer...

9. Click Alt + Delete, the selection part
becomes Red or the color you picked...
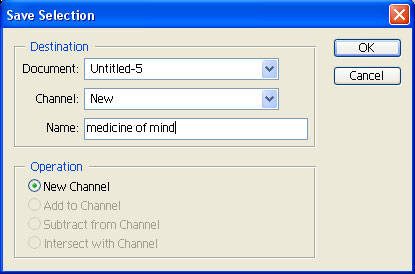
10. Click menu bar, Select > Save Selection, Name it just like i do on this pic (again it's up to you guys). Do not forget to click OK.

11. Click Image > Rotate Canvas > 90 CCW

12. Choose Filter > Stylize > Wind...
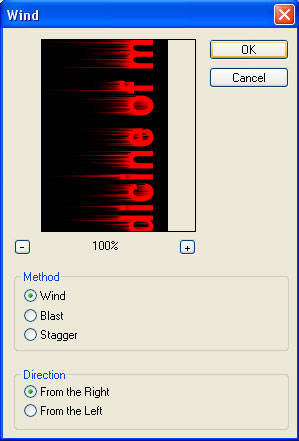
13. Click Ctrl + F 2x...
14. Back to 1st Layer position with open Image > Rotate Canvas > 90 CW
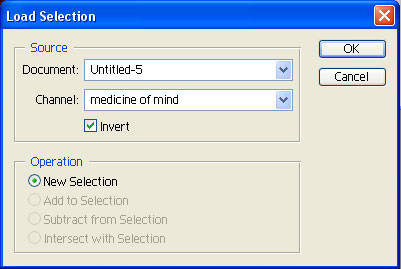
15. Go to menu Select > Load Selection, remember to activate the Invert section.
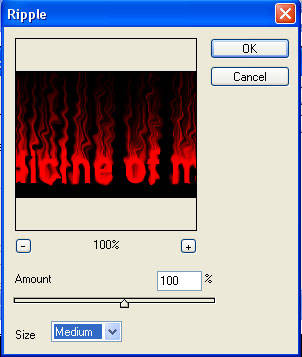
16. Go to Filter > Distort > Ripple..
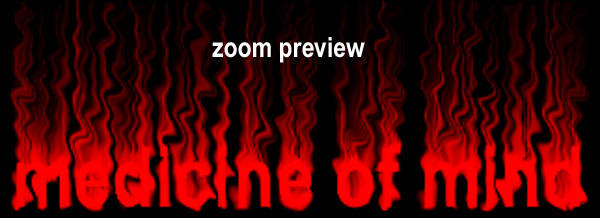
17. Finaly... It's a wraaaaaaaaaaaaaaaaaaaaaaaaaap!!!
Good Luck!
View Indonesian Version Here!
Related Topics :


wah ini cool beud.. thnx for the tuts... it's so nice :)
ReplyDeletethnx anya..
ReplyDeleteyou're so beautiful too :P
kunjungan balik........
ReplyDeletewoww... it's so fast :) thnx
ReplyDeleteLagi Mencoba Buat :)
ReplyDeletemakasih banged bunda udah mo repot2 sampe di sini :)
ReplyDeleteterimakasih tutorialnya mas :)
ReplyDeletesama-sama mba'e...
ReplyDeleteuhh hot banget nich.
ReplyDeleteapanya yg hot kang?
ReplyDelete