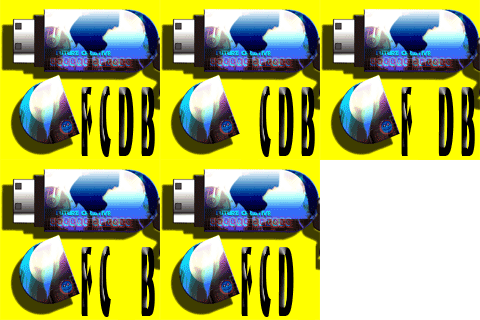
 Hi there again... this time I am gonna show you how to create a magnifique Flash Disc using this magic application, CorelDRAW...
Feel free to post your critics, requests, requirements or whatever-related comments here. Don't be rude,
Owners of this website aren't responsible for content of comments.
1. Open the application, make a new blank document ofcourse, what else!

2. Draw a circle with pressing F7 (Ellips Tool), do not forget to hit in the same time the Ctrl to get the whole circle in line like this...

3. Block that circle and make it double with pressing Ctrl + D, double it in one straight line just like this...

4. Again draw a persegi panjang with Rectangle Tool (F6) like the image shows below, put the box right in the center position between the first and second circle!
5. Block all the image, click Weld from the Menu Bar to merge all the stuffs.. Now you have a landscape capsule like this...
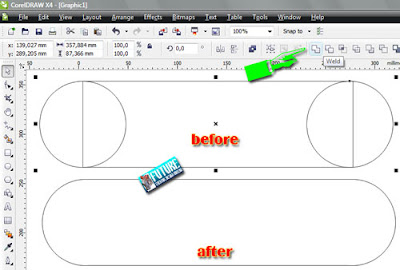
6. Again and again, block that capsule and press F11, the Fountain Fill came up, leave the default, click OK to terminate it.
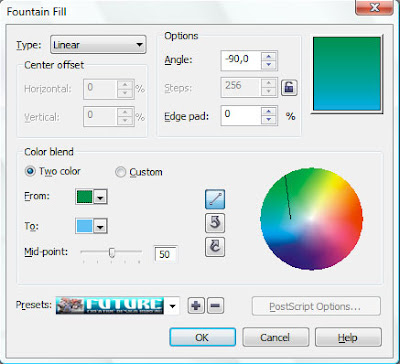
7. See the result after you colorize that image...

8. Make it double after blocking it and hit Ctrl + D, fill with #FFFFFF, set the second capsule smaller than the first one!
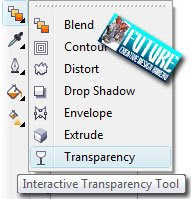
9. Kiss the Interactive Blend Tool on ToolBar, pick this kinda ... pic ... Interactive Transparency Tool. Do this thing!

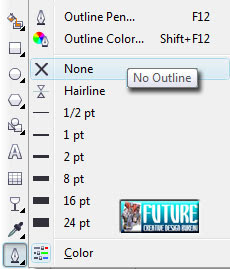
10. Flatten all that image, lick the Outline Tool on Toolbar, pick this No Outline! Voila, all the lines disappear! Don't get bored if I say this to you.. 'Block'... Lmao... yupp, block all image, push Ctrl + G to merge all the two images. Now you gotta shiny gorgeous capsule just like mine here!


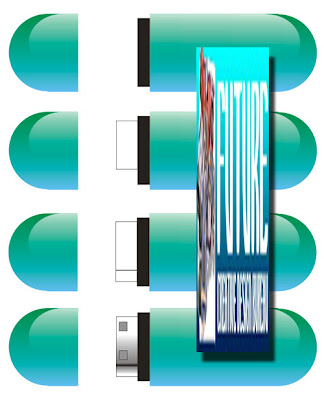
11. Next thing to do is... broke the capsule into two pieces, you can do that with making a white box without outline... Got it? Go on.. after that, we'll gonna get this image...

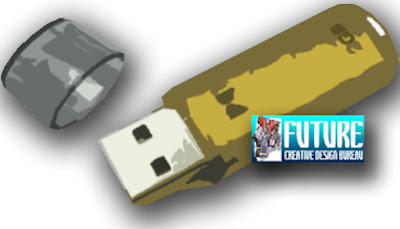
12. Add your capsule with all USB acessories stuffs... Hell yeah!!! follow me then...



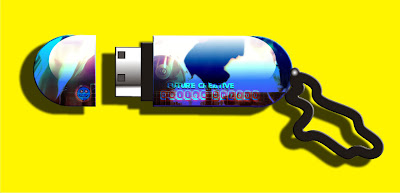

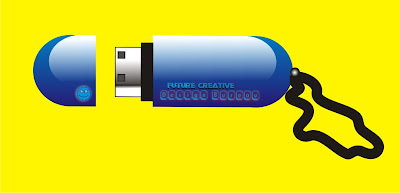


gila men hasilnya mantap abis...cara pembuatannya kayaknya sedikit rumit ya
ReplyDeleteThank you for the visit, good afternoon with happiness and smiles. Hugs.
ReplyDeleteduh, otakku gak sampe nih. hebat banget coba yg bikin artikel ini.
ReplyDeletelol actually i also dunno how... thats y i put a tagboard beside it.
ReplyDeletemy blog skin's template doesnt comes with the comment section i guess...
i dont know how to do it.
@ Tony : itu udah direduce kuk kang dari source aslinya :p
ReplyDeletesaya sederhanakan sedemikaina rupa sampe yang termudah :)
@ Valter : Thnx to you too :)
@ Sang Cerpenis : sama dund :) mang otak kita harus sampe mana ni???
@ Candy : Read my message, please!
yea it's done... everything same with my frens that have comment on their blogs. but nothing came out.
ReplyDeleteHello.
ReplyDeleteVery interesting post. I really liked the photo scroll down to the end of your page.
Have a very nice day!
DorothyL
good tutorial !!!!
ReplyDeletekeren nih tutorialnya :)
ReplyDelete@ Candy : fiuhh... i have no idea bout that.. so sorry :(
ReplyDeleteYou have to ask to some expert then... and that obviousely not me :( sorry dear...
@ Dorothy L : thnx for comin' back again :)
@ Nelson Kaligis : makasih kang, namanya kek familiar deyh... sapa ya... :(
@ Easy : ada yang kurang gk kang???
nice tut... thnx a bunch!
ReplyDeletecan you make it clear in couple step..??? 'coz i feel like i'm lost somewhere in that steps.... thnx again...
ReplyDeleteGood morning, passing for new visit, day of happiness and smiles. Hugs
ReplyDelete@ elena : makacih non... tp mksd nya gmn si??? bagian mana yg gk jelas??? duuhh maap deyh inglis na acak2an...
ReplyDelete@ valter : thnx for comin' again and again brow!!!
genial! bhs indonya donk hee...
ReplyDeletehasilnya bgus cu...
ReplyDeleteminta duang luuhhh... weeee :p
ReplyDeleteGw gag ngerti bhs inggris tp karena ada gambarnya ya agak ngerti dikit...thx infonya sob...
ReplyDeletemantabs :)
ReplyDeleteapanya?
ReplyDelete