Monday, December 28, 2009

Win a Google Nexus One!

There are so many sites that we can use to generate some bucks from the internet. Just like I've described earlier, Infolinks.com is a great program like google adsense. You'll get a commission every time a user clicks on the link on your ads. They insert ads into your posts.

Installing the code/script from Infolinks.com into your blog is so easy, just put the code into your Edit HTML section on your blog, then their system will automatically generate and display ads that are relevant to the content of your blog. That's what you can call Contextual ads.

If your blog is about technology and stuffs related to it, then the ads appear for example about Nexus One. It’s been hot topic on the internet for weeks on end. Every phone geek wishes and the day is almost here. Maybe you’ve heard of it? The Messiah, lol. The official street name is Nexus One. And so.. and so.. and so.. Should have waited for the Nexus Two? lmao...

Have I mentioned here that you can get that Nexus if you join them now?


Shortcomings, the loading of your page will be a little overwhelmed and your visitors will probably feel a little uncomfortable, because it interrupted by ads that appear when the mouse cursor over the ad link. But I need to remind you again that there is no ad links on all of the text or article, just a few links from the text/article that includes an ad link from Infolinks.com

Overall, because this program is similar to google adsense, this PPC ads is highly recommended if you have a blog in english.

Wednesday, December 16, 2009

Photoshop 3D Text Image Galery

Photoshop 3D Text Image GaleryWe will explain with the simplest words I know how to do creating a simple 3D Text image composition, layout an interesting background, and define eventually the true light source.

Basic composition here is very you. And it is quite important. There are so many artists put too much distracting detail in their 3D text implementation, photo manipulation, image retouching, creating or even painting, so in this beloved project.. if there's a project anyway, lmao... we would be better focus on how to get the attention directly, how to -let say- direct viewers into the image and this is the important thing to do.. simplify its background, which is, it doesn’t overwhelm the real aim, the main theme of your basic intention.


Photoshop 3D Text Image Galery


Photoshop 3D Text Image Galery


Photoshop 3D Text Image Galery


We definitely would explore how to create -somehow- a delicious and offensive interesting background to complement the subject, You with your life definition in designing. Lastly, to tie all the elements together.. hopefully we would be able to define where the hek the light source is coming from.


Photoshop 3D Text Image Galery


Photoshop 3D Text Image Galery


Photoshop 3D Text Image Galery


Photoshop 3D Text Image Galery


Photoshop 3D Text Image Galery


Photoshop 3D Text Image Galery


Photoshop 3D Text Image Galery


Whatever it is a still life, landscape, or goddamn portrait, you'll gonna needs what we called a central focal point. What is it you want to convey and what is it that you want to get across? You will gonna need to be able to give sense of depth, and mostly capture a viewer’s attention and keep them interested.

In order to do that you must know where there are the craziest bumps and where there are the tiny smooth little spots, it is a ver usefull thing to do, produce what moves you, and put all your beautiful ideas down, create something appeals and attractives to you the most, how do you feel about the subject matter...


Photoshop 3D Text Image Galery


Photoshop 3D Text Image Galery


Repetition

Just to remain y'all... It can be as simple as you like, or as hardest. Never give up. Give a lil' try to always incorporates something old and something modern to your insane amazing design. Don’t produce art just for the heaven's sake of art, lmao.


Photoshop 3D Text Image Galery


Photoshop 3D Text Image Galery


Photoshop 3D Text Image Galery


Photoshop 3D Text Image Galery


View Tutorial about How to make a 3D Text with Photoshop here!

Fight Fire with Fire

Fight Fire with Fire
This month is a month when many peoples around the globe celebrates Christmas, that’s why we share some really beautiful result of image editing here at PSD Holic.

Sorry for taking some time to work at this but I must say ..WOW ..WOW ..WOW.. How can I miss this for so long! This is a well worth tutorial for everyone to get their hands on experience. Sick effect! I created a similar effect using a few different steps on psd.tutplus.com by Jayan Saputra. Thank you for sharing this my friend!

Here is what He created there... (but ofcourse this one is the one I explore more and more...).


Fight Fire with Fire


So there you have it! Fight Fire with Fire thing! I hope this is another PSD tutorial again I wrote, but.. lol I'm kinda tired or something, so.. with this sample of Creating Fire and the amazing
Hell Fire - Remembering I wrote earlier has helped you further your Photoshop skills. I also hope it was a worthwhile read because a lot of blood sweat and tears went into creating the picture and the tutorial!!


Fight Fire with Fire


As a personal opinion that there are so many of a certain kinda tut you can find in i-net. This is great. If you do not like, just waiting for the future tut here. If you want to get another Tuts, then contact the owner of the site (which is my self as well, lol) and express your damn opinions on me. Or maybe, better yet, make your own tut here (submit it here) and make $ 1500 or something? : P haha.. kidding.. :p Awesome Indeed!!! I think we all did a great job, sure.


Fight Fire with Fire

Fight Fire with Fire

Fight Fire with Fire

Fight Fire with Fire

Fight Fire with Fire


I hope you had fun creating something nuts. Hey, this use to show off my impressive portfolio now, can I?!?!


Saturday, December 12, 2009

3D Text

3D TextIt can be as simple as you like, or as hardest. Never give up. Give a lil' try to always incorporates something old and something modern to your insane amazing design.

Like I said very often... Don’t produce art just for the heaven's sake of art, lmao.

So here are the steps...

1. Open New Document and fill it with #7a7a7a.
2. Type something with the #FFFFFF for color.
3. Place it on center of your workflow by pressing Ctrl + A, then activate the Align Vertical Center and Align Horizontal Center.


3D Text


4. Press Ctrl + T to resize the text like this...


3D Text


5. Still with the FCDB selected, from your palette layer, press Ctrl + J to duplicate it.

Listen to this carefully... after you copy the FCDB, FCDB copy appears just above the FCDB original layer isn't it?!? Remain calm.. ignore it, lol.. I mean, you should do select the FCDB layer again then switch your tool into the Move Tool (V). From your PC, click once the Down Arrow and once the Left Arrow. Got that?!?!?


This picture taken after I absolutely turn the Layer Opacity of the FCDB copied layer down in about 35%.


3D Text


Do that (step 5 - select the FCDB layer again then switch your tool into the Move Tool (V). From your PC, click once the Down Arrow and once the Left Arrow) several times until you satisfied or at least you can see my text layer now..


3D Text


6. Back to the top of your text layer, which is FCDB copy in my work, I don't know about you.. lmao... Activate that layer (FCDB copied on the very TOP of layer). Right + Click, then choose Blending Option with this parameter..


3D Text


3D Text


3D Text


MERGE IT ALL by this action >>> Ctrl + E!!! Set the Blending Option with this..


3D Text

3D Text

3D Text


7. Flatten all your Text Layers, apply Transformation by hitting Ctrl + T and do this Perspective view on your text..


3D Text

3D Text


8. Copy that text and place it just like this, with the Blending Option turn into 40-45%

Voila.. you're DONE!!!

result...


3D Text


View other samples of 3D Text here!


Friday, December 11, 2009

Embedding with Marble

Embedding with Marble
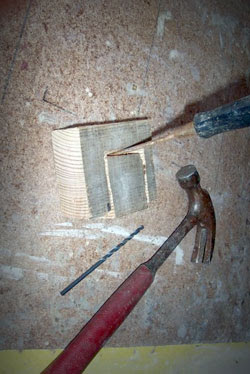
Hi there again. Embedding something to uneven survace is not so damn difficult as you can see. Whenever you've dealed with this kinda software, then you could obviously apply anything you want.

I'm gonna show you guys my other samples about applying this tricky delicious way to get that aim, just like I told you before in Cracked Skin Tutorial.. just GO NUTS!!!


Embedding with Marble


Comparing with other similar tutorial source.. this ain't the best.. but quite helpfull. Visit our Cracked Skin Tutorial part and you guys can see the gallery of embedding something to other surface or cracking skin or even others just right about here!


Embedding with Marble


For you... Photoshop lovers, this is the real choice. The delicious taste and unique aroma of amazingly simple blended with strong, rich taste of art sensation leaves you with no other choice. Every tricky way of PSD Holic I gave to you gives you an unforgetable sensation.


Embedding with Marble

Embedding with Marble


If you really like the result, than it worth spending time on it.


Glytics - Chiseled look Rock Gallery

Chiseled look RockSince our inception, as a fondateur of PSD Holic - we really wanted to dedicate all that came out from this blog give a real benefit to our visitors. You!

Take a look at the image I've created with this tut at downloadable copies of this stone mason's chisel (tarred street actually at Monas area) and every tutorial here in PSD Holic. I am going to assume that you have the basic knowledge of Photoshop and its menus etc.

Can we do this? Exactly, can! There's no need a hammer, nail, edible fern or something like that bla bla bla, all you gotta do is just activate your Photoshop, use your own image source and She will do the rest for y'all.

Just like I said, I enclose all you need in PDF file format you can download at
our FCDB in simple PDF. Remember about (Leopard Skin/water DIPLACEMENT MAP)???

Note : You guys always feel in the dark, a very confused when it comes to displacement maps. Just relax friend, take it easy. It is like taking a piece of cloth and wrap it around the object/image. Cain became textures patterns (eg. carbon fiber) and the object/image is your map (street). Obviously you need to experiment with your own settings in this.


As you can see, this lesson is adopted from the real source here at ...gosh... I forgot. This friend of mine gave me this PDF file and he wanted me to translate this into BAHASA, so, I decided to make it two version and publish it here. Again and again, I always say this to you.. it's OK if the result of your work don't look symmetrical, your work become a mess or whatever it turns, as that looks more natural and more be you.


Chiseled look Rock Gallery

Becoming this

Chiseled look Rock Gallery


It’s so darn easy, simple, and quick. When I 1st saw the finished artwork I thought this will be one of those long tuts. but I guessed wrong and it extremely made my day.

So there you have it! One Chiseled look Rock. I hope this tutorial will help you further your Photoshop skills. It is not just about getting some information on how to manipulate something becoming another thing from these tutorials I made.


This is the image that inspiring me to write the tut in Bahasa...


Chiseled look Rock Gallery


Voila, you can absolutely send any information written here to your best friend or you lovely family as well. Find about all PSD or PDF Source file downloadable here. Last but not least, don't worry if the tricks you learnt here are all bad and didn't have sense of art at all.

Notice this : PSD Holic will cooperatively and proudly work with you to present your small or big business to the world the way you see it.


Visit Chiseled look Rock tutorial in Bahasa (PDF Downloadable source) here!


Creating Bubbles

Creating Bubbles
Creating bubbles using Photoshop is not so difficult as you can imagine. It is a quick and easy damn way to create many kinds of shapes and textures, just like
How to use Brushes in Photoshop, and How to Install and Manage... especially if they are small and you need them in large quantities.

You could absolutely draw your own bubbles!

Create a new document and filling the canvas using the Paint Bucket (G) tool with the color you want. Aqua Blue for example.

Press your M Key to call the Elliptical Marquee tool up to your blank document.


Creating Bubbles


Use the Dodge tool or by clicking O Key. Select Brush as 125 or more depending on your bubbles and Range as Highlights and Exposure as 50%.


Creating Bubbles


Make gentle strokes around the bubble with the dodge tool to get the following effect. And.. Voila.. Your Bubble is ready, just press ctrl + D to deselect the outline of the circle.

Obviously you could make as many bubbles as you want like that, even small and big, just repeat the process. Works well? Let's save it for future use! Nothing worse than making the perfect brush preset but forgetting to save it, lol.


Creating Bubbles

See this tutorial in Bahasa