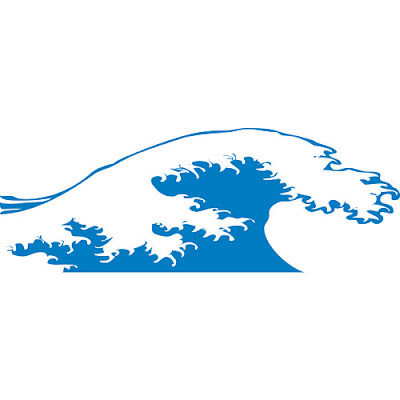
 In this opportunity, I wanna show you how to make a simple ocean wave in Photoshop. The first time you do this you may think that is a hard thing to do, but once you catch the moves it’s easy and fun. OK, enuf with mongkey talk, let's start the lesson :)
Jump right in and create a new 700X600px document. Fill it with the dark blue color. See first screenshot below for your guide about filling the layer with dark blue color thing.
Again create another empty layer by pressing Shift + Ctrl + N and name it wave. Set a light blue color for a foreground and dark blue color for a background.
Press G key then hit Alt + Backspace to fill your workflow with that light blue color.
After that, you can apply Filter > Render > Fibers with the following settings: Variance = 23, Strength = 7. If you go it right, your wave layer should now look like mine..
Go to Menu Filter > Distort > Shear with the following settings:
That tricky part depends on your image size. Explore your own then! Now you should choose the Rectangular Marquee Tool (M) and create a simple rectangular selection on top of wave Layer you've created earlier.
Go to Menu Edit > Transform > Warp like shown on the picture below:
Ok, with my compulsive organizational speech out of the way, lmao, I realized that this wrap thing, is a mess.. Yupp I know that, but hopefully it gets the point across at the end of the tut. Now.. Press Enter and then Ctrl + D to Deselect it. SHAZAM! This is the result..
Create a new layer or you can simply press Shift + Ctrl + N again as usual. Choose Brush Tool (B) and try to create water splashes on a wave crest. You can turn the Layer Opacity for this paint in about 79% or something. Then apply Blur > Gaussian Blur to your wave layer in about 1,7 radius px. And that's it.
and with simple organisation right here and right there, becomes like this:


tutornya selalu bagus............sayangnya loadingnya kelamaan kang genial.......buerat bgt nih......adu du duhhhh hehehehe
ReplyDeletewoooowwwwww........manteb tenan ternyata....buat efek ombak seperti ini aq baru ngerti.....ternyata caranya ampir sama denga efek bendera berkibar ya........thakns lho kang...
ReplyDeletemaaf dee kang... saiia sejujurnya dari dalam lubuk hati yang terdangkal, otak bawah sadar saiia tetap memeertinyahkan untuk mempergunakan image dalam resolusi seperti ini, inipun uda saiia kurang2in di pas2in sama lebar pagenya, original imagenya ttp bisa diperoleh dengan mengklik thumbnail tentunya... sekali lagi saiia mohon maaf jika konsekuensinya menjadi berat loadingnya... tanpa menunggu semua kebuka, langsung komen juga gpp ko' kang..
ReplyDeletepeace
Yang pasti ilmu photoshop bertambah dari Mas Genial ini. Semoga saya bisa mempraktekannya Mas. Trims. Salam sukses selalu :)
ReplyDelete@ harryh77 : saiia mohom maaf, entah knp saiia gag perna bisa buka blog sampeyan :( >>> http://www.harryonline.info/ <<< atau saiia nya yang bermasalah?!?!?!
ReplyDelete@ Aditya's Blogsphere : klu bendera berkibar tanpa wrap seperti di ataspun bisa kang.. tp kira2 emang senada sii :) terimakasii juga kang atas kunjungannya :)
@ arkasala : as always kang... hatur nuhun juga kang uda sudi mampir :)
ReplyDeletesalam sukses juga buat akang sekeluarga :)
Selalu ada tambahan pembelajaran berharga disini...
ReplyDeleteLangsung ta' praktekin dulu.
makasih banyak Kang.
gambarnya lama ya kebukanya XD
ReplyDeletetapi keren, deh kalo bisa buat ombak ini
Hello my friend Genial, thank you very much for your visit, good Sunday with happiness and peace. Hugs Valter.
ReplyDeletetampilan ombak yang sangat bagus sekali
ReplyDeleteTutorial photoshop ini yang lama saya cari mas
ReplyDeleteWah....bagus hasil photoshop nya....tapi bila gambar di risize lagi agar loading bisa cepat emunculan gambarnya, yang ada hasil gambar malah gak sempurna....biar tampilkan apa adanya, sapa tau z ada yang berminat buat du jadiin walffr PC...
ReplyDeleteSemangat sob buat tutor tentang Photoshonya....
Mantabs sekali, cuman setuju ama temen2, lumayan berat ini.. Mas......... Blognya.
ReplyDeleteKalo mo ikutan Djarum Black Competition, coba mampir ke blog saya lagi, dan klik di item "blackholiczone" item sebelah kanan atas.
Nanti ada link lanjutan yang berisi, Djarum Black Competition Vol.2, langsung klik.
Submit Blog, isi data dengan sebenar2nya. Jangan lupa baca dulu rules dan regulationnya.
Tunggu sampai blog terdaftar (registered blog) biasanya sampai 1 atau 2 hari, kalau sudah terdaftar, silahkan mulai buat artikel2 nya.. :)
Sukses!
muantab sob, lagi bingung cari bekgron, tak praktik dulu
ReplyDeleteinteresting..im gonna try it
ReplyDeletetest dulu ah, kayak na asik nih hahhaa....
ReplyDeletekalo dikasi peselancar akan terasa lebih jelas
ReplyDeletehehehe.... nemu blog yang keren neh.....
ReplyDeletebagus artikelnya.....
makasih ya ilmunya....
what a trick :) that's amazing... thank you for sharing this...
ReplyDeleteyeow huhuhu fantastic
ReplyDeletethnx for all guys :)
ReplyDelete