
 For this kinda tut... I'm gonna devide it in
 I know for some people... feel in the dark (like I told you before...)
when it comes to diplacement maps.
This is my take on them : think of it like taking a piece of cloth and wrapping it around an object. The cloth being the texture/pattern (carbon fiber) and the object being the map (in this case, the original image) it could anything... Anything... just like 'water reflection' here, or something like cat or even a frogg mapping by something other stuffs... (for that,
mayB I'll show you later).
You need to experiment with your settings in this section, 'coz here,
I'll show you two different ways to get the reflection of water... (remember this, not an animation of it...)
| PART I This following tut shows how to create a map of displacement and relatively simple way to create a water surface with it. This method is not to adjust the height of the waves and the distance, but the result, at least, good results if the water is calm and if the surface is not interrupted by other elements. Section one: creating a displacement map We start with making an image in which the brightness represents the height of the surface. Bright is high, dark is low. The dimensions of this image control the size and shape of the waves. Start with a larger image to create smaller waves. Note this, larger image to get smaller waves. |
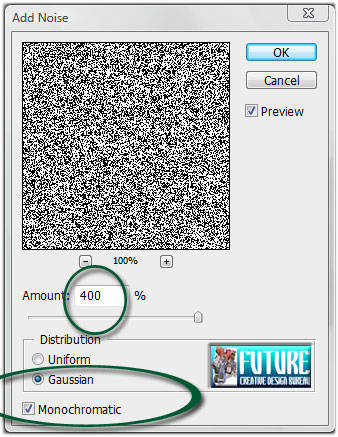
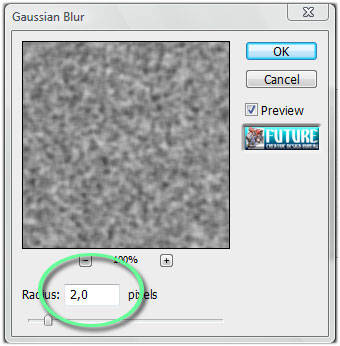
| Create a new file in RGB mode of 1000 pixels wide by 2000 pixels high. Go to Filter > Noise > Add Noise... Enter these settings: Amount: 400% Distribution: Gaussian Monochromatic. Click OK Go to Filter > Blur > Gaussian Blur... Choose a radius of 2,0 pixels and click OK. 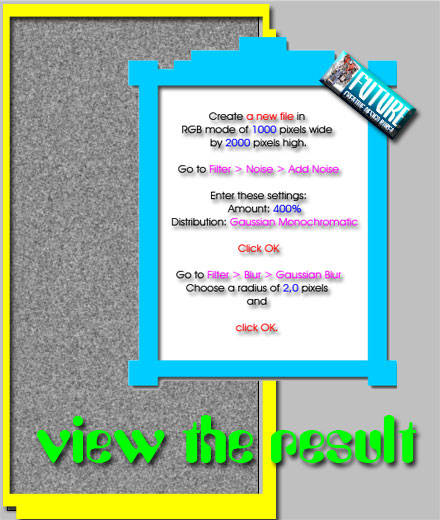 |
 |
 |
| We will use the result of the previous steps as a bump map to create a representation of the tilt of the surface. We will do this separately in channel 1 and channel 2. You can ignore channel 3. It does not affect the displace filter. |
Select channel 1 in the channels palette. 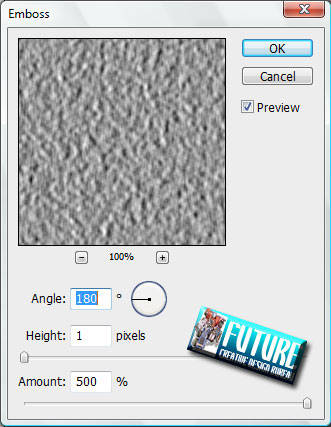 Go to Filter > Stylize > Emboss... Enter these settings: Angle: 180° Height: 1 pixels Amount: 500 % Click OK. Select channel 2. Apply the Emboss Filter again, but this time use an angle of 90° instead of 180°. 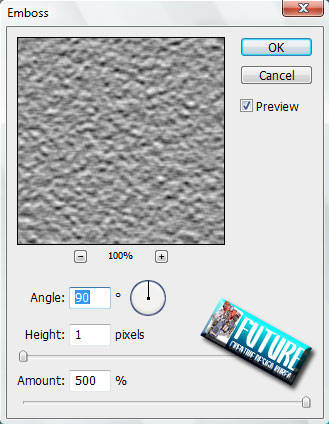 |
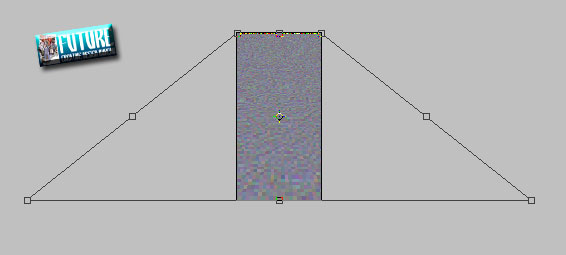
| Now we are going to change the perspective. Stretching the base lowers the horizon. We would have to drag the corners to infinity to extend the water surface all the way to the horizon. We will not do that. Stretching to anything above about 3000% is enough. The perspective stretch only works between 0 and 700%, so we will stretch to 600% twice. This equals 3600%. |
 |
 |
Unlock the background layer. Zoom out and go to Edit > Transform > Perspective. Drag one of the bottom corners to the side, to a width of 600% and hit Enter. Select the canvas with Ctrl+A. Press Ctrl+Shift+T to transform again. Crop away the area outside the canvas with Ctrl+A and Image > Crop. 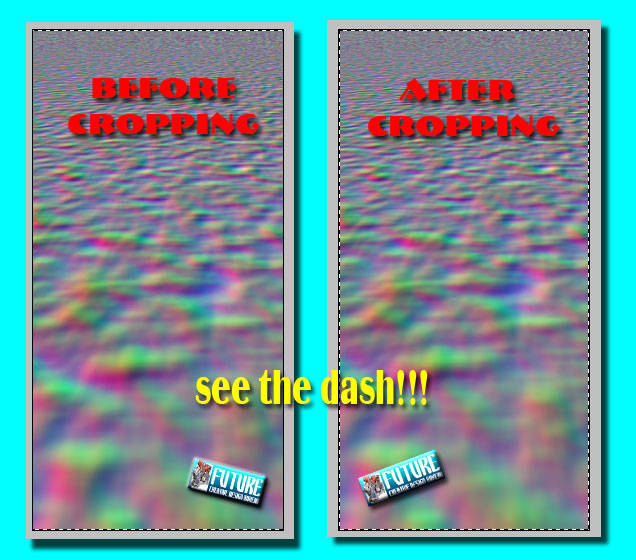 Reduce the height of the image to make it square. In this case 1000 by 1000 pixels. |
 Hit me to enlarge! |
| In reality, waves cause rotations in a reflection instead of translations. As a result, the horizontal distortion decreases towards the horizon. The vertical distortion does not. However, we have to adjust channel 2 as well, because the perspective change has caused aliasing near the horizon. We will use motion blur later to compensate for this. |
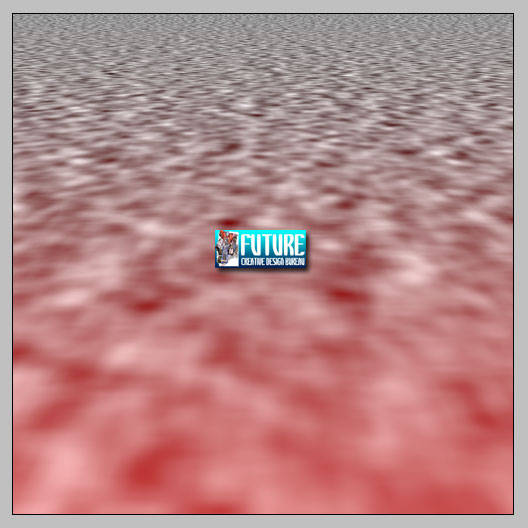
| First adjust channel 1: Select channel 1. Press Q to switch to Quick Mask Mode. 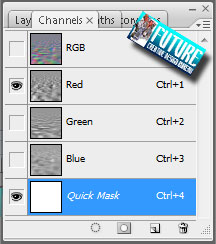 Draw a white to black linear gradient from the top down across the image to create a gradient mask. Press Q to go back to Standard Mode. Now we have a gradient selection. Fill with medium gray (brightness 128). |
 |
Adjust channel 2 in a similar way: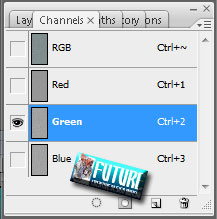 Select channel 2. Go to Quick Mask Mode. Draw a gradient to select the narrow part near the horizon where the waves are too large. Press Q to turn the mask into a selection. Fill with medium gray. |
 |
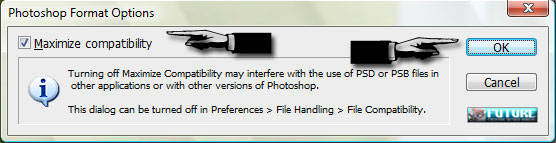
| This is what the finished displacement map should look like with the blue channel hidden. Note that in the green channel, the bright areas will shift a reflection upwards, which represents a tilt towards you. The dark areas produce a tilt away from you. This may be a little confusing because it's probably the opposite of how your brain interprets the brightness variations. Save as .psd with Maximize Compatibility. You may have to change the preference at Edit > Preferences > File Handling > Maximize PSD File Compatibility to be able to save with Maximum Compatibility. |
 |
| That's the First Part of Water Reflection lesson. |
Related Topics :Air Brush Style Vektor with Photoshop Menu Navigation Abstract Background Rain Effect Matrix Effect Retouching Image Transparent Image


waaaahehhe.. bener juga ya.. thanks thanks..
ReplyDeletekayaknya me harus banyak exploration.. :D
wah mantap nih...
ReplyDeletenyobain ah, keren keren..
tutorial PS yang hebat nih..
ReplyDeleteboleh dicoba kan???
Kereeeeeeeeennn....keren sekali mas, boleh nggak kalau aku ada order sub ke dirimu?
ReplyDeletemantap tipsnya, harus berani mencoba saya,...
ReplyDelete@ kika : itulah maksud dari tulisan ini di buat :p
ReplyDelete@ suryade : iyah bener om... kelanjutannyapun uah muncu ko' om... ini big first partnya ajah...
mksh udah mau mampir di sela2 kesibukan blogwalking nya om :)
@ all : thnx for comin'...
YMku papan_reklame7@yahoo.com
ReplyDeletephone 081382807409
Aku tunggu.
keren brooo.....bisa gw coba nie....ngikut nyontek karyanya yach...mklum seneng banget ngedisign
ReplyDeletejiahhh, jadi penasaran pingin nyoba :((,,, tapi softwarenya gak punya ... :((
ReplyDeleteChamphion :D,,, Barca melaju hehehe
Cuma kloroplas kok mas (organel dalam sel tumbuhan) :D
ReplyDeletenice blog...
ReplyDeleteSalam Kenal ya....?
plus link exchanged....
Met wek end....
yup mari kita coba
ReplyDeletehehhehehe..nice info ny wajib dicoba...coba akh...!!!
ReplyDeleteemang iseng ya bikin leher org kaya gtu.. tp kweren bgd dah om gondrong ni.... (mnt granita ah) :D
ReplyDeletewah,keren banget.thanks ni
ReplyDeletehehhh dimana lu??? Gue butuh nih..
ReplyDeletei can't wait for the next session of this tutorial. i thought this tutorial have next step, right dude?
ReplyDeletewah - wah, beneran nie, semakin amoy tutorialnya :)
ReplyDeleteapa resepnya nie kang? :D
coba coba rame rame....
ReplyDelete@ all : thnx for comin' and ofcourse your nice and lovely comments :)
ReplyDelete@ Kika : gw udah coba bales ke blognya kang :) maaf td gk smpt angkat tlp nya :(
@ thegands : hell fuckin' yeah! It's written here kang :) enjoy!
wuw.. kereeenn..!!
ReplyDeletemantrabb......!!
inform-nya kereeen sob!!!tukeran link yuk!!
ReplyDeletemakasih yah atas infonya.....
ReplyDeleteaq kan mencobanya...
Keren nih blog, byk infonya..segera diterapkan
ReplyDelete@ wi3nd : apanya kang?
ReplyDelete@ firman zaelani ridwan : link added, thnx 4 the invitation :)
@ www.katobengke.com : ho oh kang
@ astra : iya iya iya... ibu tuh yg keren, tp saya lg cari tema emo :(
gag nemu2 :(
amazing
ReplyDeletesob ada award nih diambil y!!!!
ReplyDeleteeh sob aku mo minta linknya...
ReplyDeletetp km nyimpen dmna y???? maklum msh gaptek....
bagus tp gk ngerti. hiks...
ReplyDeletesalam kenal, makasih sharingnya.
suwun....
Nice posting ajah deh, baru mw belajar nih
ReplyDeletethanks for your visit, yaour blog is amazing..
ReplyDeleteyou are very welcome all :)
ReplyDeletedatang kemari
ReplyDeletedan selalu membuatku terkagm2
yaaaa abisan aku ga bisa mbuat gambar sebagus itu sehhh
ReplyDeletehehehe
good instruction!!
ReplyDeletefantastic result ;)
wanna try..
nice tutorial..
ReplyDeletemakasih yaa...
wah mantap bener tutornya!
ReplyDeletesy coba ah, makasih sobat atas ilmunya :)
oh ya sob.. kalo mo nyoba "improve link popularity" di copas aja artikelnya trus daftarin ke TutZone, disini ada link-nya :
http://viarbi.blogspot.com/2009/04/improve-link-popularity-and-increase.html
di awal kan ada contoh gambarnya,,
ReplyDeletenah itu yg bikin tertarik,,
barulah aku belajar mbuatnya.. ;)
ga kepikiran ternyata photoshop bisa macem2,, hehehhe..
tutorial PS tho? mending order ajah ... hihi.. ga punya aplicationnya sii
ReplyDeletewah banyak yg mo ngorder neh bro
ReplyDeleteKeren ah..aku mau buat untuk refleksi wajahku yang cuakep ini
ReplyDeletehe..he
itik kok narsis kaliii ya
ReplyDeletecoba dulu ah....
ReplyDeletebisa engk ya? hehe...
wuaaahh.. keren2 neh, template-nya neh blog bagus banget oms hehehe...
ReplyDeleteasyik ya kalo dah jago sotosop, tutorial yg bgs sob...
ReplyDeleteklo udah jago enak mau ngedit atau bikin gambar sendiri. gambar2 di blog sobat jg keren2.
ReplyDeletekeren abizzzzzzzzz
ReplyDeletethanks bro
Wuuiiisss..mantaabbzzzz bro..coba dulu ah...:)
ReplyDeletekreatif banget sob.. mantap n jelas..tutorialnya.. bikin buku aja sob.. pasti bess seller.. kebanyakan buku tutorial photoshop ngulas teknik yang basic aja.. gali photoshop terus sob.. ntar aku beli bukunya aja kalo dah terbit.. coz sekarang pusing bacanya coz gak ada transletnya sih :D
ReplyDeleteom backgroundnya bikin puyeng niiih...
ReplyDeletesalut deh bos makasih pencerahanya
ReplyDeleteGile bener, animasinya airnya mantab bener2 hidup :)
ReplyDeleteIya he.he.. ini juga lagi nimbrung.
seharusnya komen itu utk postingan satunya kang :(
ReplyDeletesoalnya itu kan versi finalnya... sementara yg ini cma diplace map duang, lom sampe ke image nya :(
sepertinya sangat sulit nih :(
ReplyDeletea little tricky, may be... sulit..? gag juga ahh :p
ReplyDelete