OK... as usual, remember this first, you could use your own damn imagination to apply whatever I told you here... you're free for it! Don't get stuck with what i say, if you guys found another better way to create something... so go for it... this is just a buch of shit right here, you can use your own style!
Figure out what i'm gonna say to you through this awesome trick, let's get it on!
First Step
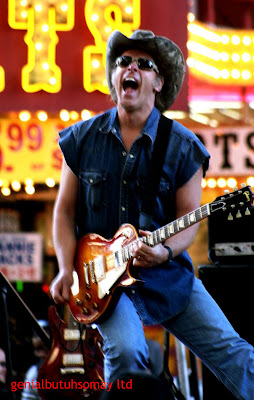
Open your image
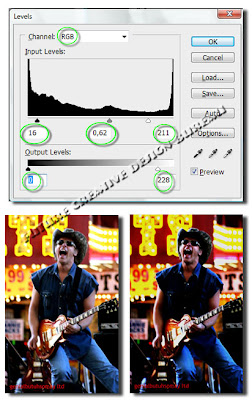
Change your image Level by pressing Ctrl + L to get the image more darker, coz believe me, this effect is more dramatic with the dark image or something
Second Step
Create a new layer,grab away your Pen Tool (P)

see the set right about here...

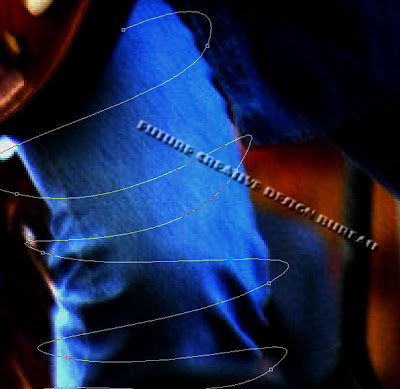
Draw out a spiraling path or something like that or even something like in my image below (what should i say?!??!?), as if you have a snake wrapped around the leg and body.
Third Step
Select the Brush Tool (B) and set your diameter to 7px, with the Opacity and Flow at 100%
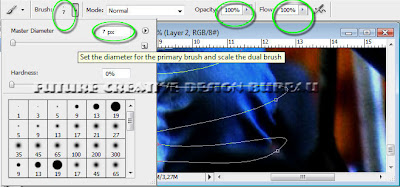
and your foreground color set to #FFFFFF. With your path still on the artwork, go back to the Pen Tool, right click on the canvas, and choose Stroke Path
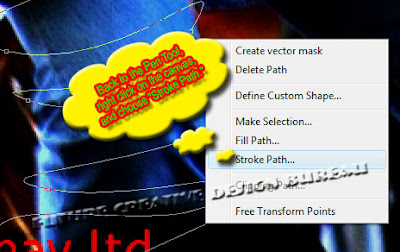
A menu will appear with the Brush set as the Tool. Check Simulate Pressure and press OK. This will make the beginning and end of your stroke thinner.

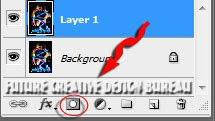
Now you'll gonna need to delete the parts you want to hidden behind the leg, body, etc... With your stroke layer selected, choose Add layer mask at the bottom of the Layers Palette.

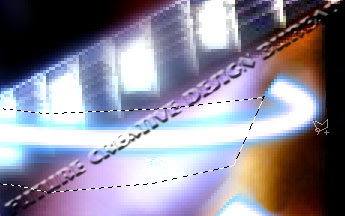
Use the Polygonal Lasso Tool (L) to select areas of the arm you want in front of the stroke -- use your eye and imagine how this path will wrap around the arm. Make sure your mask is active by clicking on it, and fill these selected areas with black. They should now be cut out, appearing as if they're behind the arm.
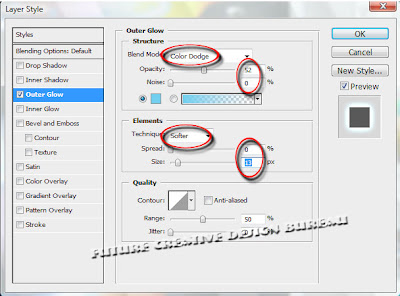
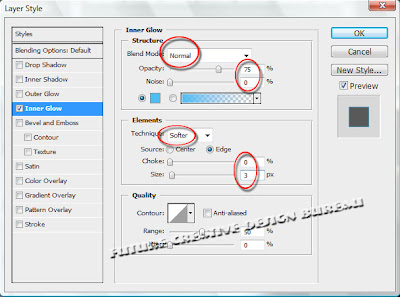
Right click on your stroke layer and choose Blending Options. A Layer Style menu will appear, where you'll be adding an Inner and Outer Glow to the stroke, making the edges of it glow with a blue hue. Use the settings below... or not..!!! Lmao!
Fourth Step
With your Brush Tool, add some quick spots around your glowing path with varying small brush sizes (3 - 5px). Make as many as you want here, as you're always free Erase undesired sparkles.
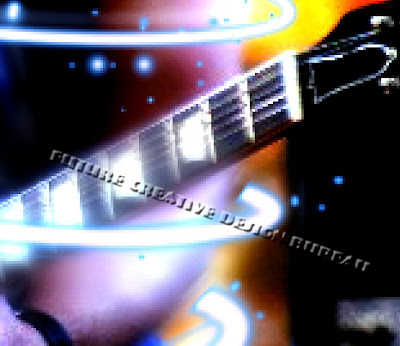
Make a copy of your stroke layer and right click on the Layer Effects icon. Choose Clear Layer Style. we simply wanno blur this layer (about 6 pixels) to add another layer of glow. Everything's looking nice and illuminated here, so let's add some sparkles.
Fourth Step
With your Brush Tool, add some quick spots around your glowing path with varying small brush sizes (3 - 5px). Make as many as you want here, as you're always free Erase undesired sparkles.
Fifth Step
We're now going to make a secondary stroke to create another level of motion. Again use your Pen Tool (P) to go over your original path, but make it a bit different and overlap parts. Select a smaller diameter brush this time with a 50% opacity, and stroke the path as before.
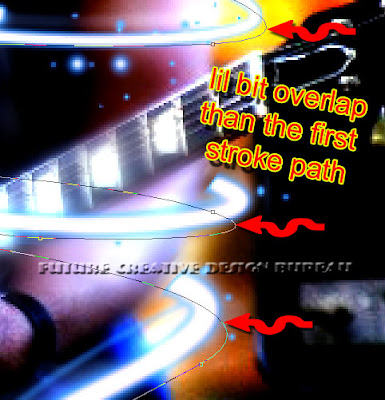
Our energy beam is nearly there. To make the effect more dramatic, you can adjust the overall hue of your photo. Create a new Curves adjustment layer, and tweak the colors to get a vibrant blue atmosphere. After your colors are locked in, use the Dodge Tool (O) (with a diameter of 35 pixels and the exposure set to 25%) to brush in some highlights underneath your beam, directly on the background photo. This makes it appear as if your beam is casting light on to the arm.
It's that good enuf for you?!?!?! OK then, For the last part of this whole trick, we'll add one more layer of shimmer. What the hell shimmer is anyway?!?!?! Hold down Ctrl and click on your main stroked path in the layers palette -- your path should now be selected. Go to Select › Modify › and Expand the selection by 7px, then feather it by 10px.
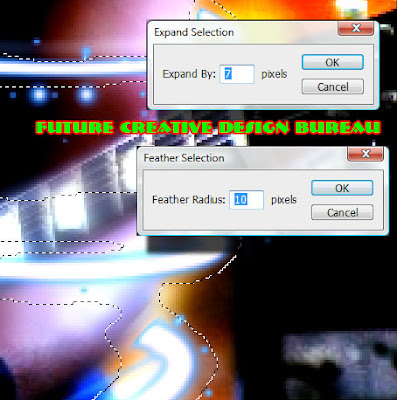
Now select your background photo layer and apply a Plastic Wrap filter, found in your Artistic filters. This will add some wispy lines around your path. Set the Highlight Strength to... the Detail to... and the Smoothness to... Finally, lightly Gaussian Blur your background layer with the feathered selection still active.
Voila.. you're done!
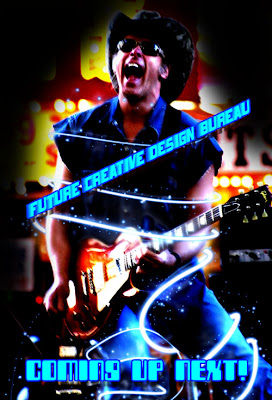
and here's my final result :
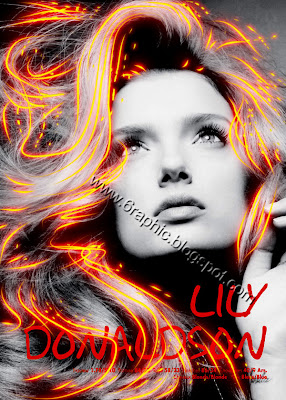
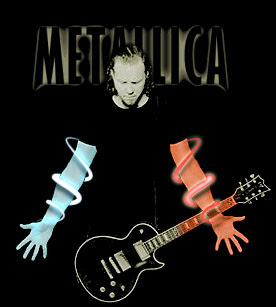
other samples :



wah mantab, baru paham feather saya...
ReplyDeletesuka merendah ni si om nya :p
ReplyDeletemksh om udah mo dateng lg singgah di sini...
ih gile, keren bgt yak! belajar aahhh
ReplyDeletenice..nice...
ReplyDeleteand thanks 4 visit my blog...have a nice day
wuihh gtu yahh,,
ReplyDeletecoba ah.. nice2,, heheheheh.. :)
sabar napa pakk??
ooo..gitu toh......
ReplyDeletejangan merendahkan dirinya dong ommmm
postingan yang fulllll nice.......
ReplyDeletegood luck yah om......
ReplyDeletesemangat.....
semuanya semuanya... terimakasih sebanyak-banyaknya... tanpa kalian apalah artinya seorang genial, ta'e-laaaaaaaaaaaaahhhh!!!
ReplyDeletemmmmmmmmuuuachhh...
weeehhhh hebat eui informasinya bagus banget, baru tau nich trik nya.
ReplyDeletegak ngerti tapi kok blognya bagusnyaaa heheheh :D
ReplyDeleteSalam kenal sob
makasih ya semuanya :)
ReplyDeletekeren ah..
ReplyDeletemanteps..aku lagi belajar desain nih
maksudnya belajar sendiri sih..
astagaaaa keyennnn ... wew... mudah2an blajarnya ga sulit yaaa ... thx utk tutorial lagiii heheheh
ReplyDeletewah keren bgt!! makasih yah tutornya, ntar aku coba..
ReplyDeletehttp://www.dewagajah.co.cc
nice post brither.keep going
ReplyDeleteeh aku tuh mo feed blogmu tapi gagal mulu euy..
ReplyDeleterssnya malah bilang blog not found 0.o
heheheh kirain request gw bs dibuatin....heheheh anw tx loh buat info2nya.....sering2 ya ngasih tutorial ky gini
ReplyDeleteklo yg nelan korban band beside..mas..
ReplyDeleteklo burgerkill sekarang dah mulai konser di luar negri..saya amat prihati ama musisi bandung..bikin konser ajah harus sembunyi2..biar gak ketauan aparat..gara2 tragedi AACC tempo dulu yg nelan korban..12 orang..
wuuiiiihhh...cooolll...it's de trial time wit ma luvlie mac...thx a bunch...nice 2 know u eniwei... ;)
ReplyDeletesidia berkunjung nih
ReplyDelete@ all : ^:)^
ReplyDeletenih..gw datengin...
ReplyDeletenih dateng lagi..
ReplyDeletesaya sudah lupa mainin pen tool nya boz...
terbitkan edisi bahasa indonesianya dong biar lebih gampang belajarnya...
masih butuh siomay?
ReplyDeletecoba ah...
ReplyDeletehehe
makasih bos.......
@ cing_oleh : napa kang??!?!
ReplyDelete@ Sang Cerpenis bercerita : masih mba'... asli dahh :(
@ @Coy : monggooo...
nice..nice...
ReplyDeleteand thanks 4 visit my blog...
have a nice day
http://iracantiks.blogspot.com/
sami-sami mbak :)
ReplyDelete