Saturday, January 31, 2009

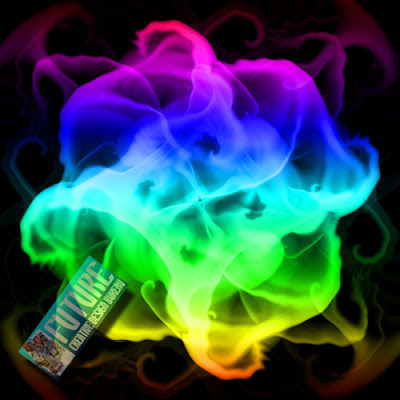
Abstract Background


Abstract art uses a visual language of form, color and line to create a composition which may exist with a degree of independence from visual references in the world. Western art had been, from the Renaissance up to the middle of the 19th century, underpinned by the logic of perspective and an attempt to reproduce an illusion of visible reality.

The arts of cultures other than the European had become accessible and showed alternative ways of describing visual experience to the artist. By the end of the 19th century many artists felt a need to create a new kind of art which would encompass the fundamental changes taking place in technology, science and philosophy. The sources from which individual artists drew their theoretical arguments were diverse, and reflected the social and intellectual preoccupations in all areas of Western culture at that time... more.

That's from Wikipedia, but what will we learn exactly today? We wanna show you how to create a simple abstarct picture, that you guys could use for background or wallpaper for example. Let's do that... Here's the steps... Watch and See...!!!

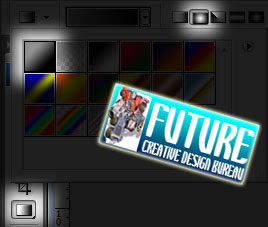
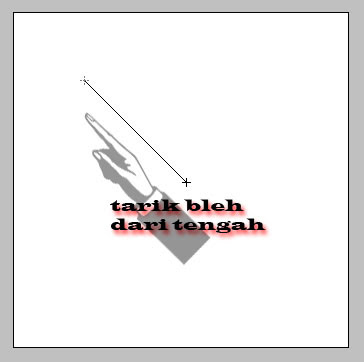
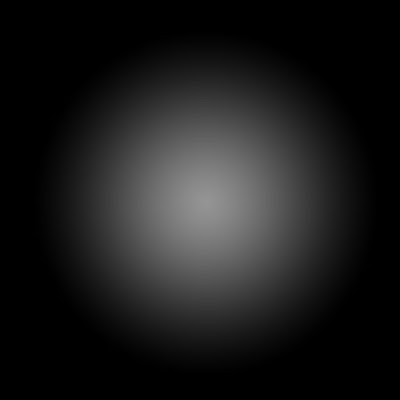
1. Open New Document, 500px x 500px, use Gradient Tool (G) to fill that new blank document with Black Background (#00000) like this:
2. Open Menu Filter > Distort > Wave, let the default just like that.. can you follow me???
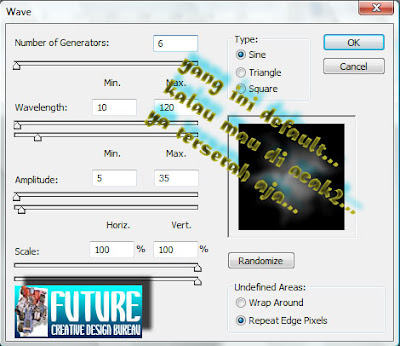


3. Click Ctrl + F (9x) to repeat the last applaying Effect, that should be the Wave Distortion:
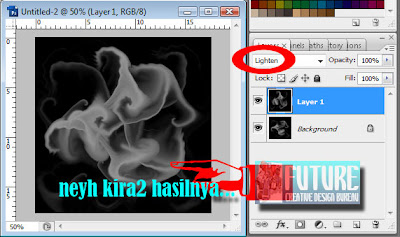


4. Bite Ctrl + J to get Layer 1. Then choose Transform > Rotate 90 CW

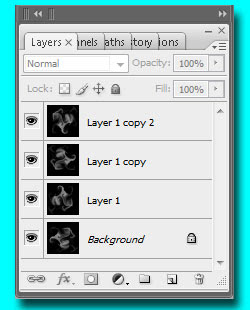
5. Hit Ctrl + Alt + Shift + T twice to get the copy from Layer 1.
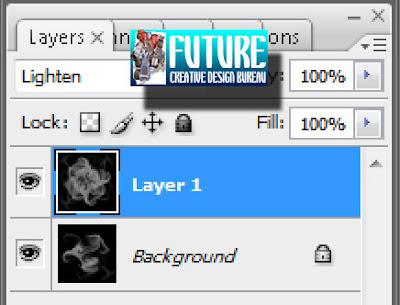

6. Suck Ctrl + E twice to merge layer Layer 1 Copy 2 and Layer 1 Copy...

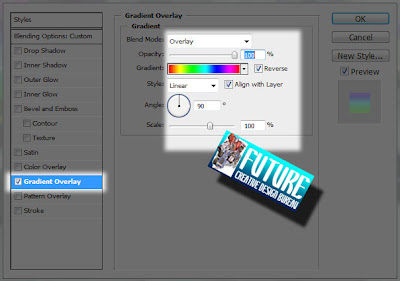
7. Double Click on Layer1, choose Gradient Overlay... just like usual, you guys could apply any color for that Gradient thing... but do not forget to change the mode to Overlay blend... and the most important thing to do now... from all our activity today is Clik OK after we get the appropriate setting.


8. Change the mode Blend layer1 to Screen... and voila... this is what i've got...!!! What about ya' guys?


View Indonesian Version Here!


Related Topics :

  • Air Brush Style
  • Dancing Text Animation
  • Vektor with Photoshop
  • Menu Navigation
  • Rain Effect
  • Matrix Effect
  • Firing Text
  • Retouching Image
  • Transparent Image


  • Rain Effect

    Hollaaaa... i came up again pop up from nowhere... Blogwalking is so quiet (or not I was due to limited money? lmao!) outside, the dark is coming, rainy, only a cigarette that accompany... Fraudulent ... Suddenly this thing arrivedon my mind.

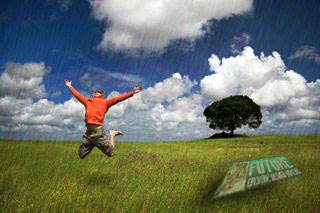
    There's so many ways to create rain effect on an image, but this time, I try to share them with what I think is what is the easiest way to reach the making of it.

    Follow the steps:


    First step

    Lift your jemuran outside ... who is more rain tonight as bygones. Bring in, or robber do bring it all to their homes certainly, not to your chest ... so, what are you waiting for...??...?!?!?!


    Second

    Lock the door of your house while you try to start learning this time, turn on the computer, do not take the coffee or smoking, it's dangerous... and 'because this is just brief, boum boum boum! Done'...!!! Lmao!


    Third step

    Sotosop opened as usual, not Corel, but if you guys insist to open Corel, that's quitely OK, but you're just steare at it not more?!?!??! Heheheh... Not more...!!!


    Fourth step

    Open an image (any pictures are allowed, except the porn stuffs, lmao!). Use the image in small size.. Go Go Go . . . ! With no guidance (image) now i show you here... this kinda blind tutorial or something... hahahahha... the one and only...


    Fifth step

    Create a new layer above your image layer. Fill the foreground with dark Gray, use the Paint Bucket Tool (G), I take the color #5a5a5a, it's what so important what the feel of the dark when it rains, OK.


    Sixth step

    Select Filter> Noise> Add Noise. Leave the default, click OK. Then select Filter> Blur> Motion Blur, use the power of your imagination to set the parimeter... OK I use Angle -51, Distance 10 px


    Seventh step

    Change Blending into Overlay option (the default Normal, of course). Lower Opacity from 100% to 48%


    Eighth step

    Select Image> adjustment> Level approximately until the rain came down on the current image (looks like). OK.


    Ninth step

    Lift your buttocks to the kitchen, we can get the coffee because the work is.............(drummrolls)............finished... ehhehehehh ... Why? What with the tutorial blind us this time? Temen-temen dapet what I mean?


    See the samples :


    View Indonesian Version Here!


    Related Topics :
  • Air Brush Style
  • Dancing Text Animation
  • Vektor with Photoshop
  • Menu Navigation
  • Abstract Background
  • Matrix Effect
  • Firing Text
  • Retouching Image
  • Transparent Image


  • Friday, January 30, 2009

    Matrix Effect

    May be you guys have this knowledge but, what ever! Have you ever wanted to turn your images into exciting and professional shots? Let us show you how. Just sit here and watch this.. thist is so available.

    This is a very popular special effect inspired the famous movie called The Matrix of course... Well... we gotta go! Here we are... Open a New document, (size does matter, eeeh.. am i get it wrong?!?!?!?.. lmao!)

    You better stay away from choosing the big size of document if your computer doesn't require that ability:


    Choose Filter > Texture > Grain
    Intensity, 100
    Contrast, 100
    Grain Type, Vertical
    Bite OK

    Choose Filter > Artistic > Neon Glow
    Glow Size, 5
    Glow Brightness, 20
    Glow Color, Choose green
    Hit OK

    Now it is time to Glow Up, but before, remind me to drink my tea first OK... Slow down...


    You gotta go! Now it is time to use Glow Effect,
    Choose Filter > Stylize > Glowing Edges
    Edge Width, 1
    Edge Brightness, 7
    Smoothness, 1


    You got it!
    It's a WRAAAP!!!

    Look at the bright side!


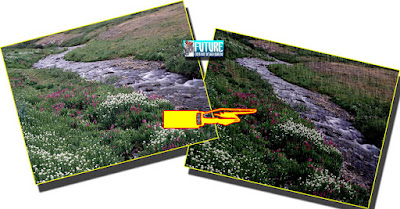
    The developping samples from this Matrix effect :


    Goodluck y'all!

    View Indonesian Version Here!


    Related Topics :
  • Air Brush Style
  • Vektor with Photoshop
  • Menu Navigation
  • Abstract Background
  • Rain Effect
  • Retouching Image
  • Transparent Image


  • Hire Me or Something?!?!


    Realistic Fire Text Effects

    xxx


    The fire effect is a popular computer-based visual effect often animated in real time. D'ya guys wanna have that ability? It's easy... I got this on neighbor when i was tired from Blogwalking... Credit goes to them ofcourse, salutados!

    OK we start it up now...


    1. Get the coffee and smoke just like usual... Open the Sotosop...

    2. Click File > New, the parimeter is up to you guys! Take Widht 400 px for pixel dimension... just like the pic below..


    3. Click the Bucket Paint Bucket Tool (G),
    fill Black (#000000) for the foreground (it's up to you actually, :>)

    4. Choose Text Tool (T), the icon-text on Tool Box opened, click right hand the small arrow icon on the corner of the T Icon...


    choose Horizontal Type Mask Tool

    5. Get your beautiful awesome cigarette.... dji sam soe or marlboro or... what ever!

    6. I get this type:


    Your screen is getting red? Hahahahhah... Let it be! Don't be panic at de disko!!!

    7. Set your Foreground Color into Red = #FF0000...


    8. Click on the outside area of your work 'till you get this on that Layer...


    9. Click Alt + Delete, the selection part
    becomes Red or the color you picked...

    10. Click menu bar, Select > Save Selection, Name it just like i do on this pic (again it's up to you guys). Do not forget to click OK.


    11. Click Image > Rotate Canvas > 90 CCW


    12. Choose Filter > Stylize > Wind...


    13. Click Ctrl + F 2x...

    14. Back to 1st Layer position with open Image > Rotate Canvas > 90 CW

    15. Go to menu Select > Load Selection, remember to activate the Invert section.


    16. Go to Filter > Distort > Ripple..

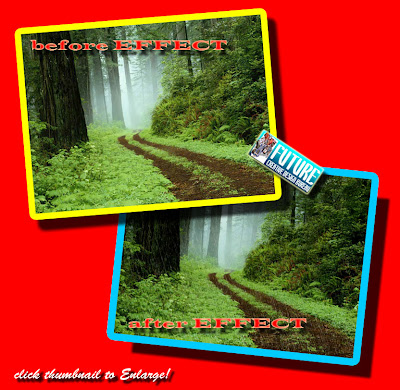
    17. Finaly... It's a wraaaaaaaaaaaaaaaaaaaaaaaaaap!!!


    Good Luck!

    View Indonesian Version Here!

    Related Topics :
  • Dancing Text Animation
  • Electrifying Text


  • Hire Me?!


    Retouching Image

    OK this time i wanna show you how
    we create someone to be different,
    to make over a man into a devil, Lol...
    See the picture below... you'll got my point...
    Retouching Image...

    1st time you should do is, get the image
    you wanna make over... here i use this
    evil picture... is that cool this guy?!!?!


    Zoom the image, then choose Healing Brush Tool (J)


    Hold Alt then click the most clean area of his face.


    Drink your hot tea, smoke...
    choose Filter -> Distort -> Diffuse Glow, apply just like
    this picture said:


    Choose Blur tool (R) set the properties,
    you guys can follow this instruction...


    Drag that Blur Tool onto the middle of the face,
    leave his eyes and his beautiful lips
    wkwkwkwkwk...


    Take the Burn tool (O), drag through the eyes area...

    Get Marquee Tool (M) Hold still pushing the Ctrl+B
    Color Balance opened,
    set the properties like this:


    And VOILA!!!!!!!! You will get this final result: It's a wraaaaaaappp!!!


    View Indonesian Version Here!


    Related Topics :

    Air Brush Style
    Dancing Text Animation
    Vektor with Photoshop
    Menu Navigation
    Abstract Background
    Rain Effect
    Matrix Effect
    Firing Text
    Transparent Image

    GBS - Emoticons

    I was really tired of words like 'plus size,' 'round' and 'large.' I thought, 'Come on, we're fat.' But me??? No I'm not, thnx... Lol! Hey... I've done all my tricks. I'm tired of myself. Just see what i mean right about here!


    gbs - Emoticons

    <img src= "http://h1.ripway.com/genialripway9/logo.gif ></a>
    <img src= "http://h1.ripway.com/genialripway9/logo1.gif ></a>
    <img src= "http://h1.ripway.com/genialripway9/logo-muter.gif ></a>
    <img src= "http://h1.ripway.com/genialripway9/logo-muter-again.gif ></a>
    <img src= "http://h1.ripway.com/genialripway9/logo-muter-chrome.gif ></a>
    <img src= "http://h1.ripway.com/genialripway9/logo-muter--with-chrome.gif ></a>
    <img src= "http://h1.ripway.com/genialripway9/logo-muter-without-dissappear.gif ></a>
    <img src= "http://h1.ripway.com/genialripway9/gbs-logo.gif ></a>
    <img src= "http://h1.ripway.com/genialripway9/gbs-logo1.gif ></a>
    <img src= "http://h1.ripway.com/genialripway9/gbs-logo2.gif ></a>
    <img src= "http://h1.ripway.com/genialripway9/gbs-logo3.gif ></a>
    <img src= "http://h1.ripway.com/genialripway9/gbs-anger.gif ></a>
    <img src= "http://h1.ripway.com/genialripway9/gbs-biggrin.gif ></a>
    <img src= "http://h1.ripway.com/genialripway9/gbs-boxer.gif ></a>
    <img src= "http://h1.ripway.com/genialripway9/gbs-boxer1.gif ></a>
    <img src= "http://h1.ripway.com/genialripway9/gbs-boxer2.gif ></a>
    <img src= "http://h1.ripway.com/genialripway9/gbs-cry.gif ></a>
    <img src= "http://h1.ripway.com/genialripway9/gbs-duhh.gif ></a>
    <img src= "http://h1.ripway.com/genialripway9/gbs-elbow.gif ></a>
    <img src= "http://h1.ripway.com/genialripway9/gbs-horse-laugh.gif ></a>
    <img src= "http://h1.ripway.com/genialripway9/gbs-ngambeg.gif ></a>
    <img src= "http://h1.ripway.com/genialripway9/gbs-ngenye.gif ></a>
    <img src= "http://h1.ripway.com/genialripway9/gbs-ngenyereinvention.gif ></a>
    <img src= "http://h1.ripway.com/genialripway9/gbs-sad.gif ></a>
    <img src= "http://h1.ripway.com/genialripway9/gbs-smile.gif ></a>
    <img src= "http://h1.ripway.com/genialripway9/gbs-suitsuit.gif ></a>
    <img src= "http://h1.ripway.com/genialripway9/gbs-thumb.gif ></a>
    <img src= "http://h1.ripway.com/genialripway10/gbs-embarass.gif ></a>
    <img src= "http://h1.ripway.com/genialripway10/gbs-gbye.gif ></a>
    <img src= "http://h1.ripway.com/genialripway10/gbs-onfire.gif ></a>
    <img src= "http://h1.ripway.com/genialripway10/gbs-pissedoff.gif ></a>
    <img src= "http://h1.ripway.com/genialripway10/gbs-run.gif ></a>

    <img src= "http://h1.ripway.com/genialripway10/gbs-smoke.gif
    ></a>