
 Bonjour mes amies. I've had several requests on how to use this amazing tool in Photoshop, Pen Tool (P) to create anything. Well today my Photoshop friends, your prayers have been answered. Here's the step by step using that cool magnifique tool.
It took the time to go through this tut. For me, the result was amazing if I added more samples in real vector just like in my image galery said, and I am honestly pleased with this. I’ve been trying to make a decent realistic looking something for ages, and finally.. GOT IT!!! I remembered this. Thanks for taking the time to figure all the lessons out and share the results with everyone if you'd like to!
Let’s see, how to create.
First of all, Open your New Document of Height & Width 1000×800px.
Fill your Foreground Color with #50472e or something you like then make a gradient like this ; Remember, each action in each saparate Layers!

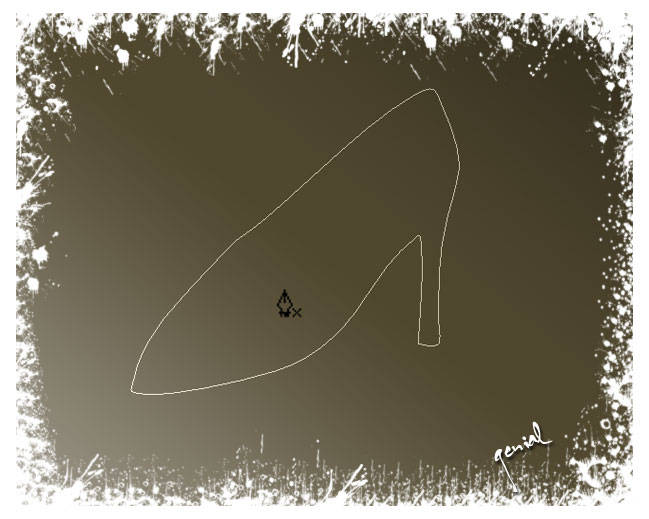
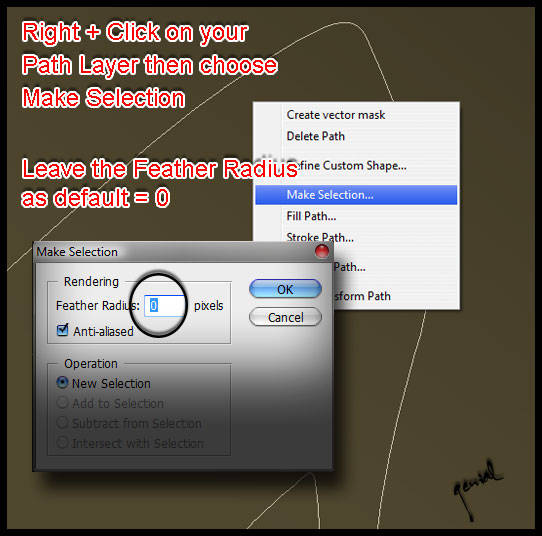
Create a New Layer, name it path of shoe then create the following shape with Pen Tool (P). Right + Click and choose Make Selection.
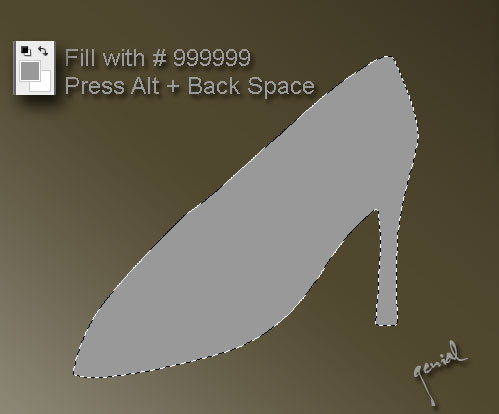
Use your Paint Bucket (G) tool or simply hit Alt + Backspace to fill the selected area with # 999999 like as shown below.
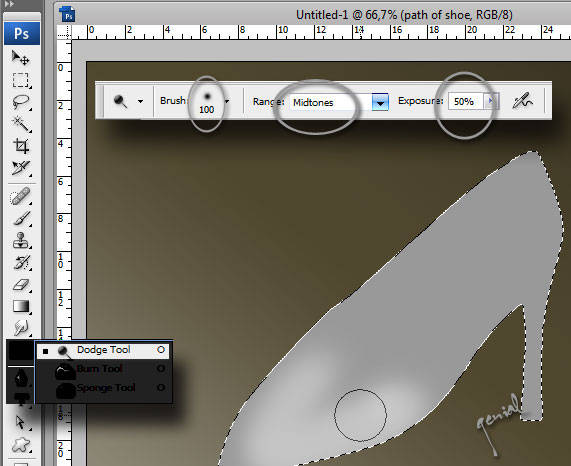
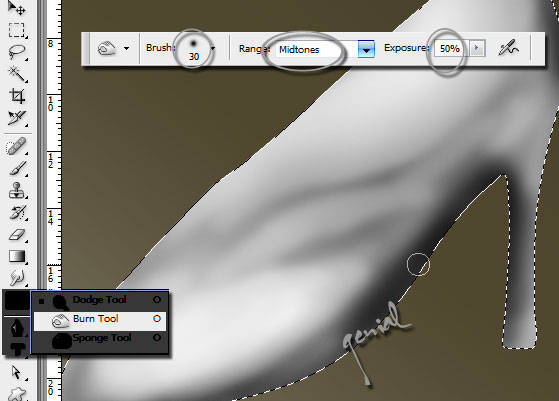
Easy fellas, easy!!! Get the Dodge Tool (O) to create following highlight in it.
You are AWESOME! I love your moves! Now switch your Dodge Tool (O) into a Burn Tool (O) by pressing the Shift + O to create the following shading ;
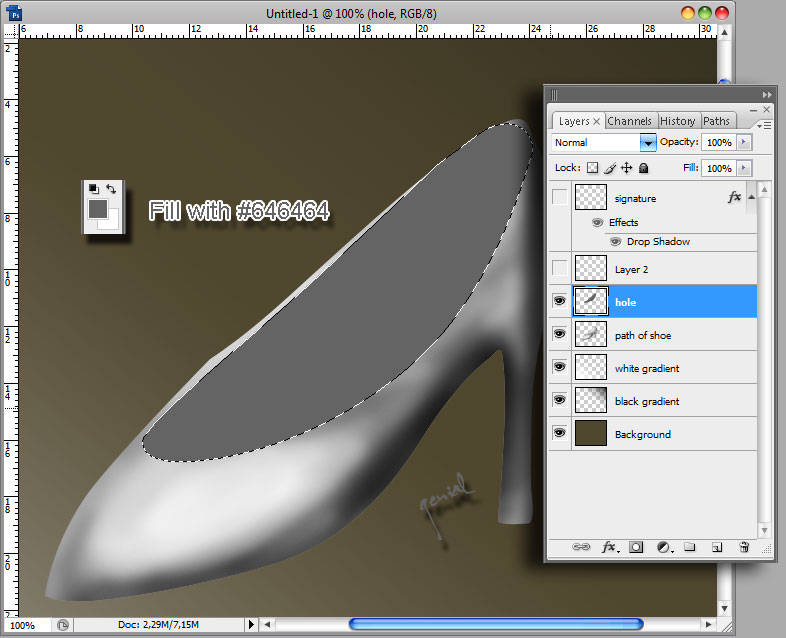
Make a New Layer & a new selection like given below & fill #646464 this color. I rename this layer with Hole.
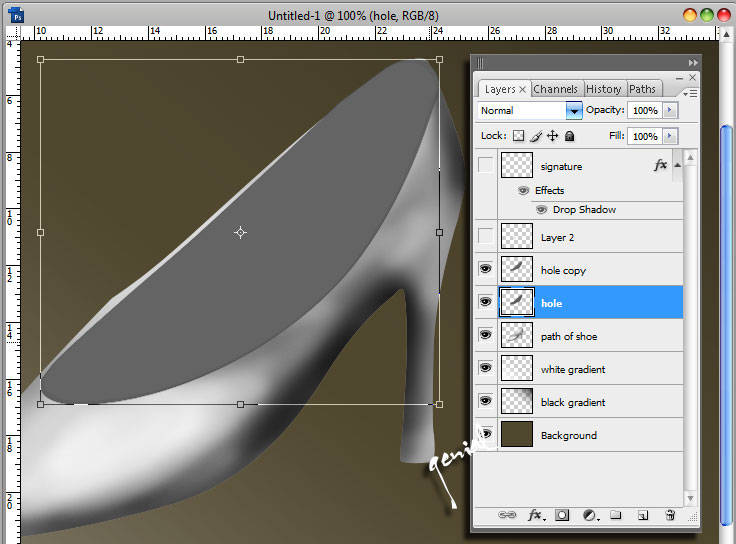
Ctrl + J to duplicate your Hole Layer then press Ctrl + T to transform that Hole Layer a little bit bigger then the first one, press Ctrl + Click on your copied Hole thumbnail Layer and fill it with #5e5e5e by pressing Alt + Backspace
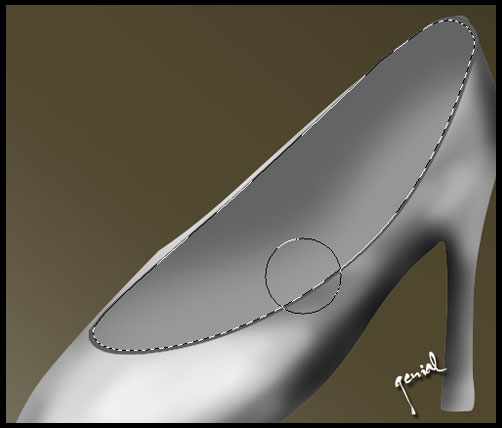
Again, give the following shading with the help of Dodge Tool (O).
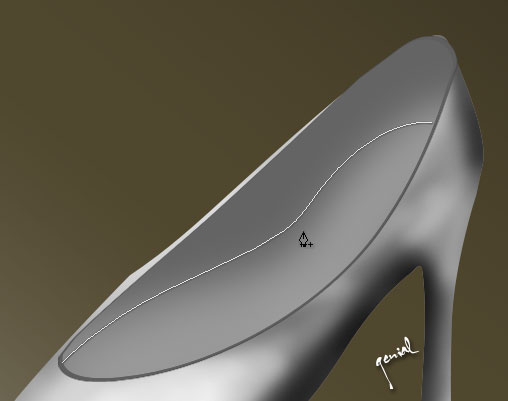
Create now a new layer and name it Inside & create a new path with the help of Pen Tool (P) like given below. Slow down while using this tool.. Feel it! Watch each point you've made. Done?!?!
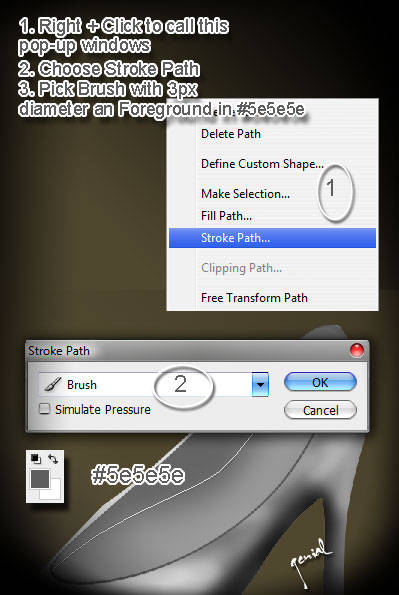
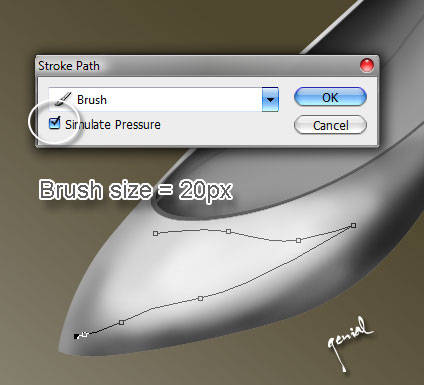
Set your Brush (B) size in about 3px diameter and set the Foreground Color with this #5e5e5e gray color.
Note : Do not check the Stimulate Pressure
Right + Click & choose Stroke Path
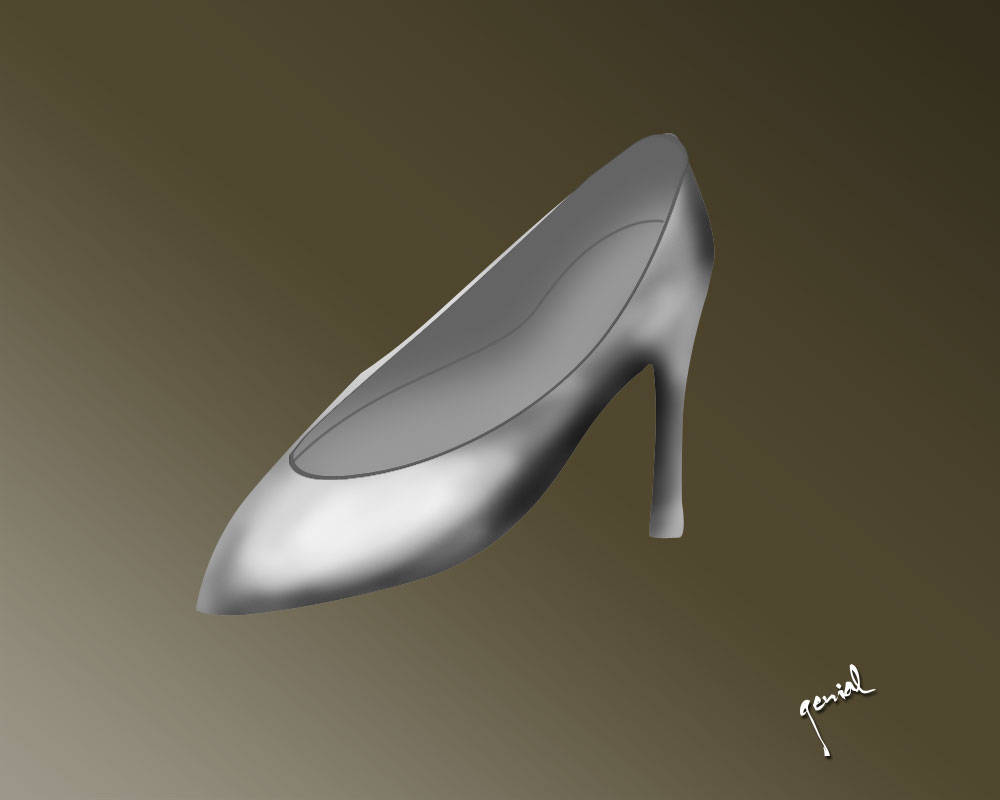
Excellent!!! Your image now will be shown as below.
Take a break for a moments doods. Drink your hot choccolate or something! Lmao!!!
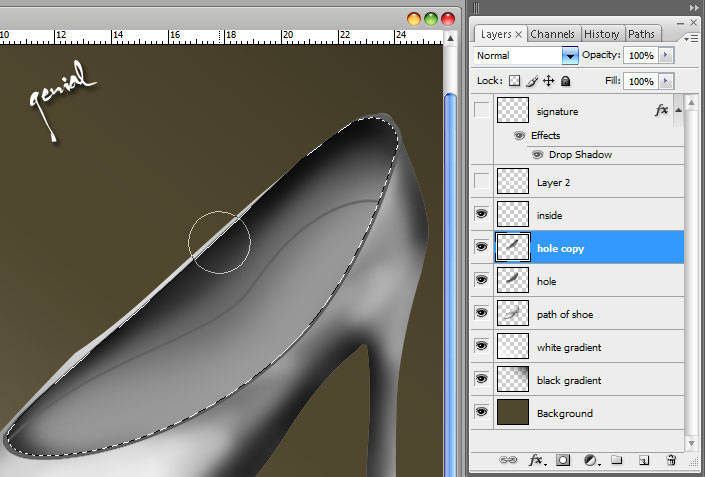
OK, back to the job! Now press Ctrl + Click on your Hole Copy Layer Thumbnail to make a selection around the image, give the shading with the help of Burn Tool (O)
Create a new layer, name it Brighter & create a new path with the help of Pen Tool like given below.

Doods, You Rock! Now Right + Click & select Stroke Path with the brush size 2px.
Note : Now you can check the Stimulate Pressure. See the different!
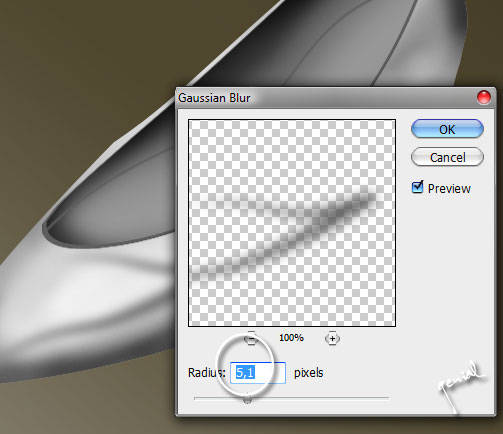
Press Ctrl + H to hide the Path. Still with the Brighter layer selected, go to Menu Filter > Blur > Gaussian Blur then enter in about 5,1px for radius. Then Turn the Opacity into about 15%
Activate your Path of Shoe layer on the Palette Layer, press Ctrl + J to duplicate it. Drag your Path of Shoe copied layer just below the real Path of Shoe layer and rename it with Shadow... and guys... do some messed thing like like this... :p
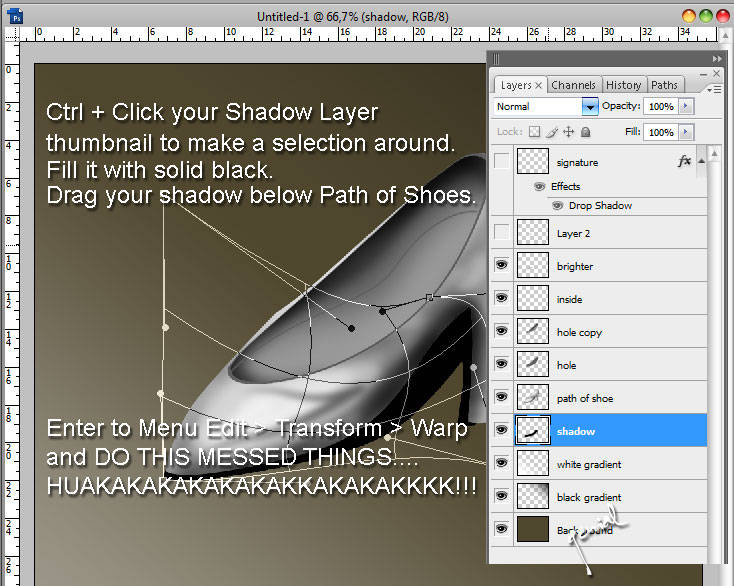
Geeezzz.. How to do that?!?!? Enter to Menu Edit > Transform > Warp. Notice that Shadow is now as a selected active layer.
After that tricky annoying part... you can go to Menu Filter > Blur > Gaussian Blur and enter 8,3px for the radius set.
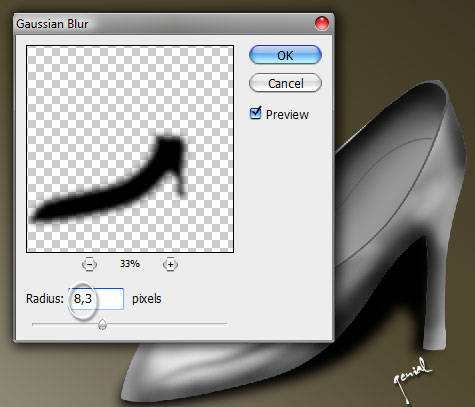
Voila! You can take a peep at your hard work now!!!

For finishing touch, all that’s left to do now is fix to make all things right. Erase any part you do not want to appear like the edges of the upper part of the shoe to clean up your image to get the realistic lady shoes. Find all the additional layers and layer styles in the downloadable lesson files at the end of the tutorial.
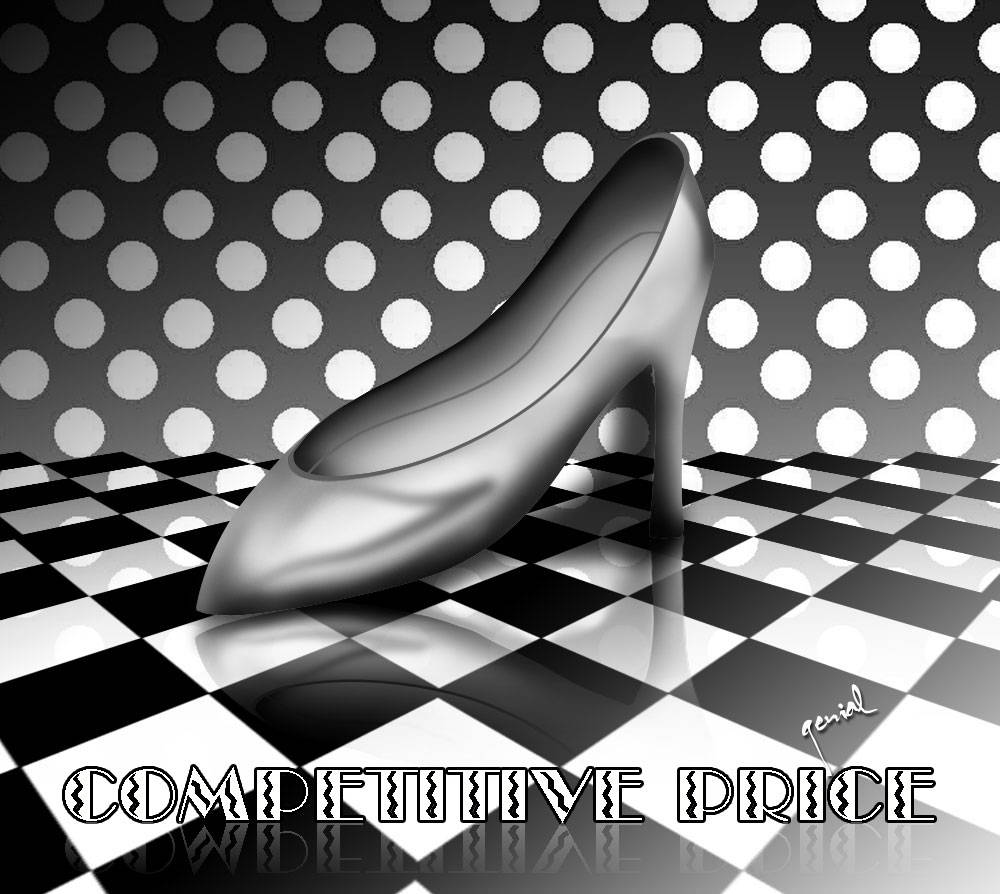
View other shoes samples here! Well guys... I hope you’ve enjoyed the tutorial.
Download PSD File here!


wedeh makin keren aja nih mr.genial hahahahahah
ReplyDeletewah.... sip banget.... langkah2nya jelas.. bisa dicoba nih..
ReplyDeleteMakasih banyak ya ah mau berbagi ilmu :)
postingan yang sangat bermanfaat, apalagi kebetulan saya senang ngotak2 ngatik photoshop... (maklum lagi coba2)
ReplyDeleteThanks ya sob
perfect money itu buat review jg y dek? iy alhmdulillah pr mb naik tp kok alexa lemot y dlink 10 hehehe
ReplyDeleteWah..gue udah nyerah duluan kalo denger yang namanya Pain Tool....
ReplyDeleteSusah banget nyeleksinya... :D
mantab tutornya, .
ReplyDeletekalo aku saran gimana kalo final image
previewnya di taruh di awal tutor juga..
soalnya pas baca tutor, daripada liat step
prtama kali pasti ingin lihat gimana hasilnya :)
CMIIW
that's nice. you are so good in using photoshop. your works are excellent.
ReplyDeletewewww... keliatannya gampang gampang susah ya... tapi bagiku koq banyak susahnya ya hahaha... emang ga bakat design nih
ReplyDeletedohh semangkin keren aja tutorialnya nie kang? lamo tak jumpo.. apa kabarnya? :D
ReplyDeleteterimaksii akng sama eneng semua iia uda berkenan mampir di sini :)
ReplyDeleteHello, thanks for your visit as well as for the comment left.
ReplyDeleteYour blog is quite nice and interesting. I'll follow him.
Wish you a happy day!
My friend Genial, Merry Christmas, thank you very much for your visit, new day of happiness and successes. Hugs Valter.
ReplyDeleteOh ternyata pake PSD bisa buat vector juga yach? Kirain cuma CDR aja. Wah sama Kang Gen bener2 dpt tutorial gratis nih. Keren abizz...
ReplyDeletewuiihh... keren abizz!! kayak lama2 aku ngiler belajar fotosop juga neehh...
ReplyDeleteHello my dear friend Genial, peace and happiness with health for you my friend, Merry Christmas for you and your Family. Hugs Valter.
ReplyDeleteDEAR MY FRIEND GENIAL...KABARKU UAPIK...SELAMAT TAHUN BARU YA KANG......MAAP BARU BISA NGUCAPIN HEHEHEHE
ReplyDeletemantaps!!!
ReplyDelete