 A great looking design can be easily created by combining various simple ways we couldn't notice before. In this tutorial we’ll look at creating a cool Business Card based around some abstract imagination I used in Card Image Gallery, some development about it, I guess lol. Then play around with a few finishing touches to really bring the design to life.
Front Card:
Well.. Open a new document in Photoshop, mine is 850×992px at 72ppi or about 29,99x35cm, however if you plan to use this for anything when you’re done. I’d recommend building it big and at 300ppi.
Fill the Layer with a solid #464545 color. Create Two folder after that. Name each folder just like I did in image below
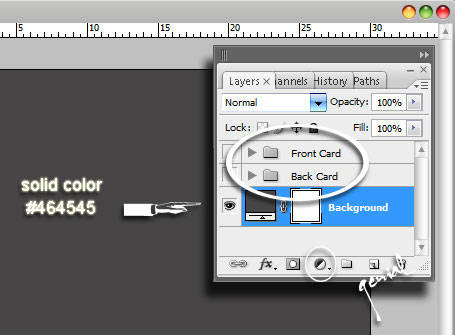
First we're gonna explore our Front Card. Group One (Front Card Layer) active, create a new Layer by clicking on this little icon at the bottom of your Palette Layer.
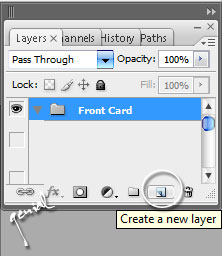
Call it Out Line. We're gonna create the card its self, start by selecting the Rounded Rectangle Tool (U) with a radius of 10px,
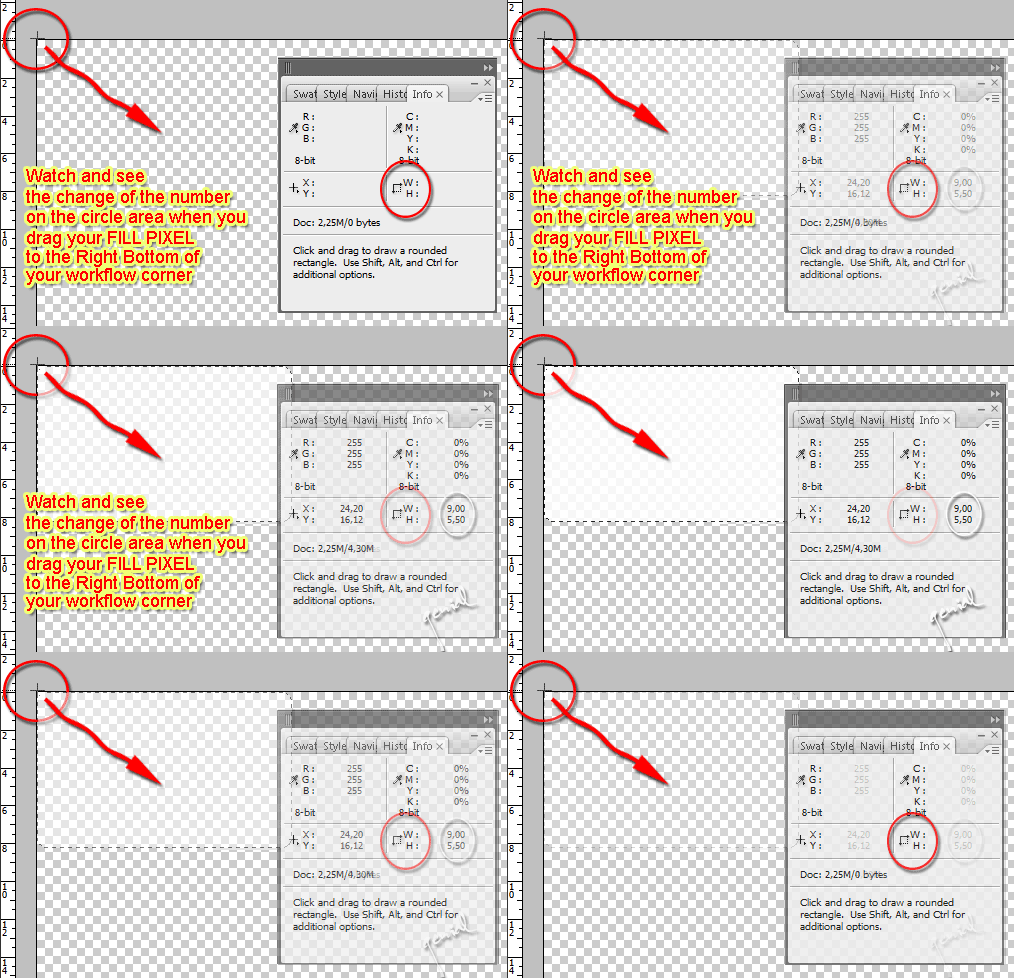
Create a new fill pixel of exact 638px width and 390px height. That's our card size, 9x5,5cm. How to get the exact size of it? Press F8 to call up your Info Section. Drag from your first left corner to the right bottom corner regarding the Info.
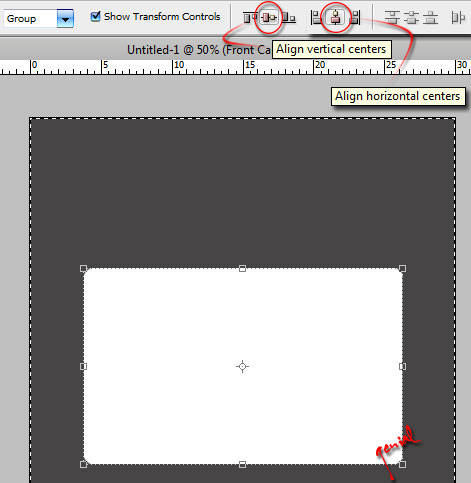
Your white card selected, press Ctrl + A to Select All, hit V Key to make your image right in the center area of your workflow.
Now set the Blending Option for your Outline by applying a Drop Shadow and a little Color Overlay touch like the image below said;
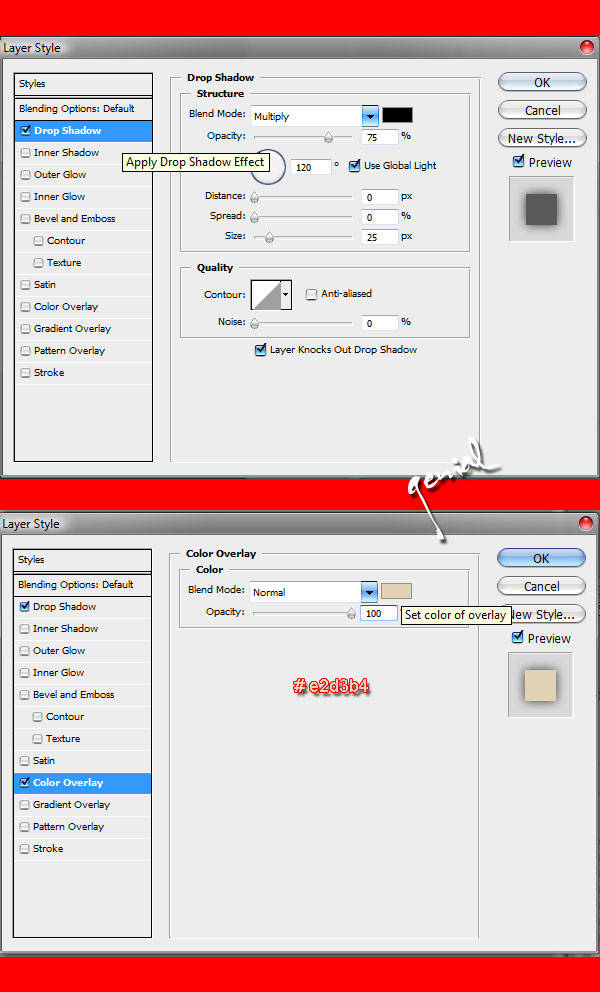
I added the letter G at a large size in the background with Overlay kind of Blending Layer and 32% Opacity to create a logo type icon. Just be creative with your Front Business card, will ya'...
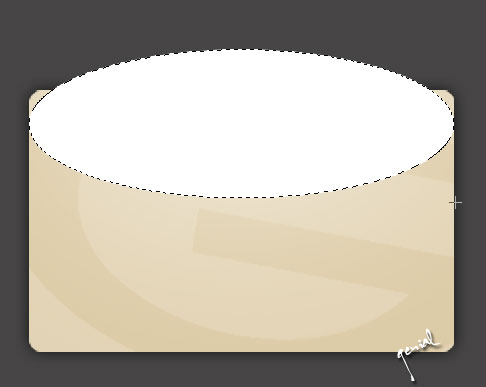
Create a New Layer, name it Brighter or something. Select your Elliptical Marquee Tool (M), make a white selection like this ;
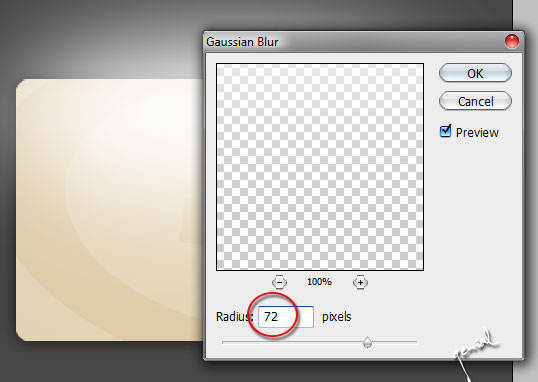
Go to Menu Filter > Blur > Gaussian Blur with 72px radius ;
Select and activate the Brighter Layer and set to Soft Light, Ctrl + Click on Outline Layer Thumbnail to select the outline image. Inverse the selection by pressing Shift + Ctrl + I and still.. with the Brighter layer selected, delete your inverse. Click Ctrl + D to deselect.
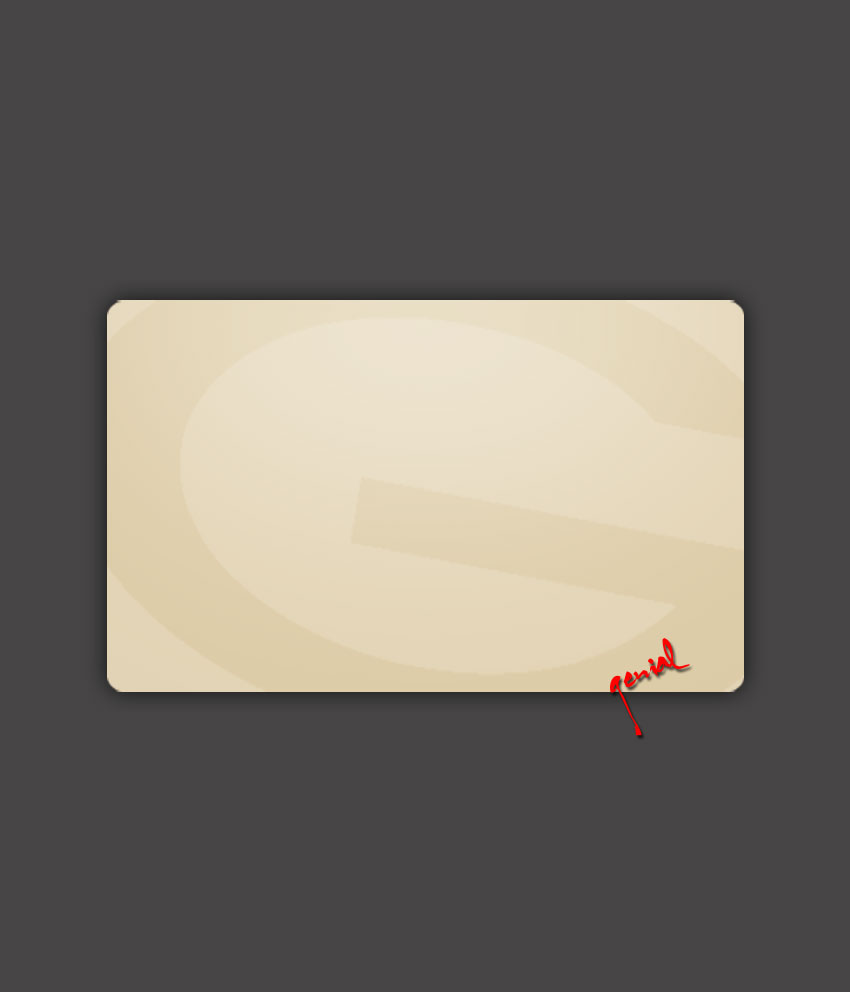
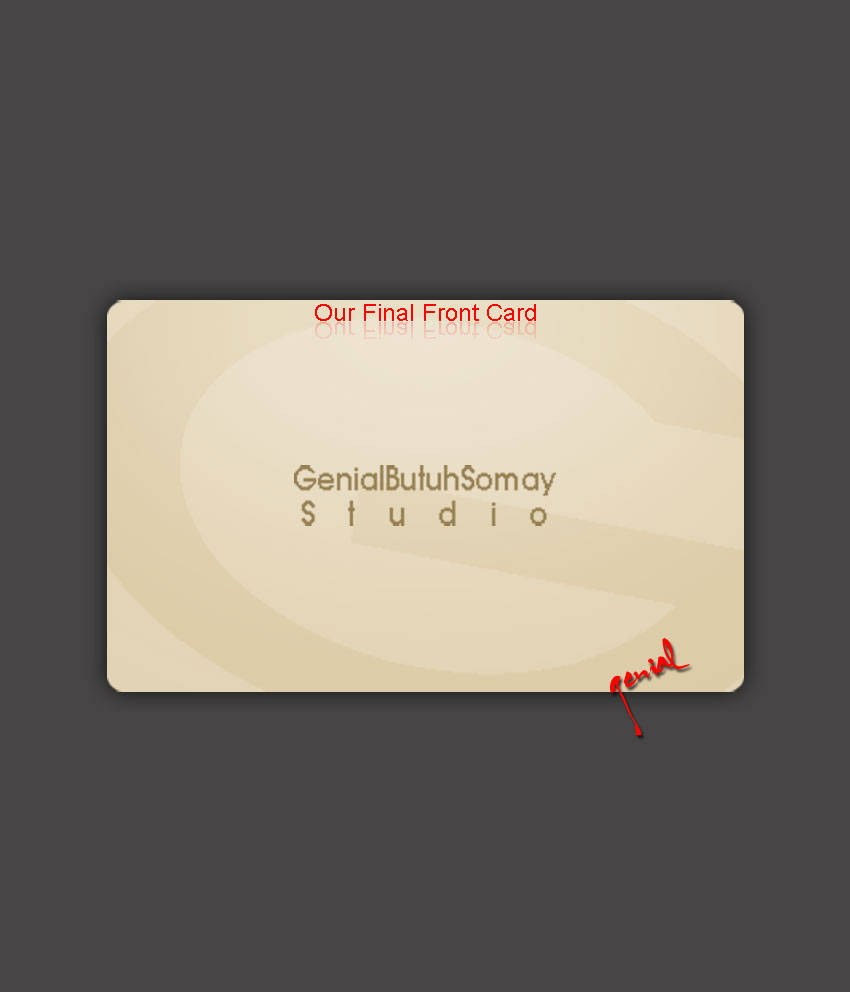
Our Final Front Card (Group One) is here ;
Back Card:
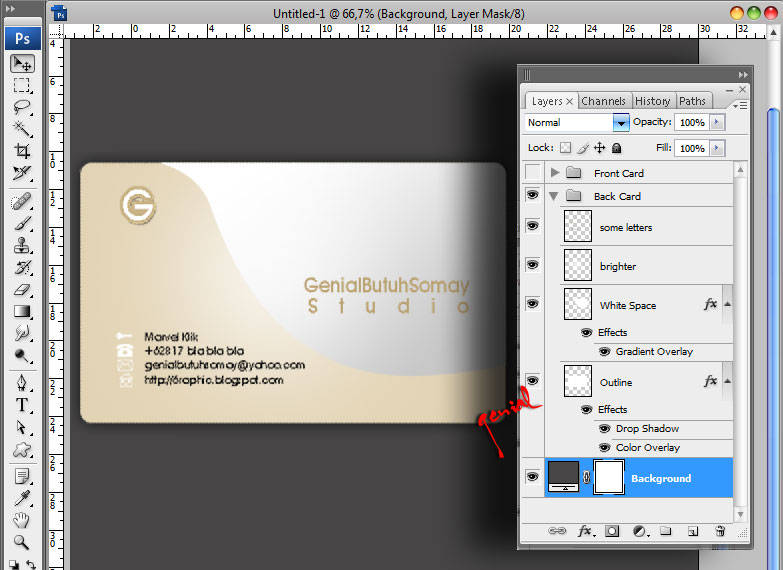
This is my Final design of the Back section with its Layers screenshot. How to do that?!?! Just use your brilliant steps to do whatever you wanna do.
Hard, but works really cool. I am so sorry to choose not finish the Back Card section, 'coz it's trully.. hard to write it all down in tut way like this. Need massive power to do this. Some steps but once you get it down it becomes much easier and it looks good.
Me My self and I.. absofuckin'lutely believe that as long as you try your best.. there is no bad or good work.. just works of art being expressed in different ways. Gorgeous. I am genial the Owner of FCDB PSD Holic, I hope y'all enjoy your time at 6raphic.
Be Cool Be Good an Be Better. Keep on the Right Track!
Other sample? Visit our Business Card Gallery here!
See and visit this tutorial in Indonesian Version.




Wah.. KEren nh Ilmu2 kapan2 kalau saya perlu buat ID card sama Diri Mu aja...
ReplyDeleteI miss you came to My blogs
Kerennnn....naksir nih...
ReplyDeleteKayaknya si akang bisa buka usaha pembuatan kartu nama :D
wew keren buanget...bisa jadi duit nih.....
ReplyDeletekerenn juga
ReplyDeletebandwidht lagi cekak :( ga biasanya nih hotspot ngedrop
ReplyDeletejadi belum bisa liat pic nya Mas
ntar kesini lagi
pasti kereen yaa :D
walaaaahhhh aq photoshop masih belajar ganti tulisan, ngasih tulisan..... xixixixixi
ReplyDeleteSemoga menjadi lahan bisnis yang terus berkesinambungan Mas.
ReplyDeleteMantap bener hasil karyanya.
Salam sukses selalu :)
Memanfaatkan ID card dalam memperluas jaringan di bisnis online.
ReplyDeleteHmm, ide yang bagus mas... :D
kerrrrrrrrrrrrren!
ReplyDeletesobatku yg satu ini mang selalu keren... gambar potoshopnya maksudnya hehehehe
ReplyDeletewe miss u genial butuh siomay......thanks untuk tutorialnya.....btw maap ya dulu ane ga ngerti masalah award so award dari kang genial ga tak ambil.....oh ya.....ane sekarang udah bisa dikit2...tolong di ambil ya...ada yang spesial tuh untuk kang genial....thanks caayoo
ReplyDeleteojo lali awarde di ambil ya....nih kang adit lho....biasalah ganti2 nama gitu hehe
ReplyDeletewah wah...baik banget si om masih mau bagi2 tips beginian...
ReplyDeletenanti tak coba deh :D
kalau buat kartu undangan pernikahan gimana? bisa pesen aja gk mas di sini??!?! caranya?!?!?!
ReplyDeletethis is tuto is realy worked to me :)
ReplyDeletetahnx for this :)
thnx for all guys :)
ReplyDelete