 There you go again?! Howdy... I promise you this is the last part of our late advertisement tutorial. May I present to you all our new local HERO.. The one and only, The handsome full of critical damages... James Pond's 007, lmao. Subhaaanalloooh..!!!
 Before you go check this one.. you should read first our previous lessons with the tittle Creating a Customized Product followed by Still on Creating a Customized Product and Long road to Pond's 007 to get all view complete on how I created this kinda facial Super Hero.. lmao.
Step 7 - Additional Details (Final Walk)
Add your own additional details for your bottle. To start, add the shiny and reflective kinda effect for the Main layer. To do this, using the Pen tool (P), make a line just like as shown in Fig.
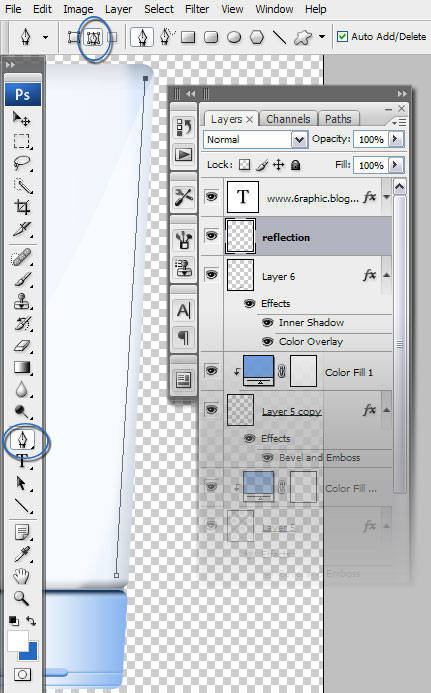
Preparation :
First, set your Brush Tool (B) with this.. Master Diameter to about 13px Soft Round.
Second, make your Foreground color filled with White.

Back to your workspace. Is your Peen Tool still active? If so, you should see a line above the Main (bottle) layer. Right-Click while the line of the Pen Tool (P) still there, then select Stroke Path from the drop down menu. Replace the line (Stroke Path) with Brush. Leave the Simulate Pressure blank.
Press Ctrl + H to view your new line, this act will automatically hide the Path. Finally.. Decrease the layer's Opacity level to 67%.
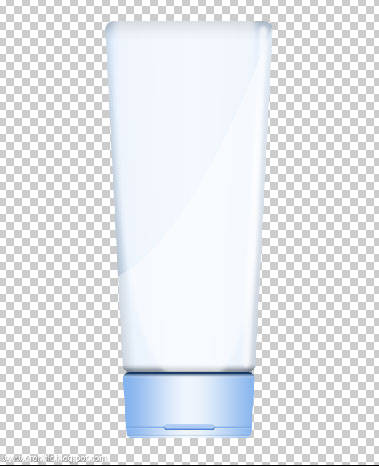
Create a New Layer, name it Sealed. We're gonna add the magic tiny ridges for the sealed area we did earlier.
Brush preparation :
Choose Hard Round 1px from the Brush preset picker (a pixel of that, would be enuf). Draw a single line on your new layer. Ctrl + Click on your Sealer thumbnail on the palette layer to invoke the selection. Go to menu Edit > Define Brush Preset. A Brush Name box appear. Name it genial (just because I'm that kinda guy.. lol.. or whatever you like)!
Press Ctrl + D to Deselect. Remove your single line (not the Layer, just the image you created earlier) from the Sealed layer. We're not gonna need that anymore.
Now you're being totally armed, right!!! Back again to Sealed Layer. Press P key on your keyboard to activate the Pen tool. Draw a line (just like when you created a Reflection).
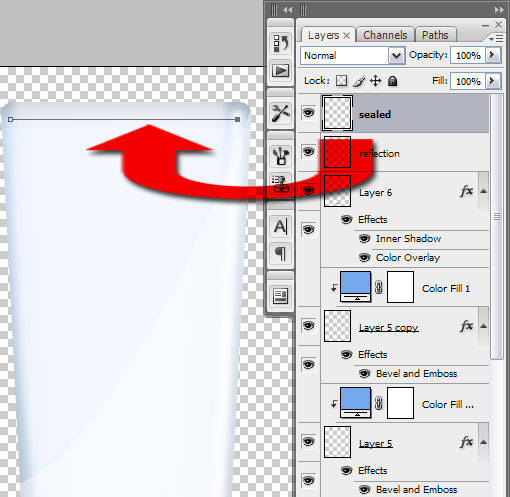
Press B to activate the Brush tool. Choose your genialBrush you created earlier. Press F5 to call the Brush Preset. And follow the direction from the image below.
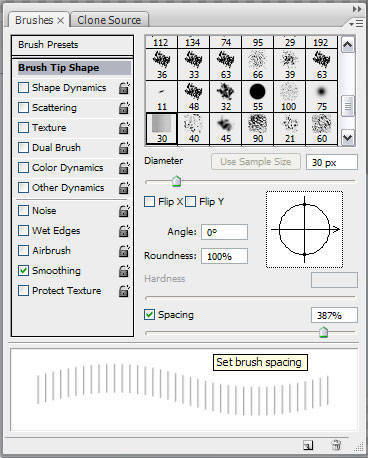
Your Pen still active, Right-Click and choose Stroke Path, choose Brush to replace the Path (this is Brush you set up - genialBrush). Uncheck or leave the Simulate Pressure Blank.

Your image should be like this...
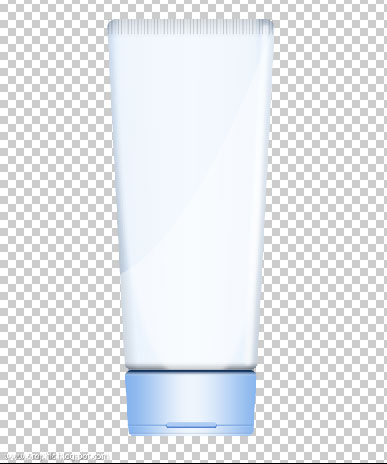
Add another Reflection to give more realistic to our product. Create a New Layer. Name it Reflection2 (or something like that*). On this layer, with the help of the Pen tool (P) (again.. lol) a shape like this..
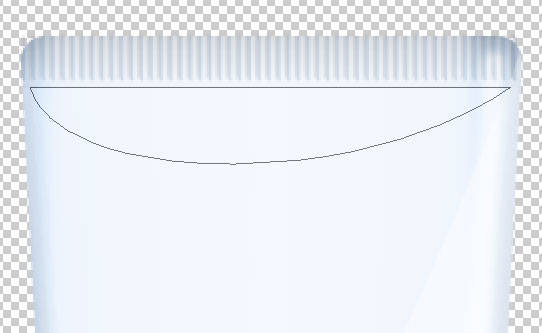
Right-Click and choose Fill Path.. and pick Foreground color (#6188b9) to fill it... Add a Layer Mask on this shape.. make some blur dynamic reflection like this... don't forget to decrease the Fill Opacity to about 9%.
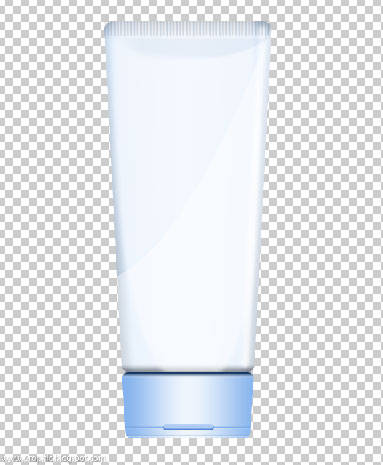
DONE!!! Your job is done! That's all for the main bottle.. How about the rests?!?! You guys should use your own ..
Fonts needed:
Century Gothic, Regular, 18pt = Committed Suicide?
Trebuchet MS, Regular, 10pt = Deep cleanses..
Trebuchet MS, Regular, 11pt = Call her NOW!
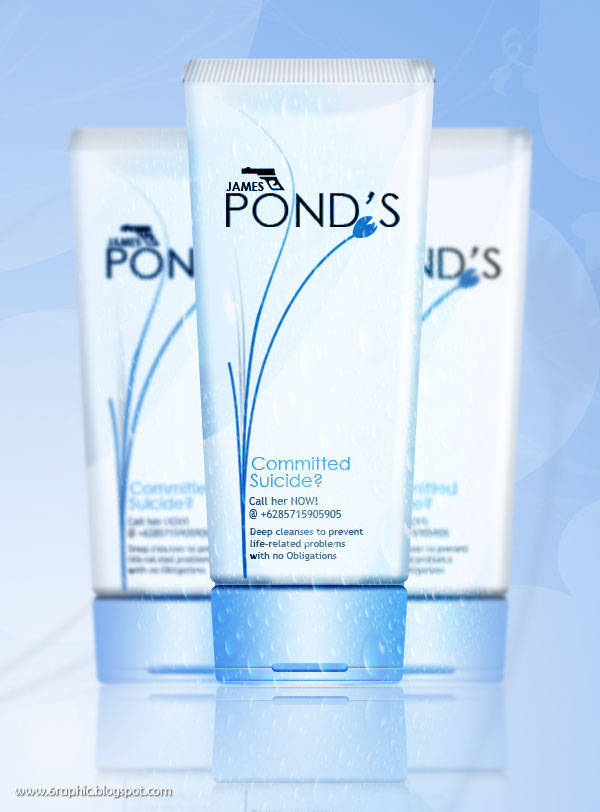
It's a wraaappp!!! The final James Pond's product is shown below. Thanks for reading!

Other sample...

Complete tutorial : James Pond's 1, James Pond's 2, James Pond's 3, James Pond's 4.


really good tutorial,
ReplyDeletei will try it..
salam friend
ReplyDeletenice tutorial.
thank for sharing,I know James pond's, coz read your post.
wach,keren nich ka tuto nya..
ReplyDeletejames pond...
gkgkgk
ijin save ya buat belajar.
mas, kok blognya sepertinya artikelnya "terlalu sempit" gambarnya terlihat terpotong
ReplyDelete*sepertinya ada yg salah gitu... mungkin browser aku, atau hal lain
r u working at Ponds institute bro? hehehe, btw nice info tq 4 share :)
ReplyDeleteya ampun, kepikiran amat bikin James Pond. Artinya James Kolam ya... atau Janes Balong (bahasa Sundanya)
ReplyDeletehebat euy... baru kali ini saya nemu blog tutorial sotosop yang dibikin sama orang Pribumi :D
walah..ini toh maksudnya
ReplyDeletesaya terkagum-kagum sendiri nih hihi
pokoke..mantap suratp Mas Gen
:D
@ seratusdua : ok.. i'll be waiting :)
ReplyDelete@ NURA : terimakasii mbak :)
@ sibutiz : monggo kang :)
@ r10 : probs fixed!!! makasii perhatiannya kang :)
@ waroeng coffee : mope I'm, not.. :p just like the idea on making this such creepy adv :p
@ rime : sebenernya banyak mbak pribumi yang punya blog berisikan tutorial seperti ini, banyak sekali bahkan, mamprah.. cuma mungkin karena mereka gag bewe atau apalah alasannya :) orang sunda mbak?!?!? :P
mnteppp............
ReplyDelete@ lyna riyanto : iia bun.. mayan cape juga 4 hari ngerjain ini :(
ReplyDelete@ ZuXuZ : makasii kang :)
wow.... thanks for sharing..
ReplyDeletesama-sama kang.. hope you like it :)
ReplyDeletekreatif sekali .. saya kira jame boon ... heee.
ReplyDeletemau tanya pak .. mengeditnya menggunakan aplikasi apa pak ? photoshoop yyah ?
ReplyDeletewuih selalu keren neh Mas gen....
ReplyDeleteDuh mav ya Mas, ge jarang OL, paling juga post2 terjadwal di achen, yang buwel nya ge males apdet.... heheheh
Hello my friend Genial, São Paulo is a big city with 15 million in habitants, it is a very agitated life for the it elaborates and trades, to live in São Paulo is a madness.
ReplyDeleteMy flight is from Mato Grosso of the south for São Paulo and Rio de Janeiro every night.
São Paulo today him of vehicles became unviable for the traffic jam of vehicles to rotate 15 kilometers group 3 hours or more when it doesn't rain. Good weekend with peace and happiness. Hugs Valter.
hasil jadinya keren ^^
ReplyDeleteini pake photoshop?
hasil jadinya kerreen ^^
ReplyDeleteitu pake photoshop?
Bookmark dulu, kebetulan kantor beli Adobe photoshop, untuk belajar kang. Yang ginian nggak mudheng tenan.
ReplyDeletekreatif banget
ReplyDeletesalam sukses
sedj
I am beginner in design and picture so I want to ask you this is Photoshop or Corel draw
ReplyDeletedibayar berapa sih ama pond's..? kwkwkwkw
ReplyDeletekerennn...kerennnn....
ReplyDeleteWah, mantep tutorialnya nih...
ReplyDeletejiahahahahaaaa....
ReplyDeletebagus neh untuk dipake kang james sebelum shooting
keren :)
ReplyDeletewow ... keren om :D
ReplyDeleteJames Bond pake pond's? :-p
ReplyDeletemantapp langsung praktek...trims...
ReplyDeleteOya sobat blogger hebat, mari ikut berpartisipasi dalam Gerakan SEO Positif Season 2...
" Judul postingan yang negatif tapi isi postingan mengandung hal positif"....
mari kita musnahkan hal-hal negatif di dunia maya mulai hari ini..
sebarkan kebaikan maka kebaikan pula yang akan kita terima...di tunggu partisipasinya...
wkwkw mantaap gan tutornya :D bisa tuh buat desain produk ^^
ReplyDeletetutorialnya mantabs banget bro..
ReplyDeletekapan2 ta coba ah..
oya, komen sampeyan di blog saya kok masuk spam ya..?
hati hati :lol:
keren deh saya ngga bisa :D
ReplyDeletenice post..
ReplyDeletegreat tutorial
Mantap tutorialnya
ReplyDeleteLengkap banget
ini gabungan nama orang sama sabun kecantikan ya? hihi
ReplyDeletehehe kirain james bond :D
ReplyDeletewah terima ksih tutorial mantap ni...
ReplyDeleteijin boorkmark ya :D
ReplyDeletemantep, ternyata bisa bikin design produk via photoshop
ReplyDeletewah... keren banget mas...
ReplyDeletepermisi kepada juragan yang punya ni blog, gw mampir di mari ni gan, dari tadi muter-muter dari mbah google, mbah google kasih wangsit buat mampir di blog agan, di postingan agan ini. nais postingan gan, minta ijin dulu nech buat bacanya..
ReplyDeletekomen :
wih, tak kirain james bon
Signature :
Describe Form Hymen and Tutorial Modding Sony ericsson|Free Download Female Wallpeper Artist|Some Trips and Trick about Blog|Download Full Video Anime
Thank you very much my friend Genial for your visit, happy new day with peace and happiness. Hugs Valter.
ReplyDeletedah lama juga nih aq g main2 denga sotosop, langsung deh tak coba
ReplyDeleteyang oncom matic itu keren banget gambarnya jernih
ReplyDeletepengen bisa secanggih itu bikin design :((
Wow sotosopnya mantap, saya ijin daftar jadi murid.
ReplyDeletecool.. like it..
ReplyDeleteahhh kerenyyaaa,
ReplyDeleteharus banyak belajar dari sini eke boo,,,
ikut subscribee yaaaa
wow, i like the process, thx for the tips..
ReplyDeleteblentung blentung...
ReplyDelete@ chikal : ini orang sepertinya ada dimana-mana?!?!?
ReplyDelete@ Merliza : punya bisnis baru tu orang >> @ chikal
ReplyDeleteoke terima kasih infonya
ReplyDeleteoke terima kasih sangat sudah berbagi. ;)
ReplyDelete