 Creating Wood Texture? It's soLast year isn't it? Lmao! We've done that section yesterday. This Photoshop text effect tut today gives a breakdown of how I created one of my realistic bloody text in some texture. Wood texture. We learn two different thing today doods, but if you read my
Lautan Berkabut... Eng Ing Eeeng!!! tut, you can leave the first step and straight jump into second and final step of this tut.
We'll learn how to pick some realistic, cute and horror, bloody text effect on wood bark texture, learn some new techniques that you will create in your works. It's a kinda helpful tips along the way.
First Step
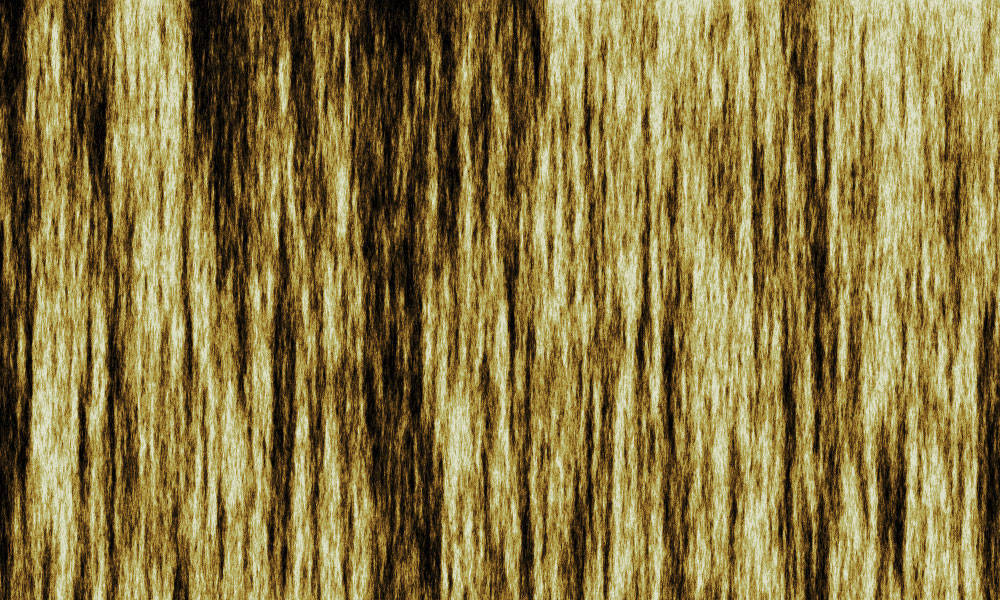
Lets jump right in and open a new document by selecting File > New from the main menu or by pressing the keyboard shortcut Ctrl + N. The size of my working document for this lesson is 1000×600 at 72ppi. First we must create wood textures. To do that, go to Filter > Render > Fibers. Set Variance to 15, Strength= 4, click Ok. You can use Randomize to set more realistic wood texture.
Click Ctrl + S to save this texture as psd file. Remember about diplacement effect tut about makin a realistic water and Creating Leopard Skin or Rock and Stone Textures Hell yeah, this is the similar way to do so. Now we must color our wood. Go to Image > Adjustments > Hue/Saturation. Set parameters, Hue = 40, Saturation = 45, Lightness = -20. Do not forget to check the colorize section.
So far, texture looks too light, not so good for the eyes.. so we need to shade it. Go to Image > Adjustments > Curves. Set parameters like image below said:
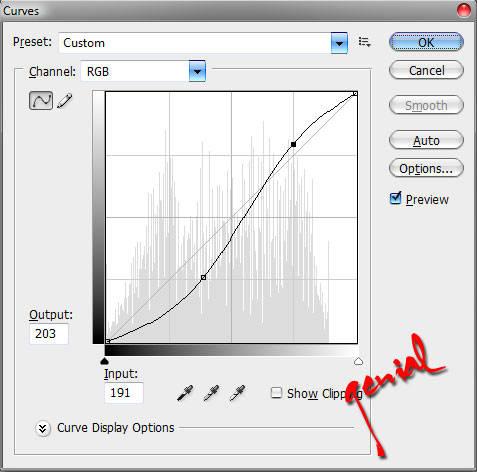
See the difference between your first image with this one!
Go to Channels on your palette layers. Hold Ctrl and click on RGB channel, we will select light parts of texture. Done?!?! Watch carefully what the image said..
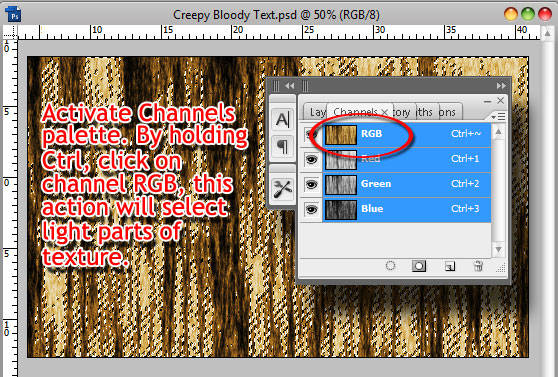
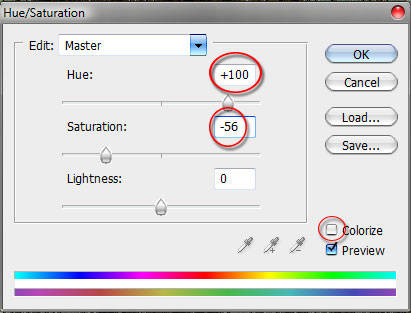
Now we need to go to Image > Adjustments > Hue/Saturation. Select Hue to 100, Saturation = -56.
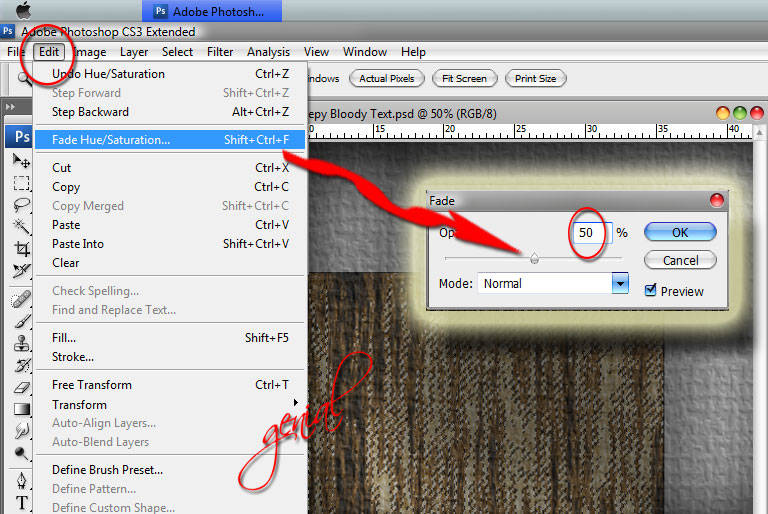
Go to Edit > Fade. Turn the Opacity down to about 50%. Click Ok and than Ctrl + D, to deselect.
Step Two
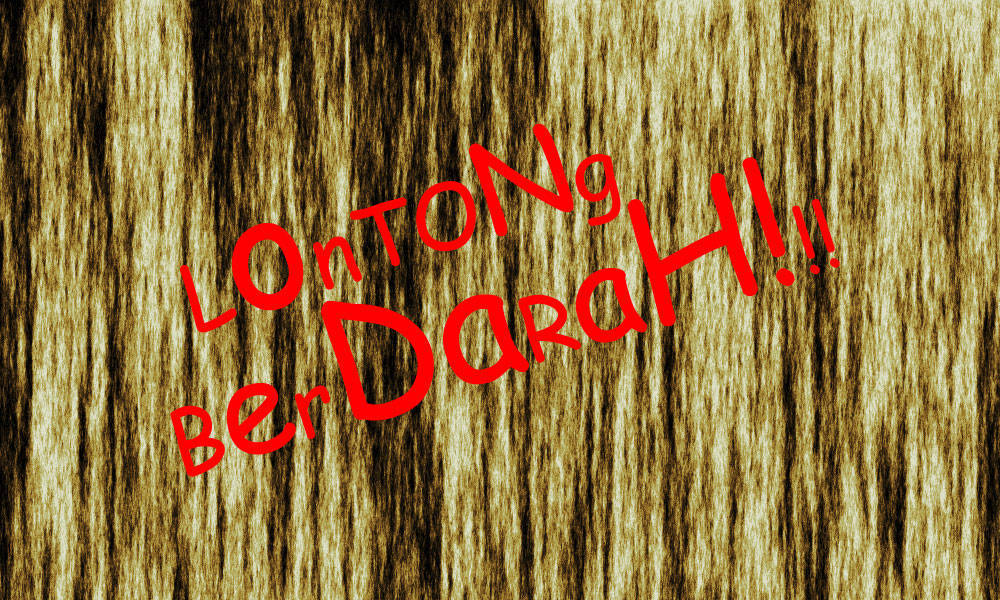
It’s now time to add some text to our document. I pick the Red Color here for the foreground color, then press the T key to invoke the Type tool. Click on the stage to place the cursor and type some text onto it. Notice that when you added the text that Photoshop automatically added a new layer for it.
note: To commit the text, you can either press the Enter key on the 10-key corner of your standard keyboard or click the Check Mark in the Text Tool options bar at the top of Photoshop.
Why LONTONG BERDARAH? Dunno! Just wanna write that down, lmao! Play with the different size of letters. Select Free transform tool and select best text placement for you. Maybe it remained you with this Carbon Fiber Look.. Yupp, this is the same trick I used here!
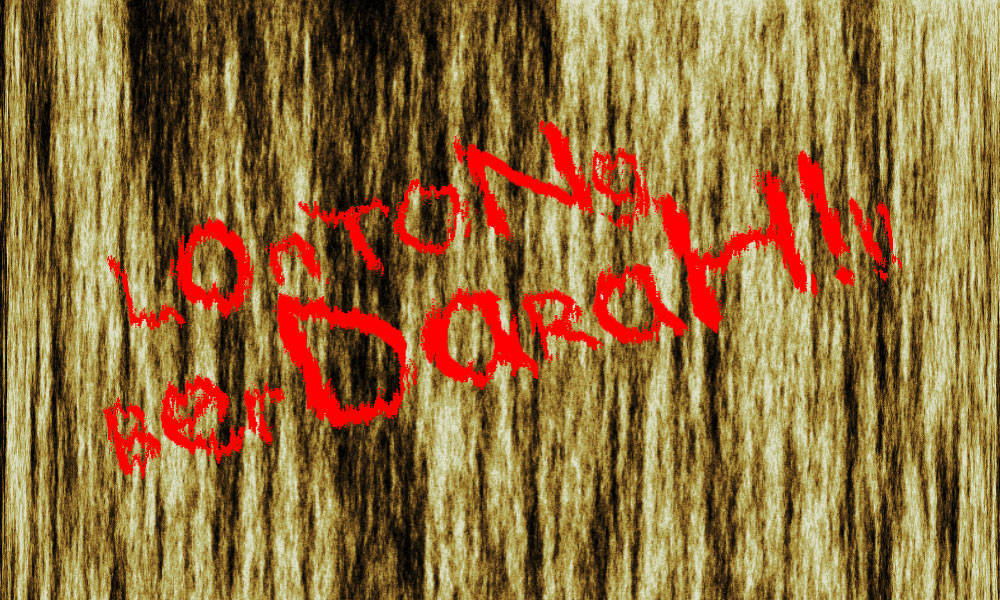
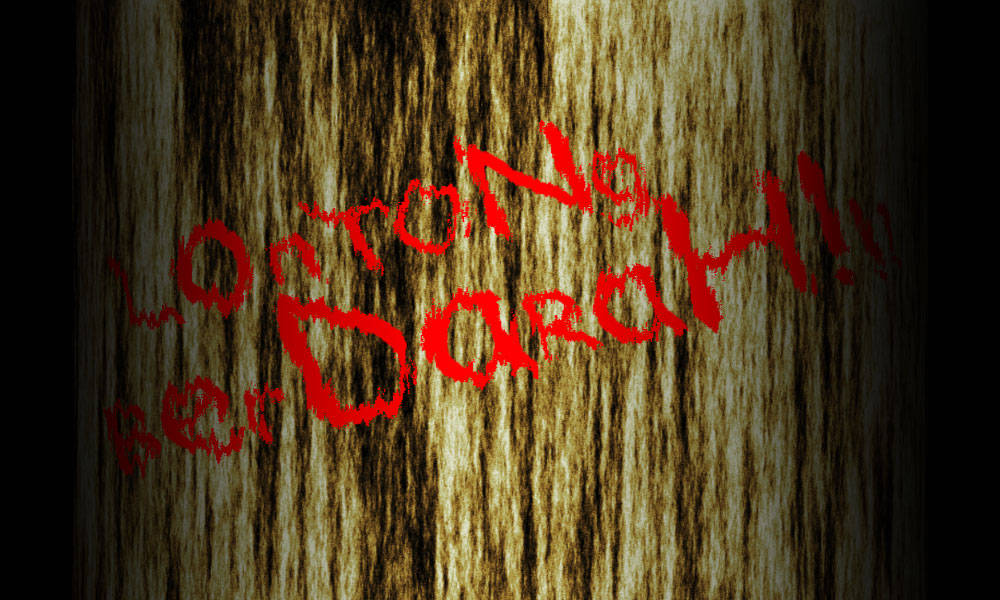
Go to Filter > Distort > Displace. On pop-up window say Yes, to rasterize text, set Horizontal and Vertical Scale 8 and select psd file that you saved in 1 step. Now your text look little bit creepy.
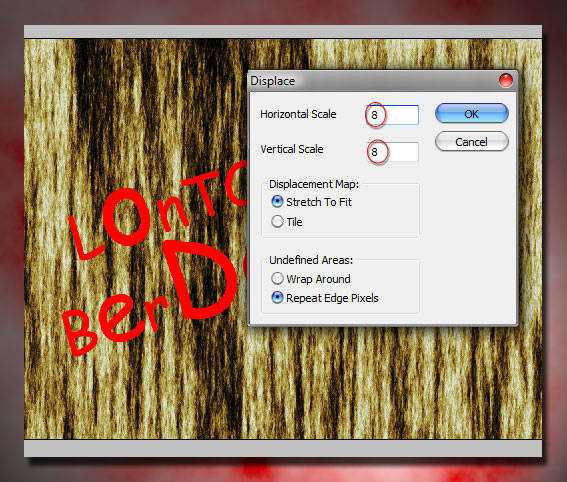
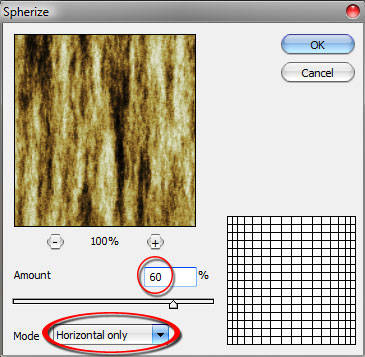
To make the wood texture looks more realistic, we need to curve it. Activate background layer, click Ctrl + A. Go to Filter > Distort > Spherize, set Mode to Horizontal Only and set amount to 60%. Activate layer with text and click Ctrl + F to repeat this filter to text as well.
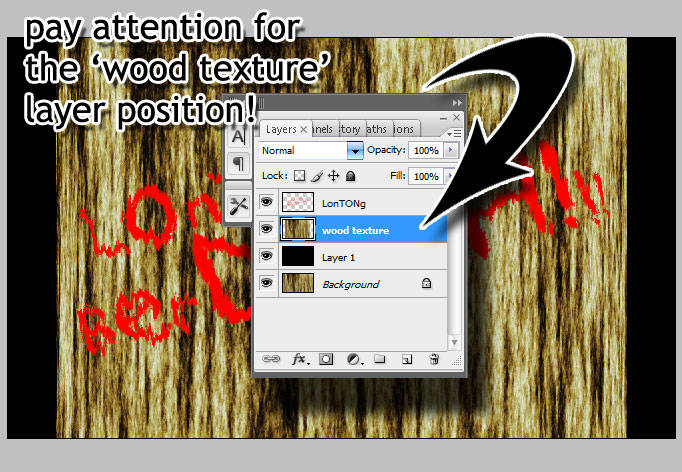
Add a new layer, fill it with black color and drag it below background. Activate wood texture on your palette Layer, take Free Transform tool turn down texture width.
Pick Gradient tool (G), take Linear Gradient. Select Foreground to Transparent gradient.
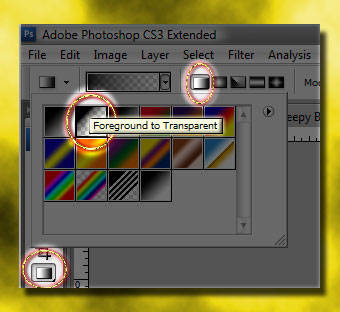
Create new layer. Again take Gradient tool (G) and click in left side and pull to center, it will overshade left side of texture. Do the same with right side.
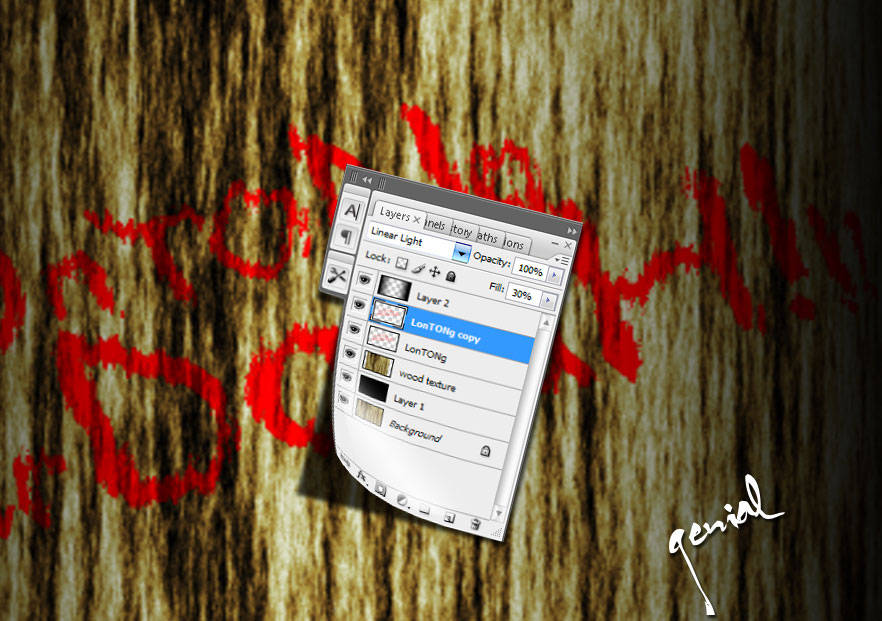
Now activate text layer and change the Blending mode to Color Burn. Duplicate text layer by pressing Ctrl + J. And to second text layer set Blending mode to Linear Light and set Fill to 30%.
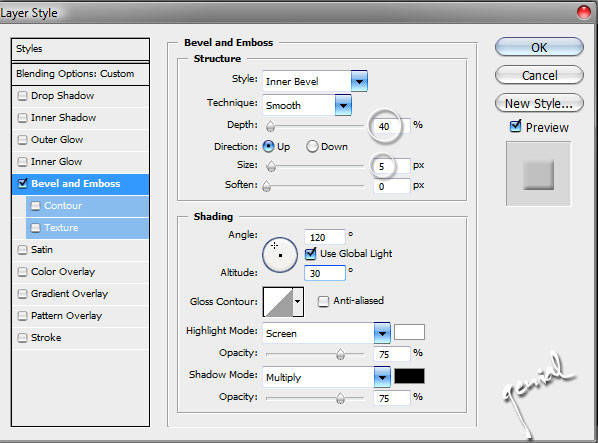
And for the final step, we must add some layer styles to second text layer. Add Bevel and Emboss, set Depth to 40%, size 5 px, soften 0 px.
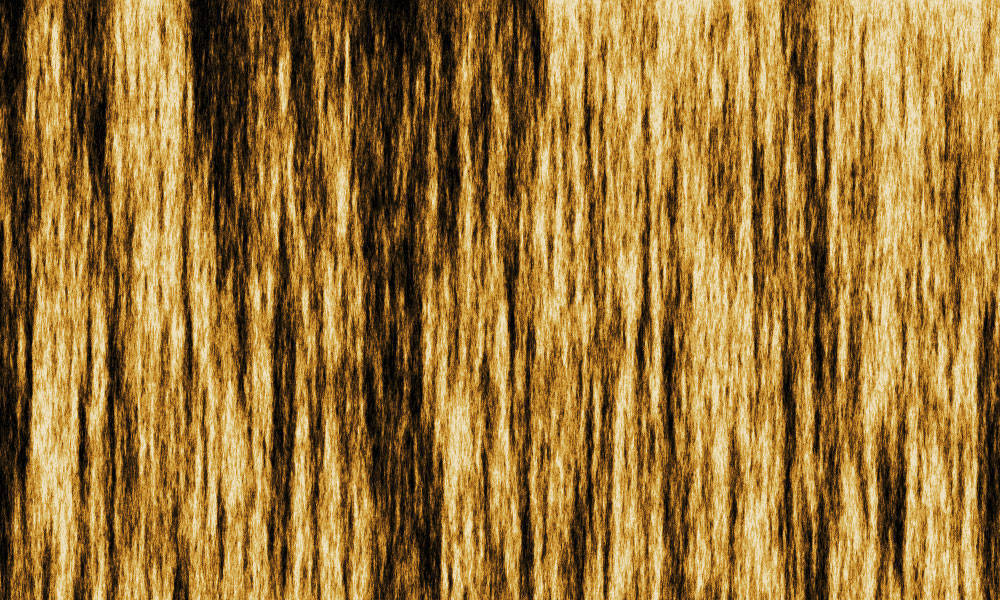
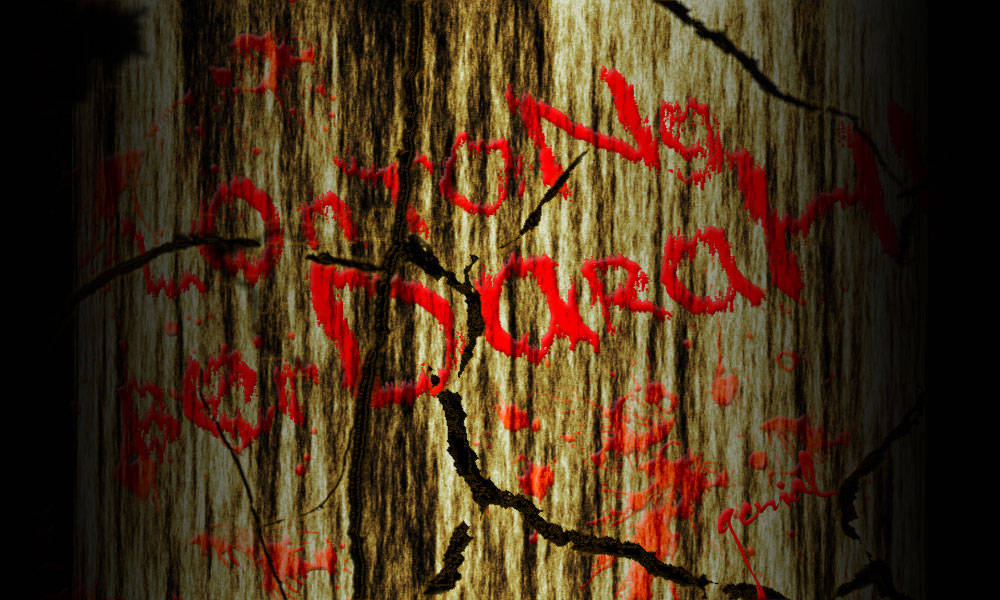
And Viola! We create creepy bloody text on wood bark texture. I hope you enjoyed this tutorial. Your job is now complete! Add some tricky blood elements, some more shyt, some more bla bla bla.. see more crazy stuffs in Carbon Fiber Look... go nuts!
For those of you who are wondering how I did for the tricky blood part, it’s all in the Rebuild our FCDB in simple PDF download link and yes.. it's all for free. Enjoy!



adek ganteng p kbr? :0 kamu dpt award ya di award from shin-kun tlg diambil makasih :)
ReplyDeleteWaduw...ribet nih kayak'x, wkwkwkkwkwkw....
ReplyDeleteMasih pemula, belum bisa yang ginian :D
that's a great text this coming halloween! ^_^
ReplyDeletebang, numpang koment saja sama mejeng,kr dari dulu sejak kapan ntah aku ga ngerti am tema postingan disini, wkwkwkkw
ReplyDeleteapa kabarmu bang?
kok apdetanmu di somay ga pernah nongol ya didashbordku
harusnya gambarnya di host di picassa ae mas, lebih enteng
ReplyDeletehappy weekend genial.
ReplyDelete@ suryaden : saiia emang sam sekali lom pernah nyoba sii om.. ntar dee di coba klu emang ternyata lebih enak... soalnya saiia emang lebih butuh gambar originalnya dari pada skrinsyut yg kecil2...
ReplyDelete@ meryl : thnx for your daily visit dear :)
mantep tutorialnya
ReplyDeleteMemperkenalkan asem! e-magz #1
ReplyDeleteAssalamualekum...
Salam hormat,
Kami memperkenalkan asem! e-magz. Majalah online yang dapat dibaca dan diunduh langsung dan gratis. asem! e-magz merupakan majalah travelling (catatan perjalanan) dan berbagai hal yang berkaitan dengan industri kreatif. Kali ini, asem! e-magz #1, menyuguhkan tentang Catatan Perjalanan Selama 3 Hari Menyusuri Pantai Selatan Lumajang, Jawa Timur.
Untuk membaca dan mengunduh asem! e-magz #1, silakan klik link di bawah ini:
http://issuu.com/anaksemeru/docs/asem_e-magz_edisi1_pantai_selatan_lumajang
Atau mengunduh/ mendownload lebih mudah, silakan klik link berikut ini:
MediaFire: http://www.mediafire.com/download.php?yxvzjnknknd
4Share: http://www.4shared.com/file/141531754/31271bc2/asem_e-magz_edisi1.html
Komentar, kritik dan saran, silakan kirim ke e-mail kami:
anak.semeru@yahoo.com
Kunjungi pula blog kami:
http://anaksemeru.blogspot.com
Jika Anda ingin berpartisipasi menjadi kontributor, memasang iklan dengan harga yang murah, mengajak/ mengundang kami untuk meliput potensi wisata daerah Anda atau ingin berbagi hal tentang industri kreatif, silakan kirim via e-mail.
Kami sangat senang jika Anda adalah sahabat dan menjadi bagian dari kami.
Terima kasih kami ucapkan atas waktu dan apresiasi Anda. Kami sangat menghargai hal tersebut.
Wassalam…
Salam sukses,
anaksemeru
info lebih lanjut, hubungi:
Blog: http://anaksemeru.blogspot.com
E-mail: anak.semeru@yahoo.com
HP.: 081336088903 - 085732275885
waduh mas...
ReplyDeleteapa engga ada kata yang lebih seram dari lontong berdarah
Hmm...
ReplyDeleteQu paling suka creepy textnya freedy kruger
ato ga texas chainsaw massacre
Keren nih... ilmu! ilmu! Heheheh... thanks buat ilmunya :D
ReplyDeletedropping by again. halloween is near. Happy Halloween! ^_^
ReplyDeletewaduh saya bingung ne...
ReplyDeletesala mas...
Tgif ^_^
ReplyDeleteHii!!
ReplyDeleteKeep teaching us!!
btw here is my new link
http://photographs-india.blogspot.com/
thnx for all guys!
ReplyDelete