
 Hi gang, 'sup?! D'ya know what... After googling for some time, I found this stunning images suitable for this tutorial. Hell yeah.. I found Star Cyborgs on soft archive.
Simply click here to get the whole images.
All rights of these resources belong to their respective owners.
In this lovely opportunity, we're gonna meke it easy with only using the old style, lol... I mean Brush Tool (B) with the composition between Highlight and Shadow that we can get from Dodge Tool (O) and Burn Tool (O)
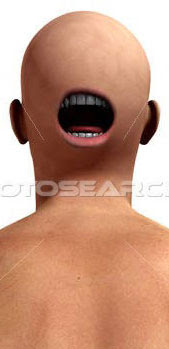
| Step 1 - Removing Background: (this is optional) But before that... Remember to back up your Image by copying it... (ofcourse this is optional, isn't it?!?!??! :D). Do this pressing Ctrl + J to get the copy of your original photo. Next, Extract the model out of BG (it's optional too... i didn't do that, red lol!!! 'coz i believe this BG is awesome its self :p). You guys could do that extracting model out of the background using Pen tool (P) or other one just like Polygonal Lasso Tool (L)... it's up to you... Done with your job? Ok, enough monkey business, lets get to the meat of our tutorial.  |
| Step 2 - Drafting the Grooves: Create a new layer above the model and name it as Draft Lines by hitting the Create a New Layer icon on the Palette Layer.  |
Using the Brush tool, with size around 15 - 20pts, foreground color set to #000000 and opacity to 50%, draw roughly how you want the grooves to look generally. Hey... you have to do this with fun, dudes!!! The joints are all drawn as circles while the rest are straight lines. Step 3 - Painting Grooves: Create a new layer above the Draft Lines and name it as Grooves. We will concentrate on all the circular joint areas first. Using the Elliptical Marquee Tool (M), draw a circular selection and fill it with #000000 like the one shown in the diagram. 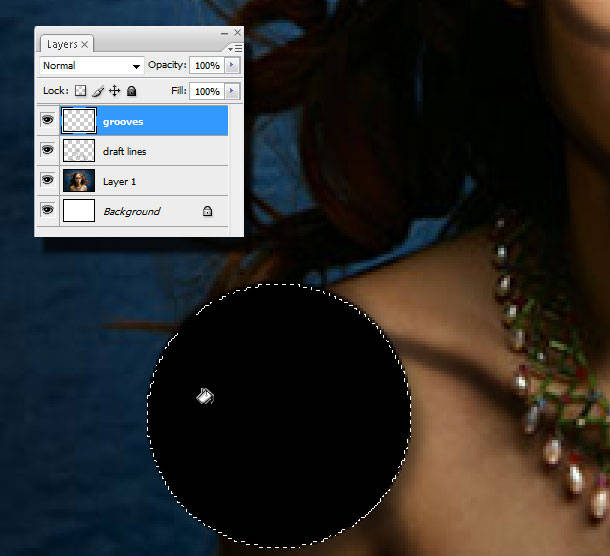 |
Step 4 - Painting Grooves: Create another circular selection, slightly smaller than the one you done earlier. Move the selection a little towards top right of the black circle. Press Delete once you get something like the example. Repeat Step 3 and 4 for rest of the joint areas. 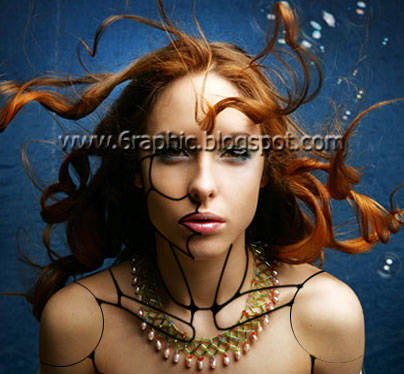 |
Step 5 - Painting Grooves: Using the Brush Tool (B), set the size to 3pt and color to #000000, paint in the remaining grooves. Add in more where you think is appropriate. 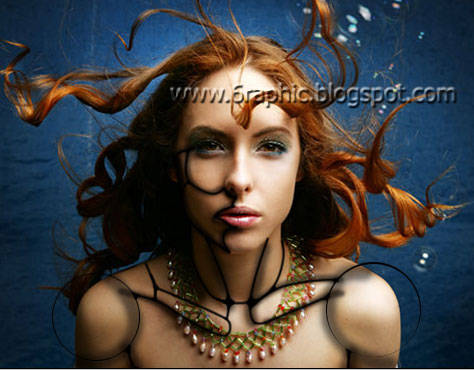 Step 6 - Apply Surface Blur: Select the Model layer and go to Filter > Blur > Surface Blur. Set the Radius to 5 and Threshold to 8. 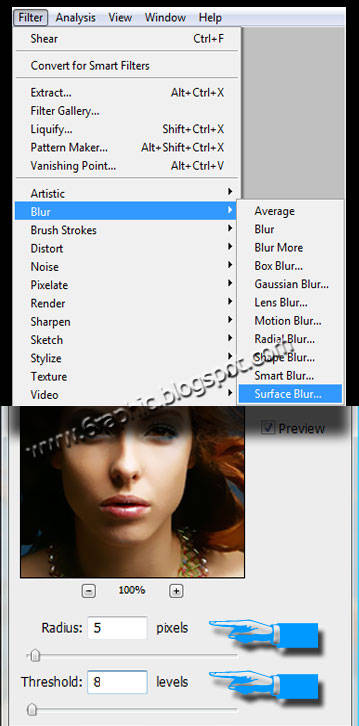 |
| Step 7 - Adding Highlights: While still on the Model layer, select the Dodge Tool (O), set the size to 5pt and use it to highlight the bottom and left edges of each pieces. This step is to enhance the depth of the grooves. 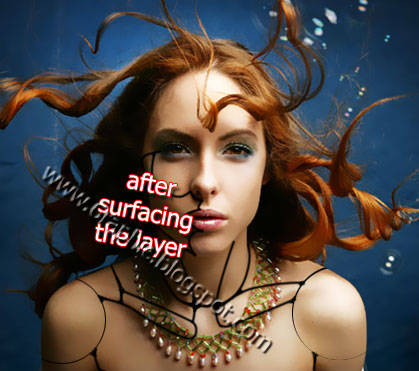 |
| Step 8 - Adding Shadows: Similar to Step 7, but this time use the Burn Tool (O), set the size to 5 pt to darken the top and right edges of every pieces. 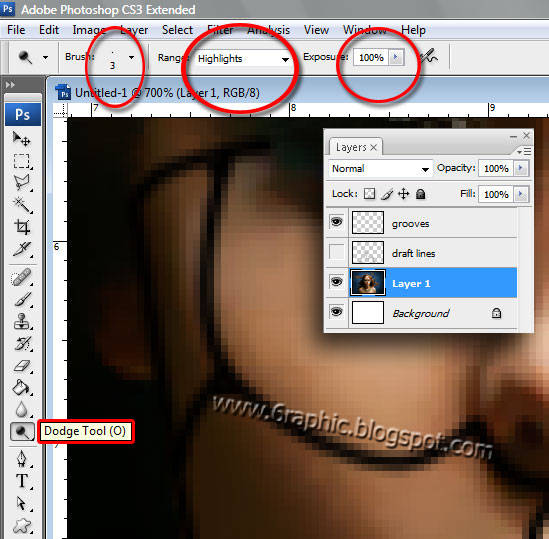 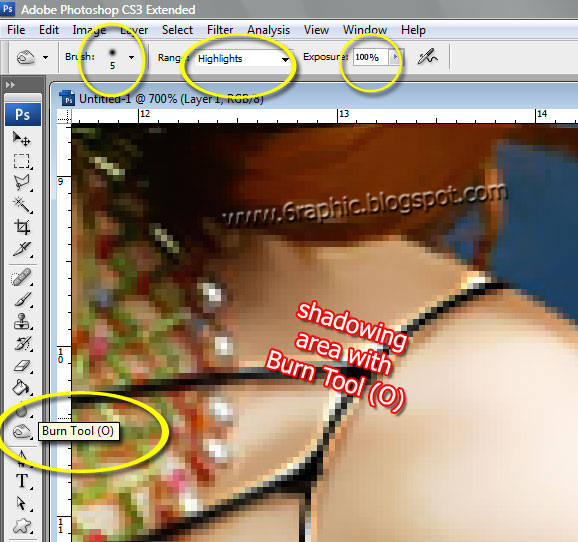 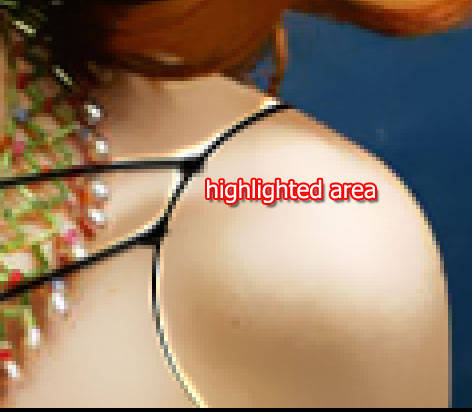 |
| and... voila! Hope you like this. Click here to view my final image. |
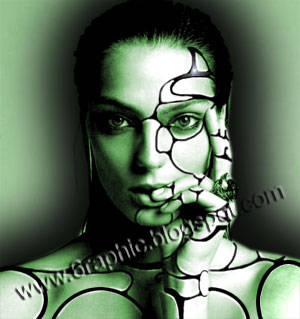
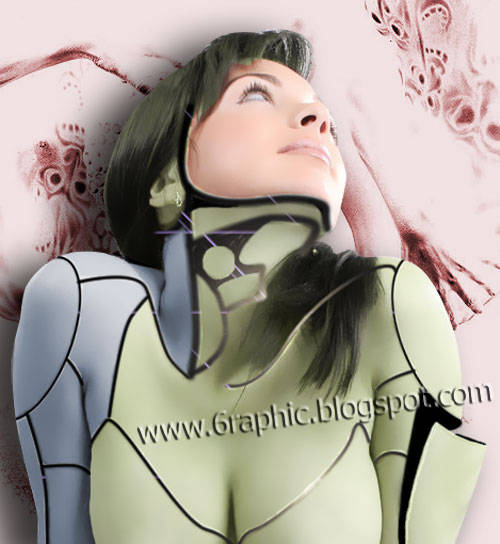
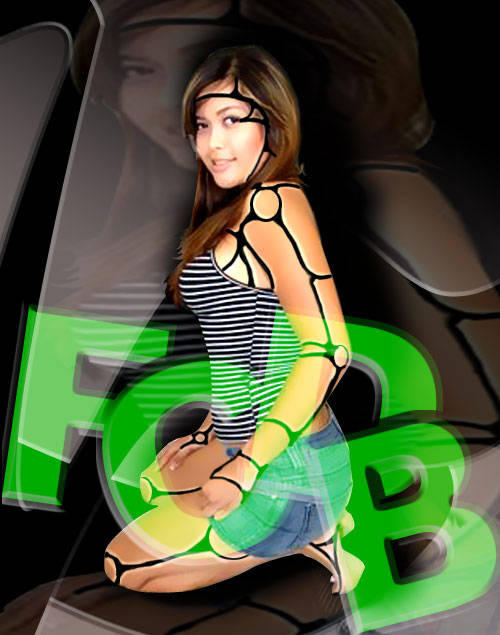
| Other samples : |


Very nice tutorial my friend..
ReplyDeletei have to try..
TFS :)
apaan tu???
ReplyDelete@ kaka-ra : thnx for your daily visit :) realy appreciate it, especially with your unnecessary compliment, Sir!!!
ReplyDelete@ neng aia : ^o^ kira-kira apa neng?
Hi Mr. G.,
ReplyDeleteHowdy? I just remember to pass by here. Your toturials will be so helpful to others who need them. I wish I have a photoshop, too. I heard it works really cool. The effects are amazing. Okay till here. Thanks a bunch for your kind comments!
Wow..Ilmunya kerten Bro tentang utak utik Photo..
ReplyDeleteSalam hangat Bocahbancar...
It's a nice tutorial Bro.. (^_^)
wew... my first visit here and i see so many images already heheheheh
ReplyDeleteblog yg rame tampilannya yachhhh ^o^ btw, FCDB singkatan dr apa? (thinking)
@ ana PS : glad to see you here again ma'am.. how about yor lovely husband???
ReplyDelete@ bocahbancar : salam hangat juga tuk anda om :)
@ clairvoyant*ling : sama mba',,, abis nya saya perdana di sana malah lebih yummy :) sedep tuh es nya :)
aku kesusahan menyampaikan komen neh
ReplyDeletelidahnya dimakan kucing kali?!?!?
ReplyDeletehehehehehehe... napa ko' gtu? susah? mksd na?
sebenarnya sih ga ada hukumnya yang tertulis tentang golput, walaupun demikian tetap di haruskan memilih,adapun masalah mau atau tidak ya itu urusan kita bnr ga???
ReplyDeleteya sesuai dengan ceritaku tadi lah
siiiiiiiiiip lah... saya mah baru banget bangun tidur om :) koplak ya om ya?!??!?! hehehehe...
ReplyDeleteWah keren abis...
ReplyDeletetapi aku gak bisa maklum..otakku dudul
he..he
Weeee keren abis bang.............sayang aku gak hobi dengan beginian.........tapi perlu belajar juga nih biar bisa
ReplyDeleteAss. Mas genial ..
ReplyDeletePostingan yg mas genial komentarin itu bukan tentang aku.Aku sih baik2 aja dan sehat selalu.Artikel postingan itu saya dapat dari buku Surat spesial untuk para suami.karena menarik dan semoga menjadi hikmah untuk orang yg mengalami hal yg sama.Makasih .
Wassalam.
sumpah mantab abisss...
ReplyDeleteskali-kali pake gw napa nel buat model.. :(
ReplyDeletewow artistik bener, kagum dgn design yg unik...
ReplyDeleteLebih mantap kalau dibuatkan e-booknya kang, kemudian dibagikan secara gratis [maunya....]. Keep blogging and do your best.
ReplyDeletehueh....... jago2 design ya..
ReplyDeleteGa usah mayuuuuuu mas genial..justru aku mau berterimakasih atas segala perhatiaannya.ok..mungkin ini yg terakhir kalinya aku berkunjung.wassalam .
ReplyDeleteloh loh loh...kok gambar selingkuhan gw disini. kok yang gak lagi sama gw semua huakakkkakaakk
ReplyDelete@ aldy : pan ada versi endonesa nya kang yg pdf di tiap postingan :(
ReplyDelete@ cinta hakiki : beneran merah nii muka siiia nya mba'... hehehhehehe... iia dee mba'... tp ttp ngBlog kan?!?!
@ zulhaq : kang.. massa sii.. berarti selingkuhannya akang 'bekas' saiia smw dund??!?!? wkwkwkwkwk...
wah, gambarnya itu lho....ck..ck.ck..
ReplyDeleteKeren kang apalagi ada yang bening-beningnya nya, he... thank's very much.
ReplyDeletewah,,,,,,sayang gak bisa sotosop,,heheh
ReplyDelete@ Sang Cerpenis bercerita : ck ck ck . . . yg mana iia mba'?!?!? :(
ReplyDelete@ Deka : huahahahahha... podo ae kita ternyata kang... doyan yg bening2... :)
@ rezKY p-RA-tama : saiia juga gag ngerti sotosop, ngertinya soto kambing :(
Wah abang yg ini hebat banget pake potosop. Jangan2 nih sampeyan y yg suka edit foto artis jadi bug***? hayo ngaku...
ReplyDeletehahahaha nih abang curigaan aje...
huahahahhahahhah... saiia gag pandai manipulasi kang, gmn dund?!??!? harus bnyk2 maen game nii.. lhohhh?!??!
ReplyDeletewah bagus nih.. saya bookmark ya sob :)
ReplyDeletemonggo.. hatur nuhun kang :)
ReplyDeletethx banget kenal blog ini. pengetahuanku ttg photoshop yg sempat mandeg bertahun2 jd ada tempat buat berguru. practical lagi...good..good
ReplyDeletesama-sama kang.. moga bermanfaat buat akang dan siapapun yang berkenan sama-sama belajar dari postingan asal2n saiia ini kang :)
ReplyDeleteampun driku gaptek bosss
ReplyDeletewahhh kedatengan juragan soewoeng saiia nya nii... makasii kang uda mo' mampir :)
ReplyDeleteLebih mantap kalau dibuatkan e-booknya kang, kemudian dibagikan secara gratis [maunya....]. Keep blogging and do your best.
ReplyDeleteiia juga sii.. gratis?!?!?! hmm... nti saiia pikirin dulu kang iia :)
ReplyDelete