Showing posts with label Text Effect. Show all posts

Saturday, October 23, 2010

3D Text Effect with Adobe Illustrator CS3

3D Text Effect with Adobe Illustrator CS3This time.. I will be.. a little different than usual, but still with my favorite software, Photoshop, only this time.. with the help and the use of 3D rendering power of Adobe Illustrator to create 3D text effects.

Step 1

Open a new document by choosing File > New from the Main Menu or by using Ctrl + N to shortcut it.. my favorite one.. Activate the Text tool by pressing the T key... I use Billo Dream fonts that you can download it here for free.

3D Text Effect with Adobe Illustrator CS3


Step 2

Text Tool still active, right-click your text and choose Create Work Path. Press the A button and then click and drag the area around the text you have selected.


3D Text Effect with Adobe Illustrator CS3


Becoming this...

3D Text Effect with Adobe Illustrator CS3


In the options bar at the top of Photoshop, you can see the Combine button... click it to make sure our letters are all stays together (as a single unit). You can now copy the selected paths by the famous shortcut command Ctrl+C.


3D Text Effect with Adobe Illustrator CS3


Step 3

Skip to Illustrator. Move on, open your Adobe Illustrator now. Go ahead.. paste the paths we copied right into your Illustrator document also by the famous shortcut command Ctrl+V.

Here comes the delicious part! Still with the path selected, choose Effect > 3D > Extrude & Bevel. After all your settings are done, click OK to get your 3D transformation.


3D Text Effect with Adobe Illustrator CS3


Step 4

Back to Photoshop. Notice that our object still selected in Illustrator, copy it back by hitting Ctrl+C, then click over to your Photoshop and hit Ctrl+V like we've done earlier. Choose Smart Object and click Enter. Rename it 3D Text like i did.


3D Text Effect with Adobe Illustrator CS3


Step 5

Create the Shadow. We’re going to do the Copy and Paste again, but now.. in Photoshop. Copy the 3D Text layer and move the copied layer just below the 3D Text layer. Guys... I believe it’s gonna be hard seeing this new black pasted version over the original, so lets change the Blending Mode into Overlay and Down the Fill Opacity as you like.


3D Text Effect with Adobe Illustrator CS3


Hire Me?!


As usual.. play around guys, have a little fun with it.
Go crazy... Exploring the Art of Madness.

Here's my Final Cut!


3D Text Effect with Adobe Illustrator CS3


Monday, July 12, 2010

Meteor Text

Tutorial Meteor TextI'm back guys with new tutorial for this blog... I'm gonna talking to you about this magnifique part of trick from Photoshop as usual. Today we're gonna create a Meteor Text Effect with simple way..

You guys just need Adobe Illustrator to create that kinda 3D Text, then simply apply the fire with some clouds and smudge tool to execute it become a fire or something.


1. Create a new standard document with the #191e1f as the BG.

Tutorial Meteor Text

2. Create cloud 1 and set the Level not too dark not too light.

Tutorial Meteor Text

3. Create cloud 2 and you have to change the Blending Mode from Normal to Difference and turn down the Fill into about 85%.

Tutorial Meteor Text

4. Create the main text (mine is a Regular Papyrus kinda font) with the help of Adobe Illustrator. Apply Auto Contrast on the text after you place it in the Photoshop in the center of the document.

Tutorial Meteor Text


Hire Me?!


5. Add some Noise on the Meteor text with 5% in Amount (it's optional), Uniform distribution and check the Monochromatic section.

6. Duplicate the Text and Add Motion Blur on it by going to menu Filter > Blur > Motion Blur. Set the angle to 16 with the 19 px in distance. Change the Layer Mode to Linear Dodge (Add).


Tutorial Meteor Text

7. From the Palette Layer, Drag these two text layer into folder to create a single group of it.

Tutorial Meteor Text

8. Create Fire.

Tutorial Meteor Text


9. ...and


Tutorial Meteor Text

Tutorial Meteor Text

10. Voila... You're DONE!

Tutorial Meteor Text

Tutorial Meteor Text

Tutorial Meteor Text

Thursday, April 01, 2010

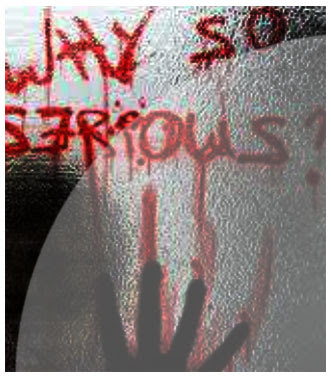
Text on Wet Sweaty Window

Text on Wet Sweaty WindowTutorial kali ini special pake telor karena saiia tulis menggunakan bahasa Indonesia. Menyenangkan bukan?!?! OK langsung ajja, setelah lama menghilang dan hanya muncul melalui postingan-postingan terjadwal, akhirnya saiia bisa kembali menulis tentang tutorial Photoshop. Pembahasan kali ini mengenai bagaimana cara menuliskan teks layaknya teks yang tertulis pada sebuah kaca, jendela misalnya, dll.

Apa ajja yang diperlukan untuk pelajaran kita kali ini? Hmm.. gag banyak en gag ribed... hanya beberapa image source seperti, sebuah photo (pemandangan misalnya atau apalah yang akan kita pergunakan sebagai background) lalu sebuah gambar kaca yang basah (habis terkena hujan atawa embun.

Untuk source image yang kedua, jika jeneungan gag punya, silahkan save gambar di bawah ini...


Text on Wet Sweaty Window


Langkah pertama

Silahkan buka gambar yang baru ajja jeneungan save (kaca basah) di photoshop jeneungan. Lalu buat gambar tersebut menjadi Hitam Putih dengan menekan Shift + Ctrl + U (desaturate). Buat photo hitam putih tadi menjadi agag sedikit gelap dengan mengatur Levelnya dengan menekan Ctrl + L.


Text on Wet Sweaty Window


Kira-kira hasilnya seperti ini... (huehehe... gag terlalu beda iia sama yang pertama setelah di desaturate tadi?). Jangan khawatir kang, nanti baru kliatan, sekarang sii.. huehehehe..


Text on Wet Sweaty Window


Lanjut!!!

Langkah kedua

Buka photo akang tante bunda neng geulis sekalian yang sekiranya akan sampeyan pake buat pemandangan di luar jendela. Sesuaikan photo tersebut dengan ukuran Kaca Basahnya atau sebaliknya (sesuaikan ukuran kaca basah menurut ukuran photo panjeneungan semua, pink).


Text on Wet Sweaty Window


Untuk menambah pemandangan tersebut menjadi lebih realistis, masukkan efek Filter > Blur > Gaussian Blur dengan radius kira-kira 5,5px, lalu ganti Layer Modenya menjadi Overlay dengan Opacity kira-kira 80% cukuplah. Lihat maksud dan tujuan kalimat di atas pada gambar di bawah ini..


Text on Wet Sweaty Window


Demikian kira-kira untuk penerapan Background yang harus kita siapkan untuk mendapatkan Efek Text on Wet Sweaty Window kita. Sekarang berlanjut pada langkah berikutnya, yakni persiapan kita akan Textnya itu sendiri.

Langkah ketiga

We're gonna move to the main strep of our basic great tutorial now. Obvious! Teks itu sendiri! Pilih Brush Tool (B) lalu pilih model standar yang disediakan Photoshop, kita gag akan neko-neko, kecuali klu kitanya emang mau neko-neko... :p


Text on Wet Sweaty Window


Buat sebuah Layer Baru, namai Text on Wet Sweaty Window atau apalah terserah akang panjeneungan sampeyan hatur nuhun hatur tengkyu ararojesss!!! Lalu pada layer baru tersebut, goreskan Brush yang sudah kita siapkan tadi beberapa kata, untuk ukuran Brushnya, akang jeneungan mba ibu bunda abang sekalian silahkan disesuaikan dengan canvasnya, di sini saiia mengurangi ukuran (ujung brush) hingga kira-kira 30%.. lalu... terserah lagi nii kang, tante, mba.. mau nulis apa ajja terserah, bagusnya sii nulis 6raphic.blogspot.com oyyyeee! huehehehehe... gmn... kelar?!?!?


Text on Wet Sweaty Window


Masih pada layer yang sama (layer text buatan akang), kecilkan ukuran brush menjadi kira-kira 8-10px untuk membuat tetesan-tetesan embun yang mengalir pada bagian-bagian tertentu dari huruf yang akang buat menggunakan brush di awal tadi...

Note : Ingat.. buat ukurannya sedinamis mungkin dengan bantuan Bricket [ dan ] pada PC akang, gag perlu takut akan membuat kesalahan.. gag ada yang namanya salah dalam menggambar/design seperti ini, hhmm.. hasilnya kira-kira seperti ini...


Text on Wet Sweaty Window


Untuk memberikan kesan bahwa teks yang kita buat ini tertulis pada kaca (jendela basah dalam hal ini, pink) maka ada perlunya kita menambah sebuah layer baru, namai dengan Putih, siram layer tersebut (yang berposisi di atas layer teks Text on Wet Sweaty Window yang akang buat) dengan warna Putih tentunya, what else?!?! hueheheh... lalu ubah Layer Modenya menjadi Soft Light dengan pengaturan Fill 75%.

Setelah itu, kembali pada layer teks Text on Wet Sweaty Window layer, ubah juga Layer Mode menjadi Overlay, pada bagian Fillnya, isikan dengan 75% atau yang sekiranya akang mba tante bapak rasa cukup...

..dan.. taraaa..

Result


Text on Wet Sweaty Window


Download The PSD File here or even Here!

All file downloadable here!


Monday, March 08, 2010

Rainbow Text

Rainbow TextWould you like to know how to create the Rainbow Effect on your Text with Photoshop? If yes, so, this tutorial is specialy made for you!

First thing first.. Open your new document, mine is the default size (1024x768px), then fill it with Black. After that, activate the Text Tool by pressing T on your PC. I choose AvantGarde Md BT. Keep the text on the center of your canvas by pressing Ctrl + A then press V, you can pick the option like this image below said ;


Rainbow Text


Next, you need to add different color to each letter on the text, you can't do edit it at least you resterize first the type. Right-clicking on the PELANGI layer to resterize it.

Activate your Rectangular Marquee Tool (M) to create selection on each letter. Do that on first letter, which is P in our case here, press Ctrl + Shift + J to cut selected letter and move it into the new layer later on. You can rename it by each caracter (mine is P) or you can leave it as the default. Watch the Palette Layer on the right corner of your workflow there.


Rainbow Text


D'ya remember about the song merah kuning hijau di langit yang biru?!?!? lmao!!! Apply then the Color Overlay layer style to the P layer, pick the Red first (that's the default). Press OK!


Rainbow Text


Ok, you can do the rest of the song by your self. Go back to the PELANGI layer and cut every letter (like you did to the P letter) to simply separate and make each letter in each layer with the same way. Quick apply the same Blending Options to each letter by using your own colors be in mutual accord to the song.


Rainbow Text


Note:

Red = #FF0000
Yellow = #FFF200
Green = #00FF00
Blue = #0000FF
Pink = #EC008C
Orange = #F7941D
Magenta = #FF00FF


You can delete then the PELANGI layer from your Palette Layer because it's no longer exist, it is empty now. Guys.. merge all that letters in one single layer again and name it back to pelangi!!! Lmao.. what a step!!!

Press Ctrl + J to duplicate this such layer. Go apply Filter > Blur > Motion Blur to the lower original layer with similar settings;

Angle = 90
Distance = 200 px

Note: For the Distance, it depends on your image size or your letter size. Play around with that.


Rainbow Text


Looking good, isn’t it?!?! C'mon c'mon c'mon.. Keep on creating effect, doods.. Go to the upper layer which is pelangi copy layer, then use Select > Load Selection or you can short it cut by simply press the Ctrl + Click the layer thumbnail from Palette Layer to load the selection (selection of our text line).

Next, use again the Rectangular Marquee Tool (M) and hold Alt button to cut away the lower part of selection. Nice trick isn't it?!?! Continue with pressing Shift + Ctrl + N to create new layer and name it bright section or whatever you like! Fill this selected area (and of course in the bright section layer) with white to transparent gradient color.


Rainbow Text


Easy guys, easy..!!! Turn the Opacity or bright section layer into about 50%.

Well, I don't think I’ve not pretty much explained for this time.. You've obviously finished this tutorial folks.. Good luck and thank you for reading this tutorial. Hope you enjoyed it much, even just a lil' bit.


Rainbow Text


Read this in Bahasa!

Wednesday, December 16, 2009

Photoshop 3D Text Image Galery

Photoshop 3D Text Image GaleryWe will explain with the simplest words I know how to do creating a simple 3D Text image composition, layout an interesting background, and define eventually the true light source.

Basic composition here is very you. And it is quite important. There are so many artists put too much distracting detail in their 3D text implementation, photo manipulation, image retouching, creating or even painting, so in this beloved project.. if there's a project anyway, lmao... we would be better focus on how to get the attention directly, how to -let say- direct viewers into the image and this is the important thing to do.. simplify its background, which is, it doesn’t overwhelm the real aim, the main theme of your basic intention.


Photoshop 3D Text Image Galery


Photoshop 3D Text Image Galery


Photoshop 3D Text Image Galery


We definitely would explore how to create -somehow- a delicious and offensive interesting background to complement the subject, You with your life definition in designing. Lastly, to tie all the elements together.. hopefully we would be able to define where the hek the light source is coming from.


Photoshop 3D Text Image Galery


Photoshop 3D Text Image Galery


Photoshop 3D Text Image Galery


Photoshop 3D Text Image Galery


Photoshop 3D Text Image Galery


Photoshop 3D Text Image Galery


Photoshop 3D Text Image Galery


Whatever it is a still life, landscape, or goddamn portrait, you'll gonna needs what we called a central focal point. What is it you want to convey and what is it that you want to get across? You will gonna need to be able to give sense of depth, and mostly capture a viewer’s attention and keep them interested.

In order to do that you must know where there are the craziest bumps and where there are the tiny smooth little spots, it is a ver usefull thing to do, produce what moves you, and put all your beautiful ideas down, create something appeals and attractives to you the most, how do you feel about the subject matter...


Photoshop 3D Text Image Galery


Photoshop 3D Text Image Galery


Repetition

Just to remain y'all... It can be as simple as you like, or as hardest. Never give up. Give a lil' try to always incorporates something old and something modern to your insane amazing design. Don’t produce art just for the heaven's sake of art, lmao.


Photoshop 3D Text Image Galery


Photoshop 3D Text Image Galery


Photoshop 3D Text Image Galery


Photoshop 3D Text Image Galery


View Tutorial about How to make a 3D Text with Photoshop here!