
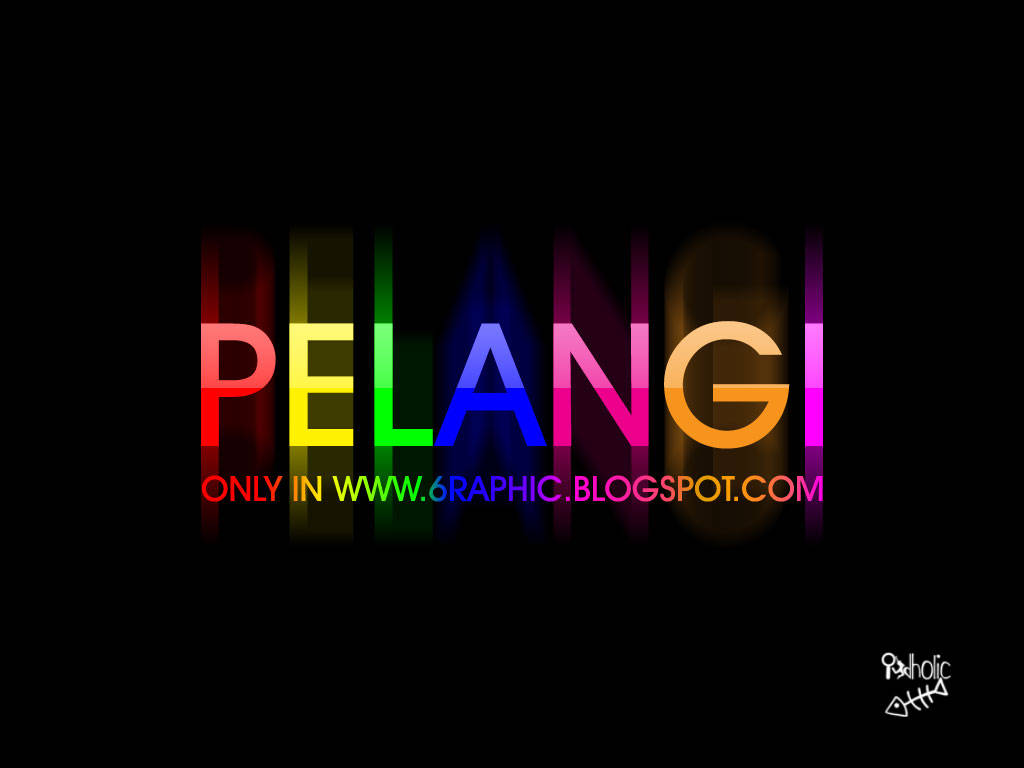
 Would you like to know how to create the Rainbow Effect on your Text with Photoshop? If yes, so, this tutorial is specialy made for you!
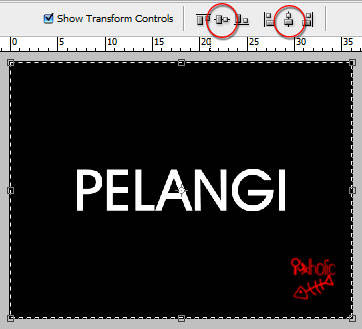
First thing first.. Open your new document, mine is the default size (1024x768px), then fill it with Black. After that, activate the Text Tool by pressing T on your PC. I choose AvantGarde Md BT. Keep the text on the center of your canvas by pressing Ctrl + A then press V, you can pick the option like this image below said ;
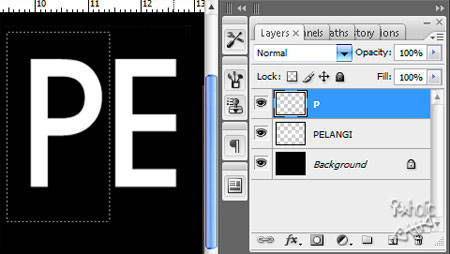
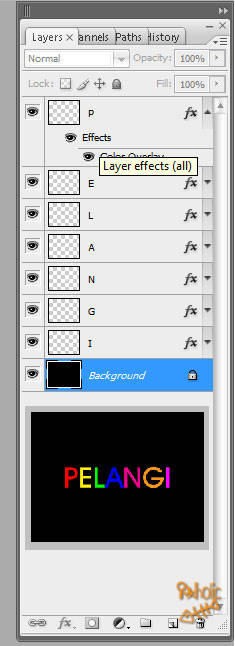
Next, you need to add different color to each letter on the text, you can't do edit it at least you resterize first the type. Right-clicking on the PELANGI layer to resterize it.
Activate your Rectangular Marquee Tool (M) to create selection on each letter. Do that on first letter, which is P in our case here, press Ctrl + Shift + J to cut selected letter and move it into the new layer later on. You can rename it by each caracter (mine is P) or you can leave it as the default. Watch the Palette Layer on the right corner of your workflow there.
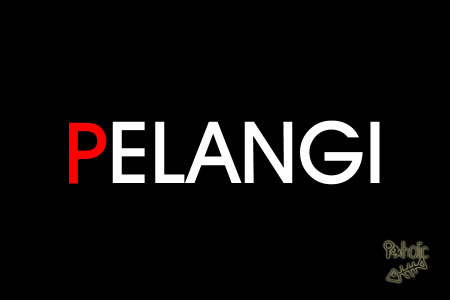
D'ya remember about the song merah kuning hijau di langit yang biru?!?!? lmao!!! Apply then the Color Overlay layer style to the P layer, pick the Red first (that's the default). Press OK!
Ok, you can do the rest of the song by your self. Go back to the PELANGI layer and cut every letter (like you did to the P letter) to simply separate and make each letter in each layer with the same way. Quick apply the same Blending Options to each letter by using your own colors be in mutual accord to the song.
Note:
Red = #FF0000
Yellow = #FFF200
Green = #00FF00
Blue = #0000FF
Pink = #EC008C
Orange = #F7941D
Magenta = #FF00FF
You can delete then the PELANGI layer from your Palette Layer because it's no longer exist, it is empty now. Guys.. merge all that letters in one single layer again and name it back to pelangi!!! Lmao.. what a step!!!
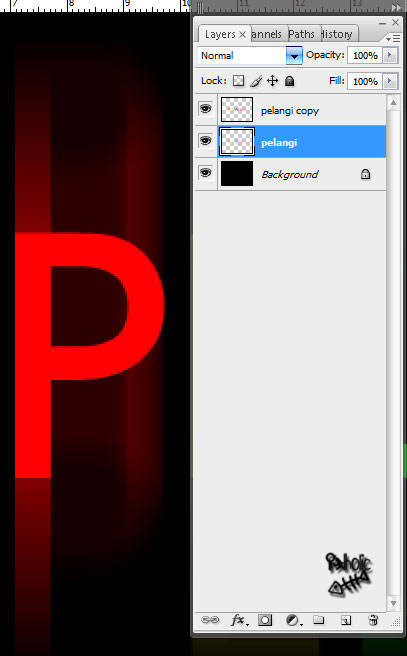
Press Ctrl + J to duplicate this such layer. Go apply Filter > Blur > Motion Blur to the lower original layer with similar settings;
Angle = 90
Distance = 200 px
Note: For the Distance, it depends on your image size or your letter size. Play around with that.
Looking good, isn’t it?!?! C'mon c'mon c'mon.. Keep on creating effect, doods.. Go to the upper layer which is pelangi copy layer, then use Select > Load Selection or you can short it cut by simply press the Ctrl + Click the layer thumbnail from Palette Layer to load the selection (selection of our text line).
Next, use again the Rectangular Marquee Tool (M) and hold Alt button to cut away the lower part of selection. Nice trick isn't it?!?! Continue with pressing Shift + Ctrl + N to create new layer and name it bright section or whatever you like! Fill this selected area (and of course in the bright section layer) with white to transparent gradient color.
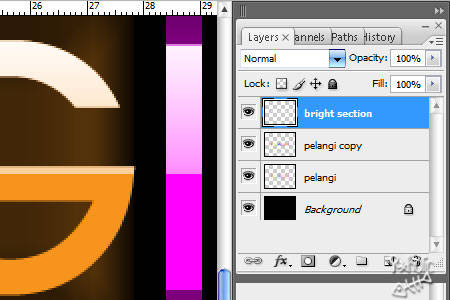
Easy guys, easy..!!! Turn the Opacity or bright section layer into about 50%.
Well, I don't think I’ve not pretty much explained for this time.. You've obviously finished this tutorial folks.. Good luck and thank you for reading this tutorial. Hope you enjoyed it much, even just a lil' bit.
Read this in Bahasa!


makin keren aja nih...
ReplyDeletejadi penasaran sama photoshop...(qiqiqi...telat...)
kode warnanya beda sama HTML colour ya?
ReplyDeletemang ada berapa sih?
sama ajja ko' sama kode html color (hexa kan maksudnya?!?!?) itu dia tuhhh yang saiia gag tau ada berapa banyak :p banyaklah poko'nya :p
ReplyDeletekode hexa utk HTML iia maksudnya?!?!? mungkin sama bun gag tau juga, soalnya saiia agag kurang mudheng sama HTML-an :) banyaknya, hhmmm.. banyak banged bun itu dia yang saiia bingung ngapalinnya :P (abis... sopo' sing nyuruh ngapalin?!?!?!)
ReplyDeletewewww... ampe 2x... kirain yang pertama tadi malah gag masuk... ternyata inetnya keblinger.. apa saiianya iia?!?!?! huehehehe... ada yg salah loh dari tuto di atas.. kira2 yg manakah?!?!?!
ReplyDeleteWuiiiiw...ini dia yang saya cari2 mas...
ReplyDeleteWeeeh...keren2...
Saya kira buatnya itu manual per 1 huruf.
Jadi tiap huruf langsung dirubah aja warnanya, wkekekkekeke....
Ntar pasti saya coba...
ReplyDeleteGak pake ba..bi..bu deh, heheheh...
kereeennn.. bisa warna-warni gitu deh jadinya :D
ReplyDeleteKang...aq add facebook nya situ loh....di app yah kang....apa kabare nih?masih tentang design grafis yah? sip deh...aq ikuti terus!!!
ReplyDeleteterimakasii buat add nya kang... baru hari nii saiia bisa onlen lagi, ntar sekalian tak kabari klu saiia uda app iia kang :)
ReplyDeletehatur nuhuh sadayana :)
@ Video Production Sydney : Method Not Implemented
ReplyDeleteGET to/not supported.
Additionally, a 404 Not Found error was encountered while trying to use an ErrorDocument to handle the request.
Apache/2.0.63 (Unix) mod_ssl/2.0.63 OpenSSL/0.9.8e-fips-rhel5 mod_auth_passthrough/2.1 mod_bwlimited/1.4 FrontPage/5.0.2.2635 Server at www.filmview.com.au Port 80