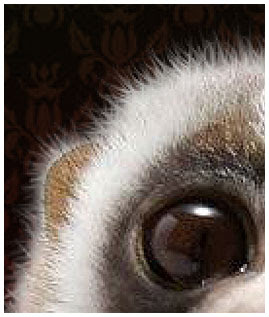
 In response to a request on methods of getting a soft fur edge, this is my first post about it (after my first digital painting stuffs, lol), while the approach depends on what type of fur you need to deal with. You can also apply this on hair of human.
In this case, the animal -which i don't know what we called it exactly- has soft fur. To replicate it, that would be a bit o'time and simultaniously practice but absolutely can be easily accomplished by anyone.
Here is my origianl image :
The first step is removing the background. Use whatever you like the most to deal with. Here I used the Eraser (E) tool. Many of designer take this step by masking or something but I prefer the Eraser and it can be done just as well.
Added a black background to make it easier to see how it works and you can remove this black layer later on.
Use a medium sized soft brush and remove all traces of the background including anything that shows through the fur. A small soft brush should be used where the fur isn’t as thick as around the face, ears and finger or even paw.
Next, you can use the Smudge (R) tool with a small brush at about 30% pressure, pull-out areas of color to simulate fur around the entire animal.
Guys... It might take several strokes to accomplish each bit of fur but that adds to the more casual look of the new edge. Vary your stroke direction with some help of your left ([) or right (]) bricket on your PC, so that all the fur isn’t unrealistically going in exactly the same direction.
Again and again... Just be careful to vary the length and direction of these strokes. Have some of them cross over other hairs for a more realistic appearance. Keep in mind also the varying length of fur that exists on different portions of the animals body.
Conclusion :
I added a shadow with a dark awesome pattern... and with the other sample, I put the animal with a huge wood background.


animasinya menrik SOb untuk di ikuti. tapi sayangnya saya kurang memahami satu persatu bahasanya, hanya mampu untuk menyimpuLkan aja. trims atas sharenya.
ReplyDeleteaww, this is cute as hell, I love it! :)
ReplyDeletegud marsogud gan
ReplyDeleteoh, i'm so rubbish at photoshop! you're amazing :D
ReplyDeletemantap ni cara membuat animasinya..
ReplyDeleteKeren-keren animasinya kang
ReplyDeletewah...ndak bisa je om..photo sop...pengin bisa he..he..salam kenal ..ya..
ReplyDeletepotoshop belum nyampe om pelajarannya ..oh, ya ma kacih ya om doanya....sukses juga nih..
ReplyDeleteKeren bro...!
ReplyDeleteMirip banget sama slinya, ampe ga bisa ngebedain...
melongo bang.... maaf neh benerannnnnn... muantabbb dah
ReplyDeletelike thiz...
ReplyDeletewaaaah jadi apik dan pas banget pencahayaannya
ReplyDeletegudlak Kang
ReplyDeleteRemove background itu benar-benar butuh waktu dan kesabaran ya, terutama kalau yang tidak terbiasa seperti saya. :)
ReplyDeleteSalah sedikit terpaksa harus ulang dari awal.
keren sekali kawan
ReplyDeleteSmakin Kreative sobat. Lnjutkan.
ReplyDeletesangat menarik... ternyata pakai photoshop, kita bisa bikin rambut2 bagian halusnya...
ReplyDeletesangat menarik... ternyata pakai photoshop, kita bisa bikin rambut2 bagian halusnya...
ReplyDeletethnx for all guys :)
ReplyDeleteGenial, saya cuma bisa kagum doang, mau ikutan buat bakalan nggak bisa :(
ReplyDeletebisa ya dibuat gitu...
ReplyDeletepicku bisa diedit dnk...hue hue.... :)
sip sip...mau bikin ndiri gak ngerti... :(
ReplyDeletegreat works gan..... even she lost her tail, but seems greater...... good manipulation.... i hope someday i can try this trick for human... :D
ReplyDeletewah, ilmu penghuni60 blm nyampe situ sob
ReplyDeleteaaaaaaaa aaaaaaaaaa aaaaaaaaa (apasi) imut sekaliiiii kayak kucing sama monyet kawin silang :* dimana belinya......
ReplyDeletehaaaaaaaaaaa paling ga ahli potoshop huaaa kalo ahli pasti mukaku bisa dipermak lebih cantik 10x lipat kali yaa :))
ReplyDeleteKreatif n inspiratif. Salute buat karyanya. Salam sobat :)
ReplyDeletemakasii iia semuanya... jd terharu nii :( hueeeeeeee...
ReplyDeletewaaaaaaah,,andai ane bisa photoshop... ane bakal ngedit tiap malam,,hihii,,,sayg nya tak bisa,,paling cuma ngerizise,,hihihi,,, bagus nih sobat,,,kreatif bin ajib,,,^^,,!!
ReplyDeletemakasii kang :)
ReplyDeletepiye nggawene ngono wi gan?
ReplyDeletesekalian nitip link ya gan...
ReplyDelete@ Kang Sugeng : itu pake tool smudge ajja kang... di gosrek gosrek, di sesuaikan ukuran brushnya sama tekanan brushnya :)
ReplyDelete@ anak SMP | Juara Olympiade Matematika Tingkat Dunia : wah wah wah... monggo kang monggo... panjang buangedd :)
so inspiration..thx
ReplyDeleteyou are very welcome :)
ReplyDeleteamazing :)
ReplyDeletethank you :)
ReplyDeletewhile the approach depends on what type of fur you need to deal with. we can also apply this on hair of human being... nice...
ReplyDeletegak iso mraktekin....ra damang tenan (doh)
ReplyDeletedamang kui opo tokh prof??!?!
ReplyDeleteooooooooo... yg dari 'kumaha damang' iia?!?!?
hey genial, can you please share a tutorial on how to add bokeh effect to a picture? I will be grateful.
ReplyDeleteI've heard about what you meant recently... usually, you can apply that kinda effect with photoscape, but I’m not familiar with Photoscape (I use Photoshop CS3 and that's a portable one :p) but you need a program that allows you to select part of an image & then apply a blur filter...
ReplyDeleteStrictly speaking, you do it in camera...
@ Atiqa Zafar : additional, the process is damn easy and you will be simply using the super powerful magnifique Brush tool, one of the coolest things in Photoshop... maybe later I will post about that :) thank you for your concern :)
ReplyDeleteyou can find this kinda bokeh effect in my other post titled Creating Mmmotion in Photoshop or learn first about how we create our custom brush here @ Creating Bubbles... that's it...
ReplyDeletewah benar2 ahli sampean mas
ReplyDeleteaku save
akangnya berlebihan kang... saiia biasa ajja...
ReplyDeleteterimakasii kang uda mau save, moga bermanfaat kang :)
keren sekali mas
ReplyDelete