 Hi there again and again... Guys, with a little tweaking, I think this could be used for a lot more than wedding invitations, goth, dark, bright, spring, summer.. whatever!
OK... Like usual... Open a new document in Photoshop. I don’t do too much girly stuff, so I thought this might be a good time to pander a bit to the ladies. First thing first... Creating some texture, I'm gonna use a rough-edged brush at a low opacity to create it.
Hit the Brush tool (B key) and from the Brush Picker choose the Chalk 60 Pixels brush (which is one of Photoshop’s default brushes). Set your foreground color to whatever you want. Mine is #695d00.
Create a new layer called Dark Yellow in your Layers palette after the brush setup and color chosen, set your brush Opacity to 17% in the Brush Options bar at the top of Photoshop and paint roughly over the canvas as shown below.
Repeat this process several times. Replacing the brush pressure to give some texture and depth in the background until you are satisfied with the results. Let your creativity be your guide, remember we'll put the text there, so try to give a contrast color on the text..
Add a Layer Mask by clicking the Add Layer Mask icon at the bottom of the Layers Palette. Restore your brush Opacity to 100%, then select GrungeBorders Brush.
Drop the Brush Opacity down to 20% or until you feel just right.
Create a new layer above the layer dark yellow, give the name of Grunge. Replace the brush color to white (by pressing the D or X key if they have not become a default). Choose one of the brushes that we downloaded with 100% Opacity.
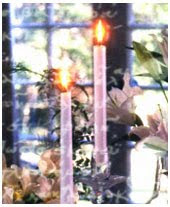
Next we'll try to be -let's say- a lil' bit creative by adding photos. Here's the photograph I've downloaded for you...
Image source: http://www.candles.org/media_images.html
Hold down the Alt key and clicking-and-dragging the mask from one layer to the other so that we can copy the mask that we had created.
Click the lock icon located between the Layer Thumbnail and Layer Mask in the Photo layer. This will enable us to move our pictures without damaging the mask that we make.
Put your photo on the left side half of the paper invitations or whatever you want how good, then use the GrungeBorders Brush on Layer Mask.
Once more... I wanna add a little old manuscript in the above photo and diluting it so that there is impressed scribbles on paper.
Image source: http://www.spamula.net/blog/2006/11/
Change the Blend Mode to Soft Light, then press Shift + Ctrl + I to make a negative movie script.
So far.. everything's just fine, right? Use this DecoStrip Brush to bring your invitation a lil' bit more attractive or something :)
Font used here is Champagne Font, and Blair Md ITC TT Medium Font.. or you an explore it for more with Belphebe Font.. It's all up to you guys :) Thanks for reading, and ladies, I hope you enjoyed yourselves. Here's the final result.
Read this tutorial in Indonesia!


 Guys, it might be most of the reliable
  Finishing the accent of your modern home with modern wall art includes


