
 Hi there again and again... Guys, with a little tweaking, I think this could be used for a lot more than wedding invitations, goth, dark, bright, spring, summer.. whatever!
OK... Like usual... Open a new document in Photoshop. I don’t do too much girly stuff, so I thought this might be a good time to pander a bit to the ladies. First thing first... Creating some texture, I'm gonna use a rough-edged brush at a low opacity to create it.
Hit the Brush tool (B key) and from the Brush Picker choose the Chalk 60 Pixels brush (which is one of Photoshop’s default brushes). Set your foreground color to whatever you want. Mine is #695d00.
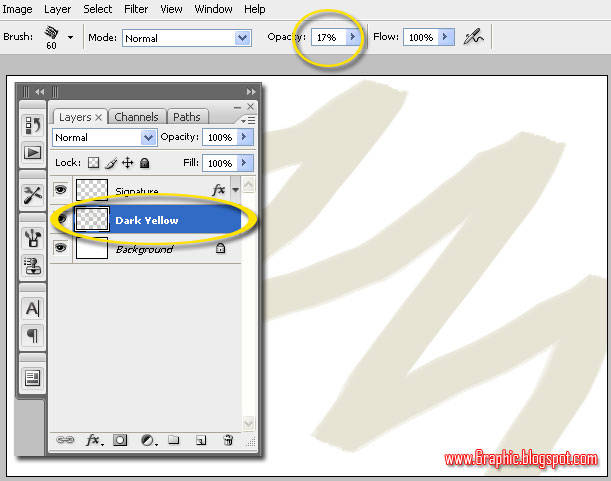
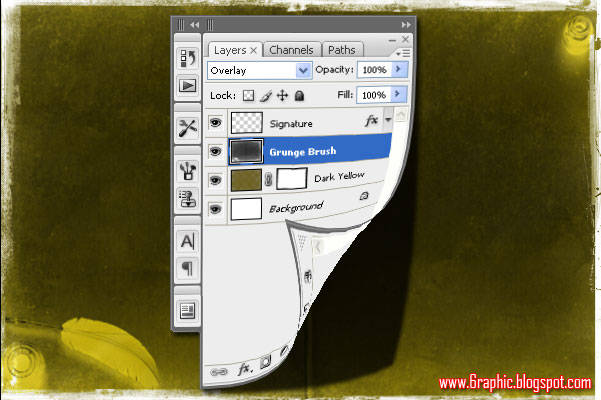
Create a new layer called Dark Yellow in your Layers palette after the brush setup and color chosen, set your brush Opacity to 17% in the Brush Options bar at the top of Photoshop and paint roughly over the canvas as shown below.
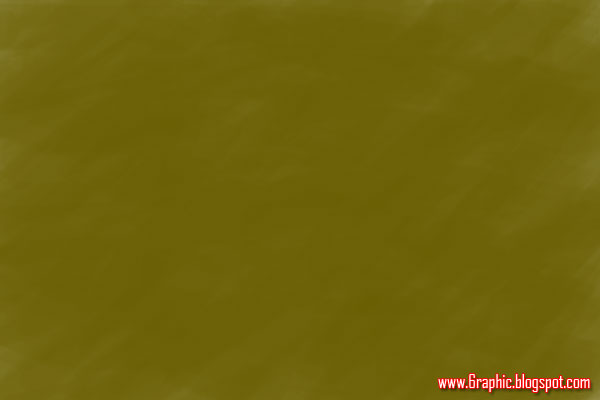

Repeat this process several times. Replacing the brush pressure to give some texture and depth in the background until you are satisfied with the results. Let your creativity be your guide, remember we'll put the text there, so try to give a contrast color on the text..
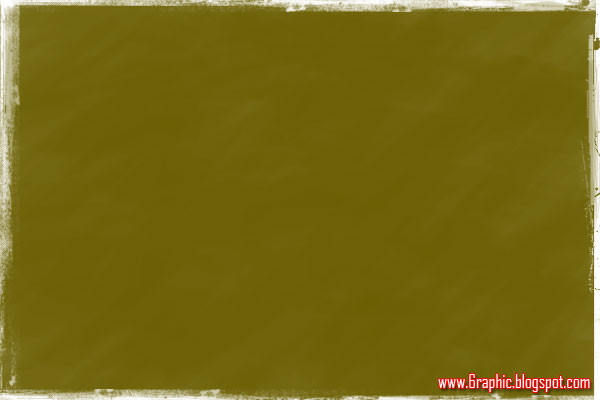
Add a Layer Mask by clicking the Add Layer Mask icon at the bottom of the Layers Palette. Restore your brush Opacity to 100%, then select GrungeBorders Brush.
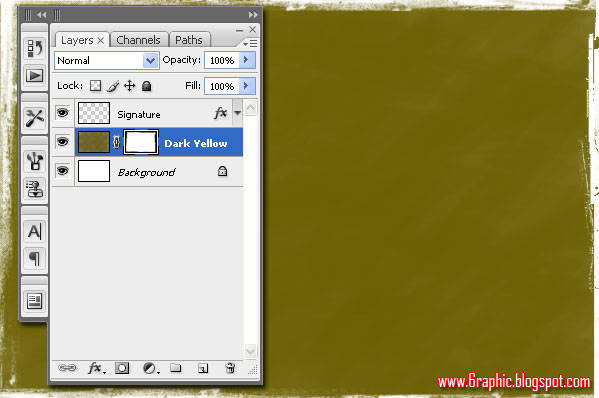
Drop the Brush Opacity down to 20% or until you feel just right.
Create a new layer above the layer dark yellow, give the name of Grunge. Replace the brush color to white (by pressing the D or X key if they have not become a default). Choose one of the brushes that we downloaded with 100% Opacity.
Next we'll try to be -let's say- a lil' bit creative by adding photos. Here's the photograph I've downloaded for you...
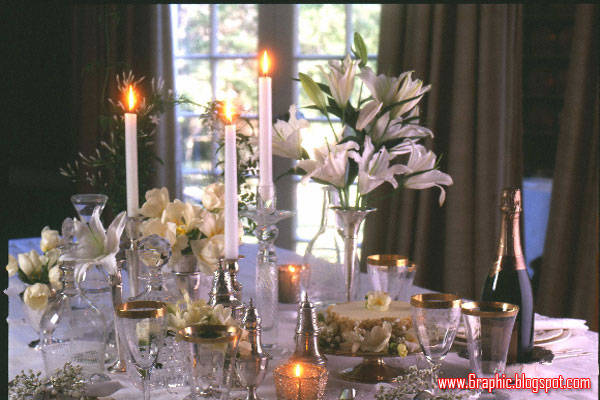
Image source: http://www.candles.org/media_images.html
Hold down the Alt key and clicking-and-dragging the mask from one layer to the other so that we can copy the mask that we had created.
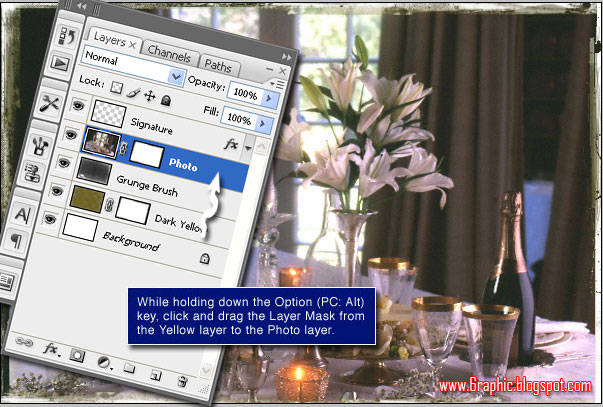
Click the lock icon located between the Layer Thumbnail and Layer Mask in the Photo layer. This will enable us to move our pictures without damaging the mask that we make.
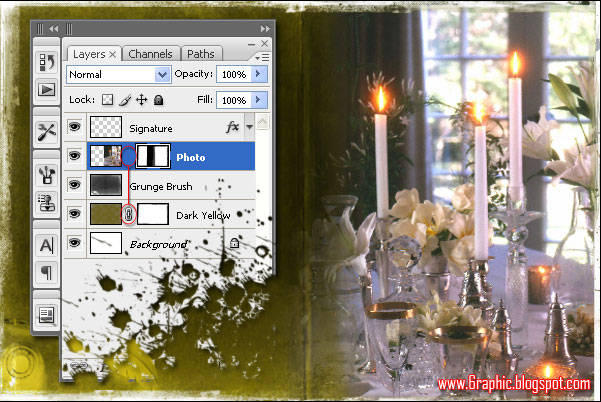
Put your photo on the left side half of the paper invitations or whatever you want how good, then use the GrungeBorders Brush on Layer Mask.
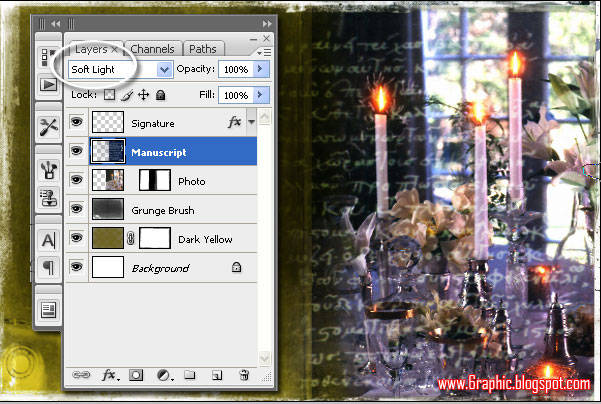
Once more... I wanna add a little old manuscript in the above photo and diluting it so that there is impressed scribbles on paper.
Image source: http://www.spamula.net/blog/2006/11/
Change the Blend Mode to Soft Light, then press Shift + Ctrl + I to make a negative movie script.
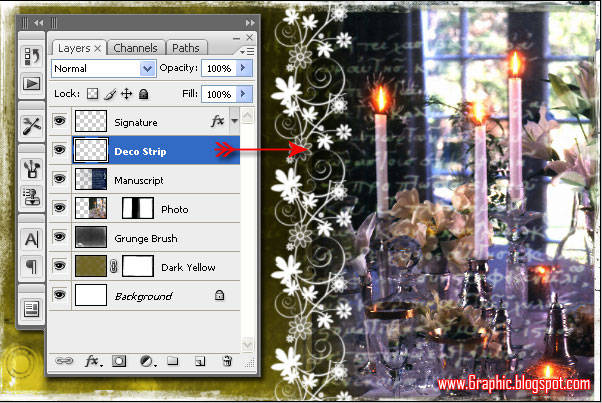
So far.. everything's just fine, right? Use this DecoStrip Brush to bring your invitation a lil' bit more attractive or something :)

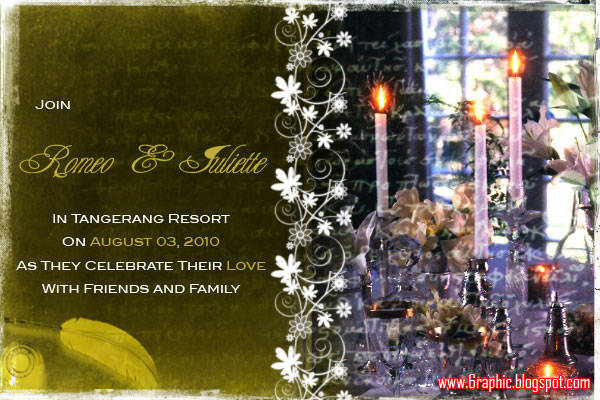
Font used here is Champagne Font, and Blair Md ITC TT Medium Font.. or you an explore it for more with Belphebe Font.. It's all up to you guys :) Thanks for reading, and ladies, I hope you enjoyed yourselves. Here's the final result.
Read this tutorial in Indonesia!


Keren bOZ...!!!
ReplyDeleteGood tutorial...!!!
Met malam and met beristirahat.
that's cool, i like gothic
ReplyDeletethanks for coming :)
ReplyDeletevisiting ur blog,,,
ReplyDeleteduh, makin susah nih pelajarannya
ReplyDeletekereennnnzzzz...sy tdk sampe segitu nya penguasaan sy akan photoshop...
ReplyDeletesip, buat yang mau nikah atau yang dapat jatah buat undangan nikahan :)
ReplyDeleteGreat tutorial there!! :D
ReplyDeleteXoxo,
Pinkie Anggia
www.sugarpuff.jp.pn
nice post sob selamat malam :-)
ReplyDelete@ pinkie.sugarpuff : I've already vote you :)
ReplyDeletecahyoooooo :)
wow, artikel ny berguna bgt nih sob.. cocok bgt bwt mnmbh wawasan ku seputar tema ini..
ReplyDeletesob, mengingt blog ni sngt bermanfaat bgt q.. tukeran link yok!!
link blog kamu sudah terpasang di blogku, link balik yach :) silahkan di liat di blogku!!
ntar pasang link ku dengan anchor text "Naruto Soundtrack" yach,
dan jdi follower q juga y, siapa thu aja dgn kehadiran blogger se-hebat kamu, blog ku bisa
sedikit rame dan berwibawa gtu.he3
ntar secara berkala q bakal sering-2 silaturahmi kesini..
d tunggu kehdirannya yach :D
salam dari blogger indonesia setengah bule.he3
makasih..
wah, master sotosop ternyata,,mantap mas
ReplyDeletehehehehehe
ajari lain kali yang paling dasar,hehe
Tukeran link yuk..saya dah pasang link blog ini di http://bolehngeblog.blogspot.com
ReplyDeletedi widget link "Blog Teman", kalo belum muncul klik "Perlihatkan Semua". Daftar "Blog Teman" muncul sesuai update postingan terbaru blog anda
Trims
tutorial bagus nih. sayange basane ga mudeng. bisa rikuwe ga, blognya dibuat dalam 2 bahasa...
ReplyDeleteterasa Lebih mudah daLam mengapLikasikan dengan dipandu postingan sobat, saatnya untuk mempraktekan.
ReplyDeleteMantep ini Sob , , , dicoba ntar ne ah
ReplyDeleteTutorial yang sangat membantu.. saya bookmark sob.. Soalnya ada pelajaran photosop nih di sekolah saya.. Saya follow blognya, jangan lupa follow balik ya..
ReplyDeletegreat sotosop work here........... may be i can learn more about sotosop here,... hhe.. nice blog brau.........
ReplyDeleteAsslm,,,,
ReplyDeleteKunjungan Balik nih Sob,
Thanks ya udah Berkunjung ke Rumahku…hehehe
Rumahnya (Blognya…red) tambah oke aja,
Gak bosen deh saya sempatkan untuk Datang ke Sini lagi..!!
Sob saya punya Blog baru nih,
Sempatkan untuk berkunjung ya, ini Rumah Baruku…
http://kecantikanwajahkulit.blogspot.com
http://menurunkanasamurat.blogspot.com
http://carabuatanak.blogspot.com
Salam,,,
wuuiihh.. kereennn banget jadinya!!! mantep iihh ^^
ReplyDeletekeren bang! digoyaaang, btw siapa itu rome and juli, nikahnya besok lusa noh..
ReplyDeletesob, link kamu sdh terpasang di blog ku dgn anchor text "FCDB"
ReplyDeletelink ku juga y sob, maksih :D
@ all : maaf utk yang berkanan tukeran link... baru besok saiia bisa penuhi permintaan akang, soalnya mlm nii saiia sama sekali gag bisa log-in di tempat saiia :( sekali lagi maaf.. mungkin besok baru bisa :) harap bersabar... dan nanti jika sudah bisa dan sudah saiia pasang... pasti saiia kabari :)
ReplyDeleteterimakasii :)
lagi rame tukeran link yah... mau dong... aku add juga yah sekalian...
ReplyDeleteSayang, masa pengantinku sudah lewat 20 tahun yang lalu, kalau nggak bisa minta bantuan :D
ReplyDeleteGen, saya save aja ya, kebetulan sudah dapat photoshop ;)
oke deh.. d tunggu yach.. keep blogging :D
ReplyDeletemampir bOSS
ReplyDeleteblognya keren, top bgt,,
ReplyDeletegoogle translatenya lagi error, bacanya ngak jelas jadinya,, hehe
ReplyDeletewooow bagus sekali Mas Gen
ReplyDeletesaya suka sekali ornamen decorative seperti bunga2 merayap gitu
sayang saya sudah menikah
khan bisa pesan sama Mas Gen :)
jalan-jalan malam.. lagi suntuk nih :D
ReplyDeleteberkunjung lagi
ReplyDeletehehehehe
salam persahabatan brooo
salam persahabatan juga bro :)
ReplyDeleteberkunjung dengan senyuman lagi
ReplyDeletehehe
makasii senyumannya kang :)
ReplyDeleteAkh..... ni orang selalu keren tips2 nya >.< jadi gregetan
ReplyDeleteahh.. si mmmiaouwww bisa ajja nii :p kmn ajja?!?!?!?
ReplyDeleteok banget tutor nya. jadi makin jago dah nih sama photoshop :D
ReplyDelete