
 Few days ago, I received a request for a tutorial how to get a Mmmotion trick on an image with Photoshop... so I figured what if I write that tuto now...
After seeing some of the source I met on internet, most of the tuto is explained with a complicated ways, too lengthy and less focused, instead I say I'm very good at these things, it's just, I think it's good if it become an alternative among many tutorial with similar subject. Hopefully this is useful to you all ...
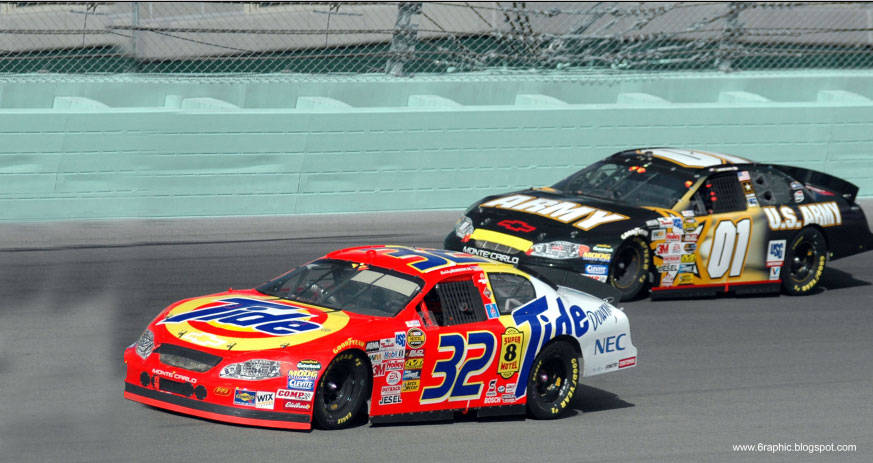
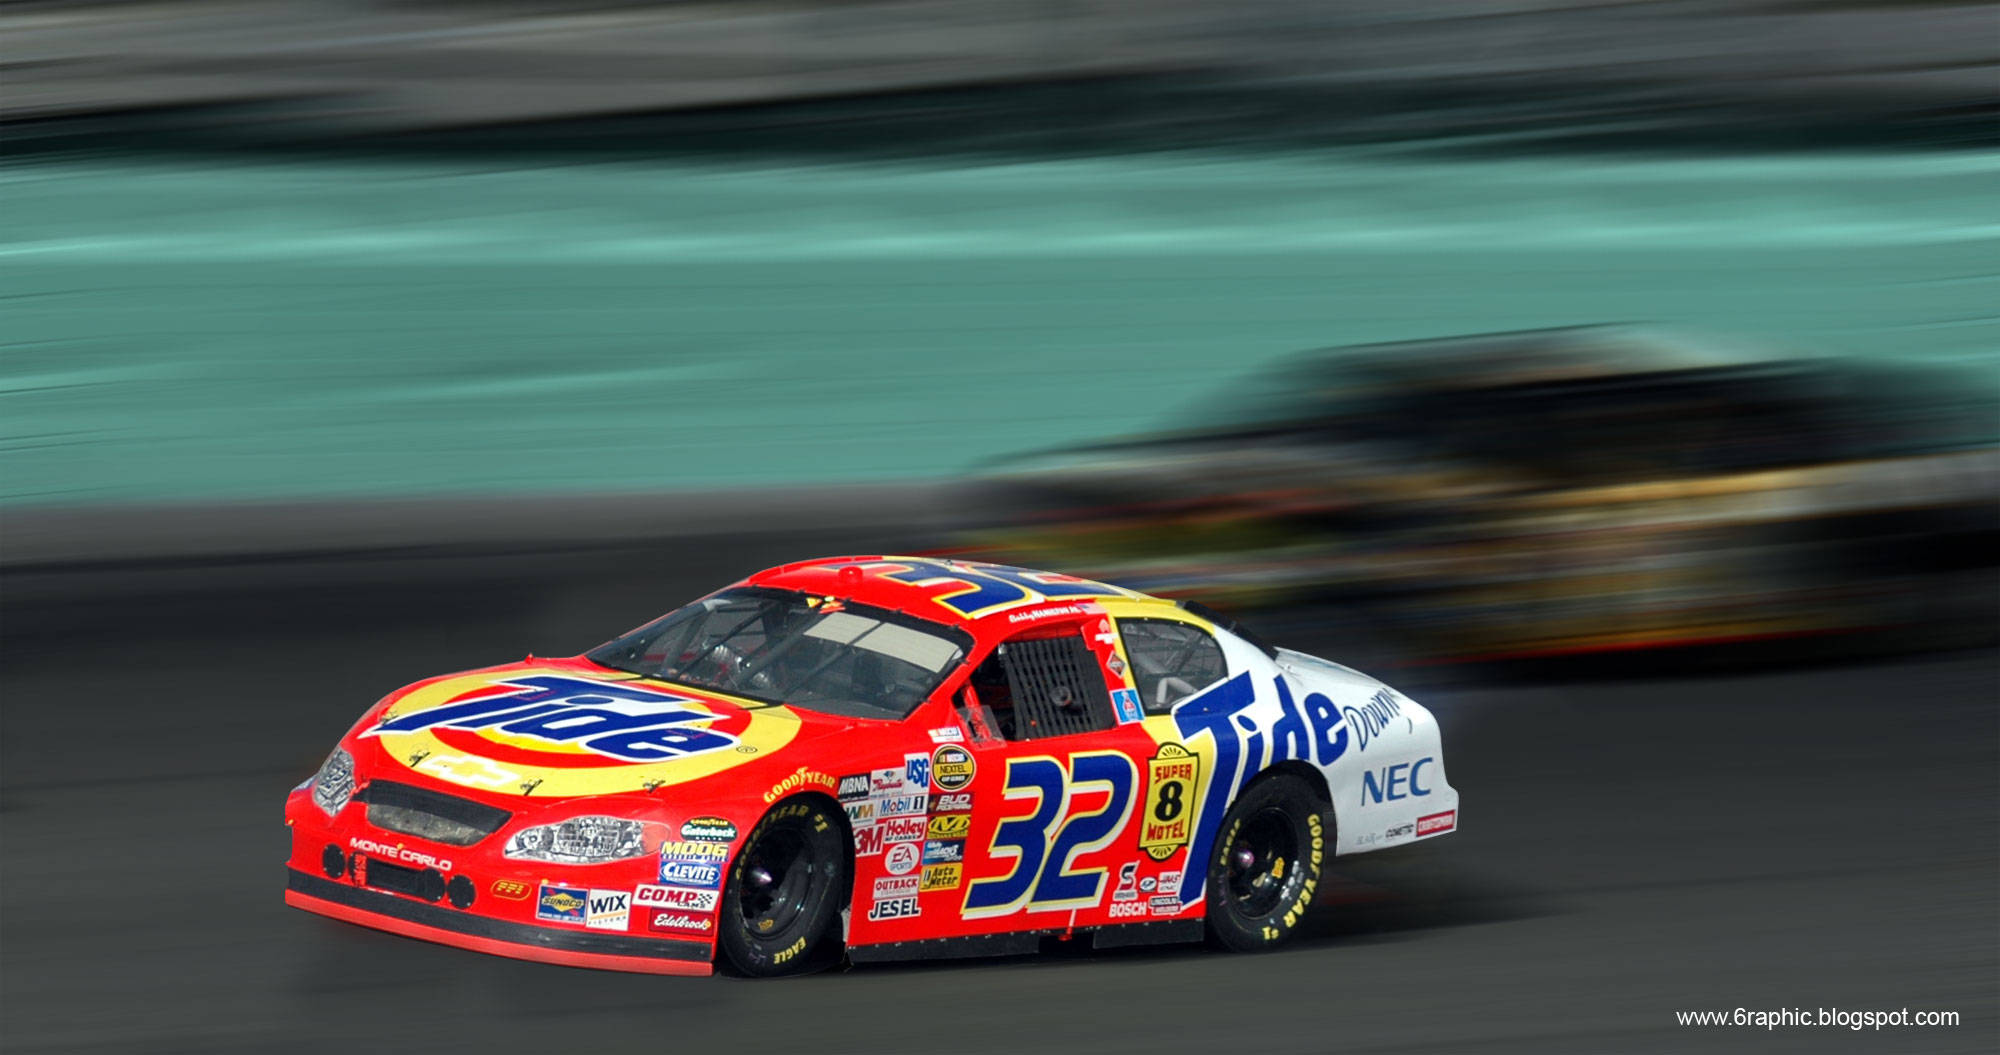
For starters, there are several perspectives that you can take when setting a moving object. For example the following racing car pic taken from www.slurpy.org/s/t5bzh2/nascar/arizonaautoracing
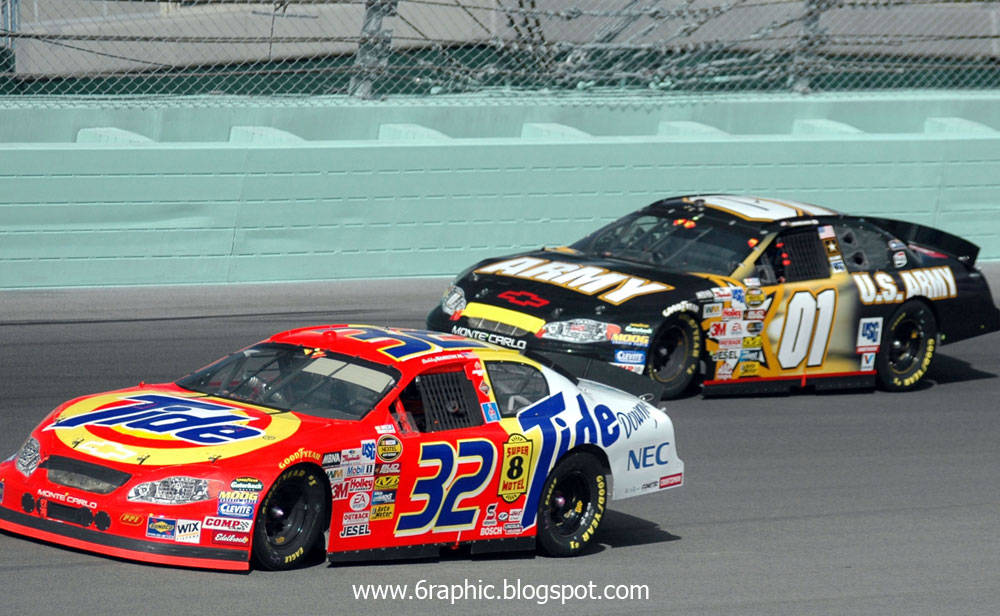
Try to be a little realistic ... looks roughly like if you are traveling with a speed of 150 mph or something. Consider how things would look like if you're really just pick up the car as an object and quiet roads or trees as a backdrop or as a focal point image.
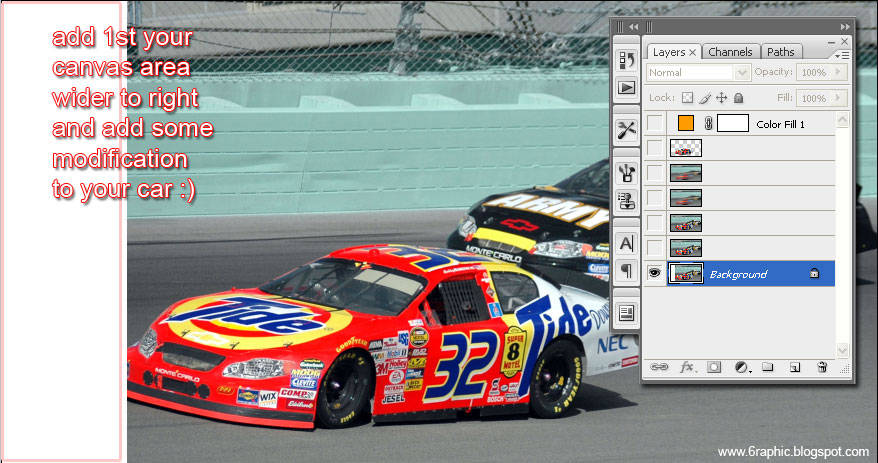
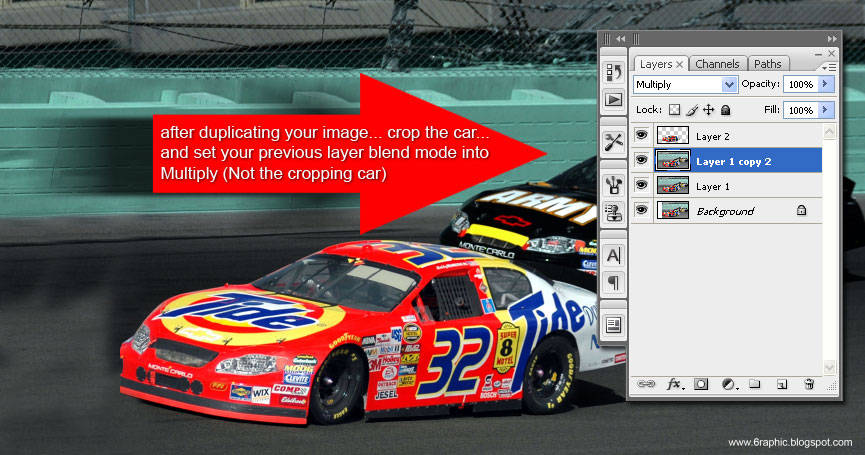
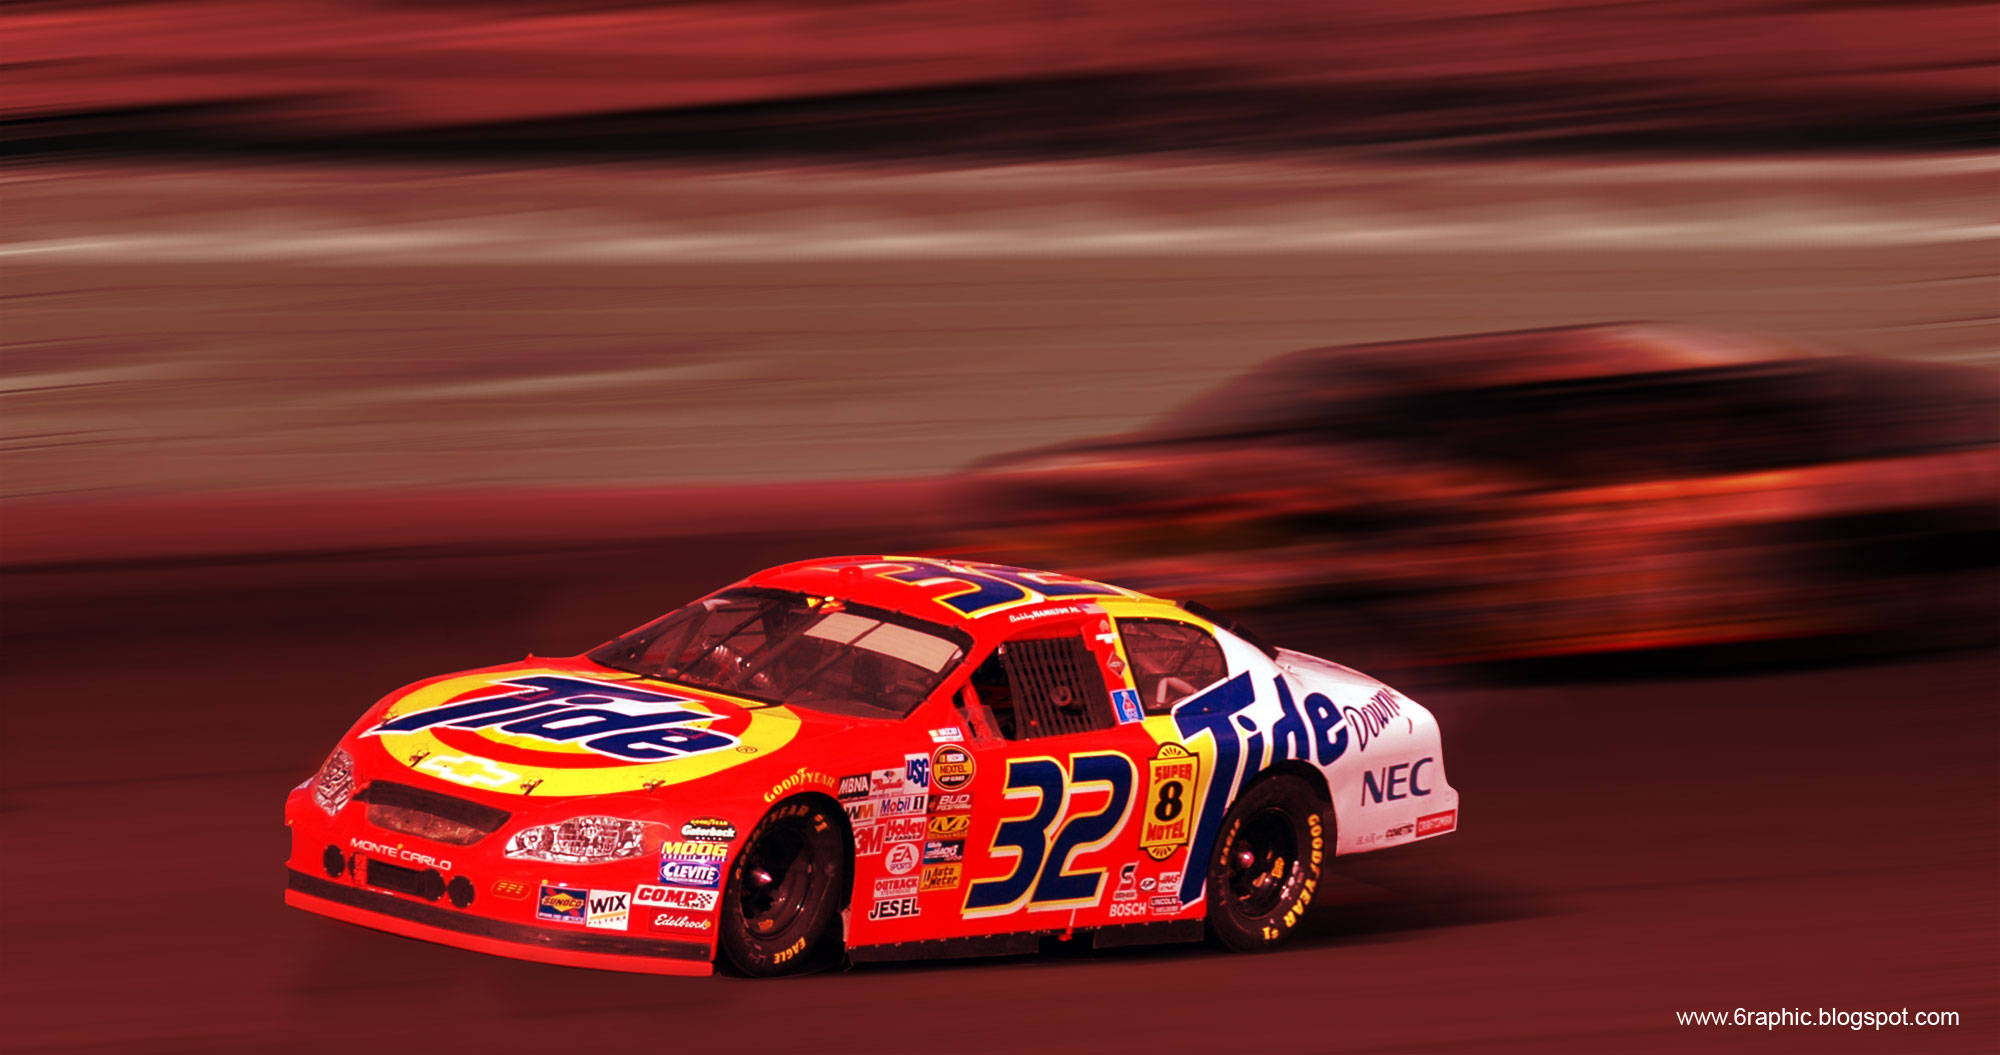
Let's focus on the car, its background would be like a blurry side.. lol. So... how to get that?!?!?! The simple easy way to figure out for me, by cropping the object we want out from the photograph. Use the Polygonal Lasso (L) tool or anything that you liked the most. Here I use the Pen (P) tool.
Choose your Cloning (S) tool and set the opacity to around 75%. Start with caution in egdes you clone so you have less exposed (cleared) area with some fuzzy edges.
Cut your car image into a new layer so the background will remain in place. See the following image for details... Watch out the Palette Layers guys..!!!
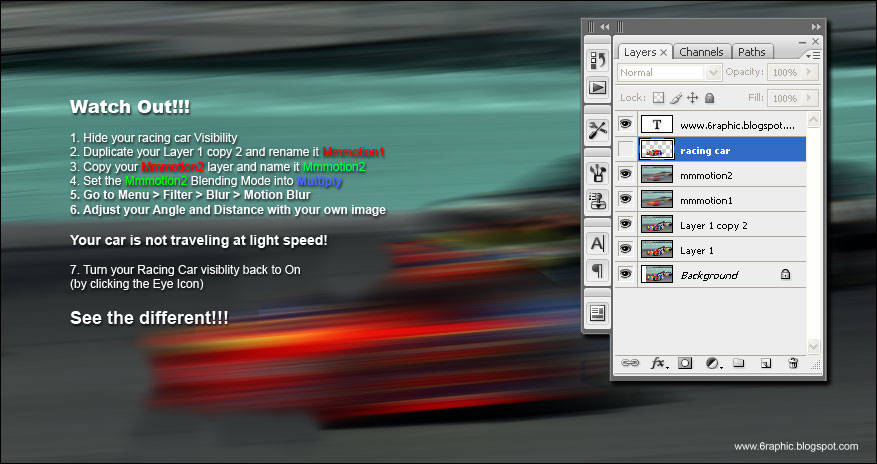
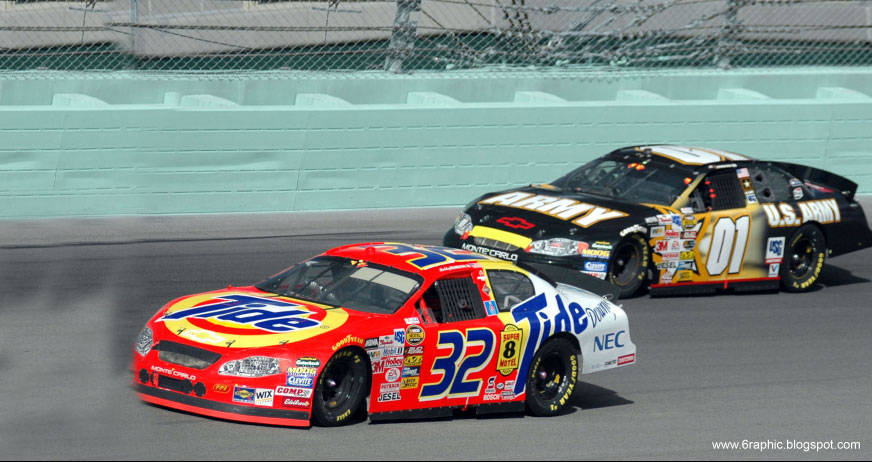
The final step is to choose the form of a car that we cut and use the blur to organize such moves. Make sure the direction of blur is consistent with the direction the car was excessive and unnecessary in this case... your car is not running with the speed of light, haha..!

Final Result...
Or... if you want your image become more dramatic or something, play around with some color... This effect isn't excessive and you'll get a Mmmmotion pic that quite realistic! There you go guys!!!
Other samples
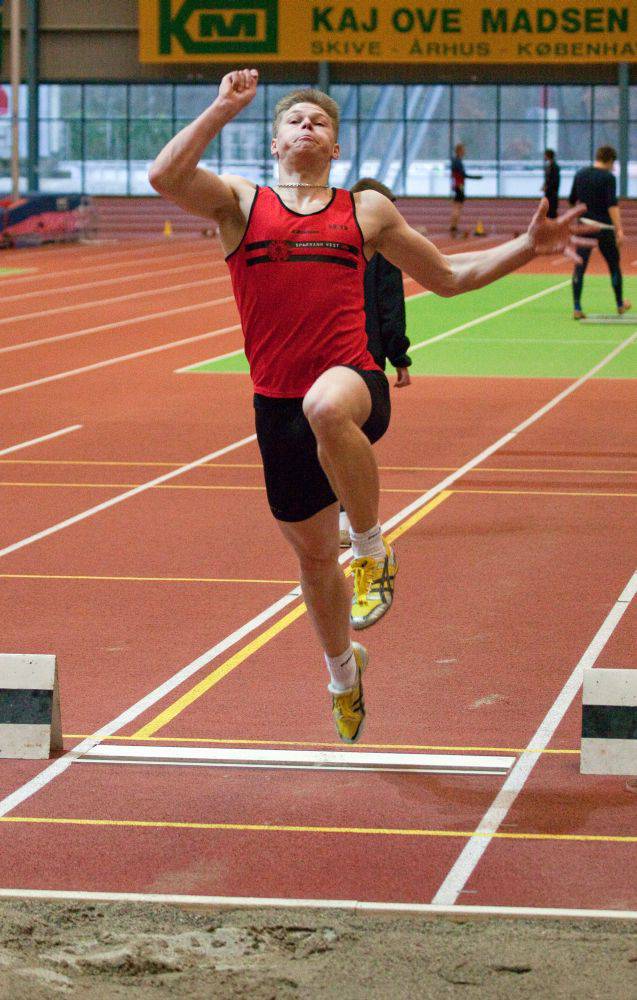
before
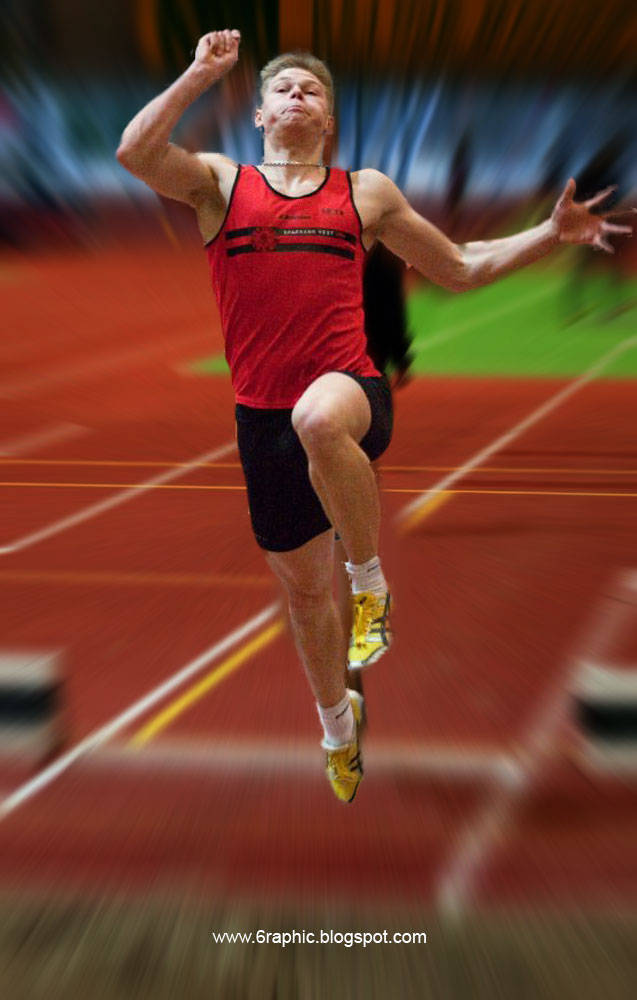
after
ps : taken from 5 different images :p


Tutorial yang menarik.....!!! Terimakasih sudah share tipa and triknya...!!! Sukses terus.
ReplyDeleteSelamat malam selamat beristirahat.
It's great triks..
ReplyDeletekeren igh!!
ReplyDeleteitu mobiL beneran yah gen
kaya mobil amenan ponakan gue he he
*ditimpuksendal
asLi kereen,jadi makin idup setelah disotosoup..
siiippp....sippp...gan
ReplyDeletejiahahaha mantap
ReplyDeletenampak kek bergerak
dan lebih fokus
Its great... Nice friend.. :)
ReplyDeletesalam sobat
ReplyDeletejadi lebih menarik nich,setelah disotosoup.
semua sip dan keren, seperti asli.
Wah Mantep ne sob ilmunya , ntar dicoba ah ,
ReplyDeleteOh ya Aq dah Follow Blognya sob no 171
terimakasii buat semua yang menyempatkan hadir di sini... maaf klu beberapa permintaan blm atau telat ditindak lanjuti... semua tetep akan dilaksanain... karena keterbatasan waktu dan sebagainya... semua ttp diusahain... :)
ReplyDeletemobilnya kaya mobil mainan ya...
ReplyDeletebagus banget ih...
ReplyDeleteoh ya sekalian mau tanya kalo mau satuian 2 foto gimana caranya ya ?
assalamualaikum...
ReplyDeletewow..mantep.
sy suka yg lagi lompat tuh..
salam
@ amaliaroseluna : pada dasarnya sii gampang ajja.. banyak cara utk bisa menyatukan 2 gambar... sebelum itu, pastinya uda tau cara cropping image terlebih dulu... penguasaan warna sangat berperan jika kita emang bener2 mau dapetin hasil maksimal yang realistis... bisa menggunakan Ctrl+U (saturation), bisa dengan Ctrl+M (penegasan antara hitam dan putih), lalu finishing touchnya dengan Ctrl+L (permainan level)... kek nya dengan 3 itu juga lumayan cukup :)
ReplyDeleteThese turned out great! I love finding out how to do new things in photoshop, so I will definitely be bookmarking this tutorial to try it out. Thanks for the tips!
ReplyDeleteHey.. How are you feeling came from that lovely cave???
ReplyDeleteThanks for the bookmark. I use to view my blog in Google Chrome and it looks great. It looks fine on IE 6 too! Stay connected with my blog and I’ll write more useful tutos.
The best thing would be if you ask me something and then I can be able to create a post solving that problem. Thanks and keep me updated if you found any error/problems with anything in my blog.
Kids just love it!!!
keren brow...lam kenal..kunjungan balik.
ReplyDeletesalam kenal juga kang :)
ReplyDeletenice artikel!
ReplyDeletega ada yang versi indonesia?
sebenernya pernah saiia sertain tiap tuto di sini dengan versi bhsa indonesianya sekaligus... tp akhirnya saiia mengumpulkan versi bhsa indonesianya dalam satu postingan yang terus2n saiia apdet... bisa di liad di postingan saiia yang bertitle download tutrial in pdf version :)
ReplyDeleteWaw..keren.
ReplyDeleteBener2 keren dah :)
Serasa ngebut tu mobil :D
iia kang... makasii kehadirannya kang :)
ReplyDeletekeren, om. bisa buat mendramatisir foto yang statis :3
ReplyDeletesepertinya bisa dipraktikkan buat bikin photo-editing motoGP yang pengen saya buat :D
di monggo kang... unjukin ke saiia iia kang klu uda selesai :)
ReplyDeleteKok daritadi di refresh2 gak bisa tertampil semua yah gambarnya?
ReplyDeleteAneh bener --"
Btw, hasilnya pasti keren banget lah :D
Oh..ia kang, soal hosting + domain, your welcome :D
iia kang sama-sama... tau nii... saiia juga dari tadi gag pernah liad semua gambar2 saiia semua di sini... entah lagi ada apa nii sama hostingannya :(
ReplyDeleteinet saya yg bocor atau gmn mas... gambarnya banyak yang gak nongol :(
ReplyDeleteterimakasih atas tutorialnya, sangat membantu mas :)
ReplyDelete