
 There are numerous tricks and techniques people use when making an image of this nature, but I am going to show how I created this image using only the very basic tools.
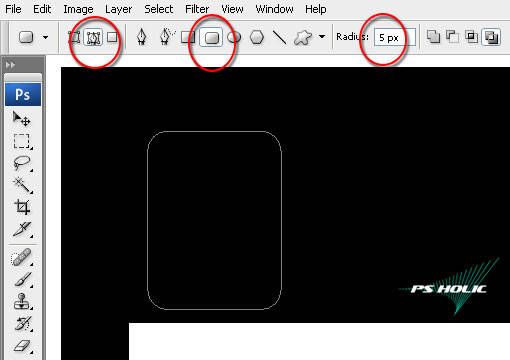
Using the Polygonal Lasso (P) tool, Rounded Rectangle (U) custom shape tool and the Rectangular Marquee (M) tool to make a strip of 35mm film.
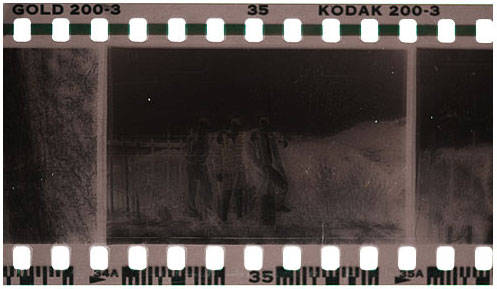
The first thing I needed to do was to assemble the basic structure of the figure. Taking or even deleting segments one by one. Make sure to always follow the curves and contours of the original film like the image below taken from Kodak Gold 200 film in order to help keep the familiar recognizable shape.

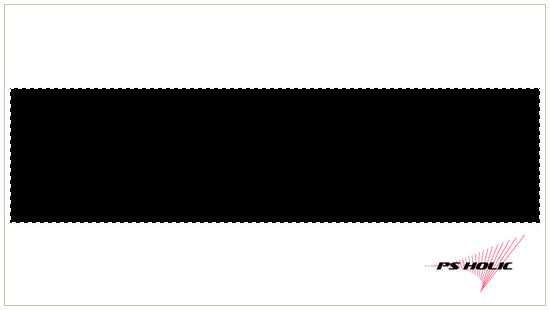
Starting with creating the base film, the camera feed holes and the black edges. I will reveal the all Photoshop method here. Open a new document with a white background. Mine is 1700×900 at 70ppi.
Create a new layer and rename it Film. Choose the Rectangular Marquee (M). For now I just want to lay down the basic structure of the figure by pressing the D key to reset the foreground and background colors to black and white, then press Alt-Backspace to fill the selection with black.
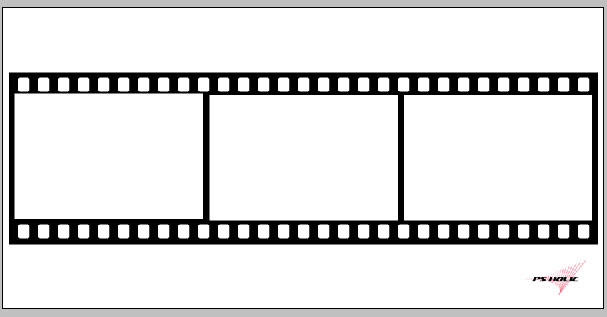
Guys... Ofcourse we need the area where the photos will be placed somewhere. 2×3 aspect is good to be a standard frame format for a 35mm camera, isn't. Set the Rectangular Marquee (M) tool and mark the Fixed Aspect Ratio box and set the ratio to 3 Wide and 2 High. Go ahead and drag out the first opening.
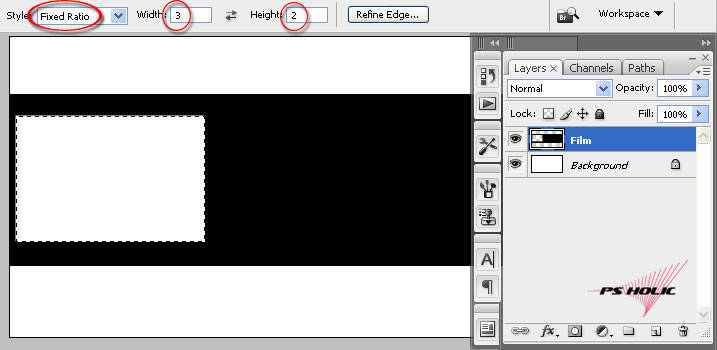
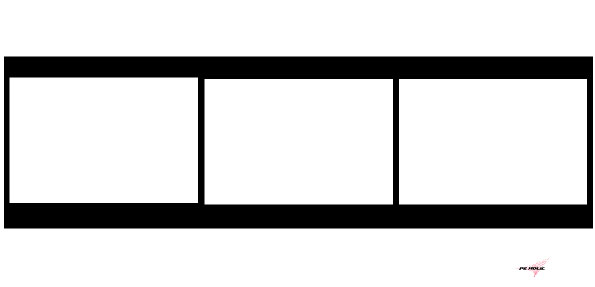
By continuing to activate the selection, move your rectangle to the right (to the left by Beyonce, not me... lol) and remove all remaining frames. While holding down the Shift key, drag the selection horizontally or you can move it easily by using the arrow keys on your keyboard. Slow down, dood... :) Don't forget to press Ctrl+D to deselect.
Pick the Rounded Rectangle (U). If you have difficult to see the area of your workflow, you'll gonna like this one... Zoom in on the top left corner of your film by pressing Ctrl-+. Now you might happy enough with the positioning of it.
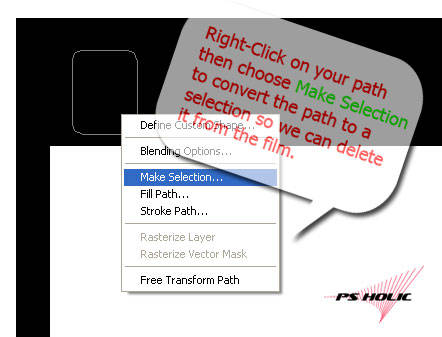
Click on the Paths tab in the layers palette and click the Convert Path to Selection icon at the bottom of the palette then click back to the Layers tab... or you can simply follow what the image said to you below...
Finish the top of the film, proceed the step until you done with the bottom.
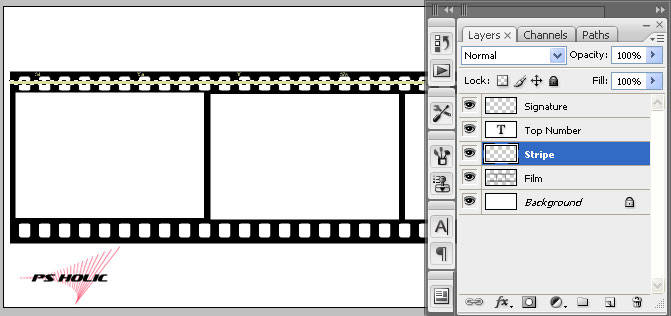
Press the T key to grab the text tool from the Tools bar, set the foreground color to #ddde9e.
Finished??? Double click on the layer name and rename it Top Numbers.

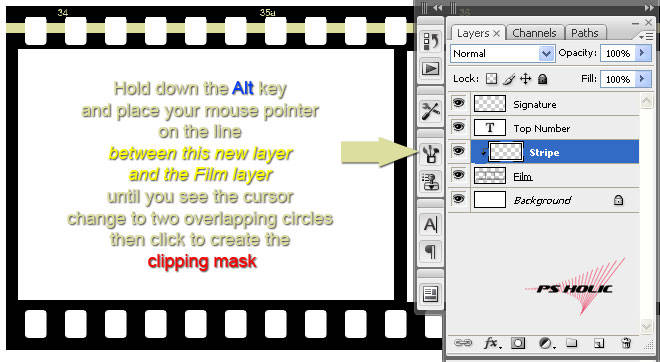
Again, add a new layer below the Top Numbers and name the layer Stripe. Change the Style of your Rectangular Marquee (M) tool back to Normal (unfixed). Create a single stripe like this...
Press Ctrl+D to Deselect, then see carefully what the inset below said to you... (Creating Clipping Mask section).
Turn the opacity of the Stripe layer down to 35%. Back to the Top Numbers layer, duplicate it by pressing Ctrl+J and don't forget to name it Bottom Numbers.

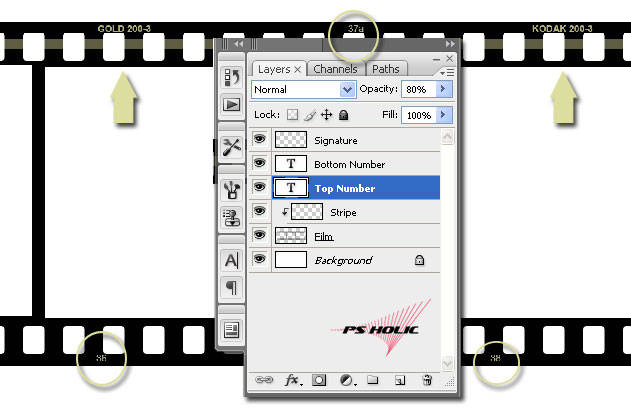
Move fast to the next level. You can add something you like, barcode for example... Anything! Put the Kodak type and Gold type or anything you like.. whatever.. and I don't care about that, lol.
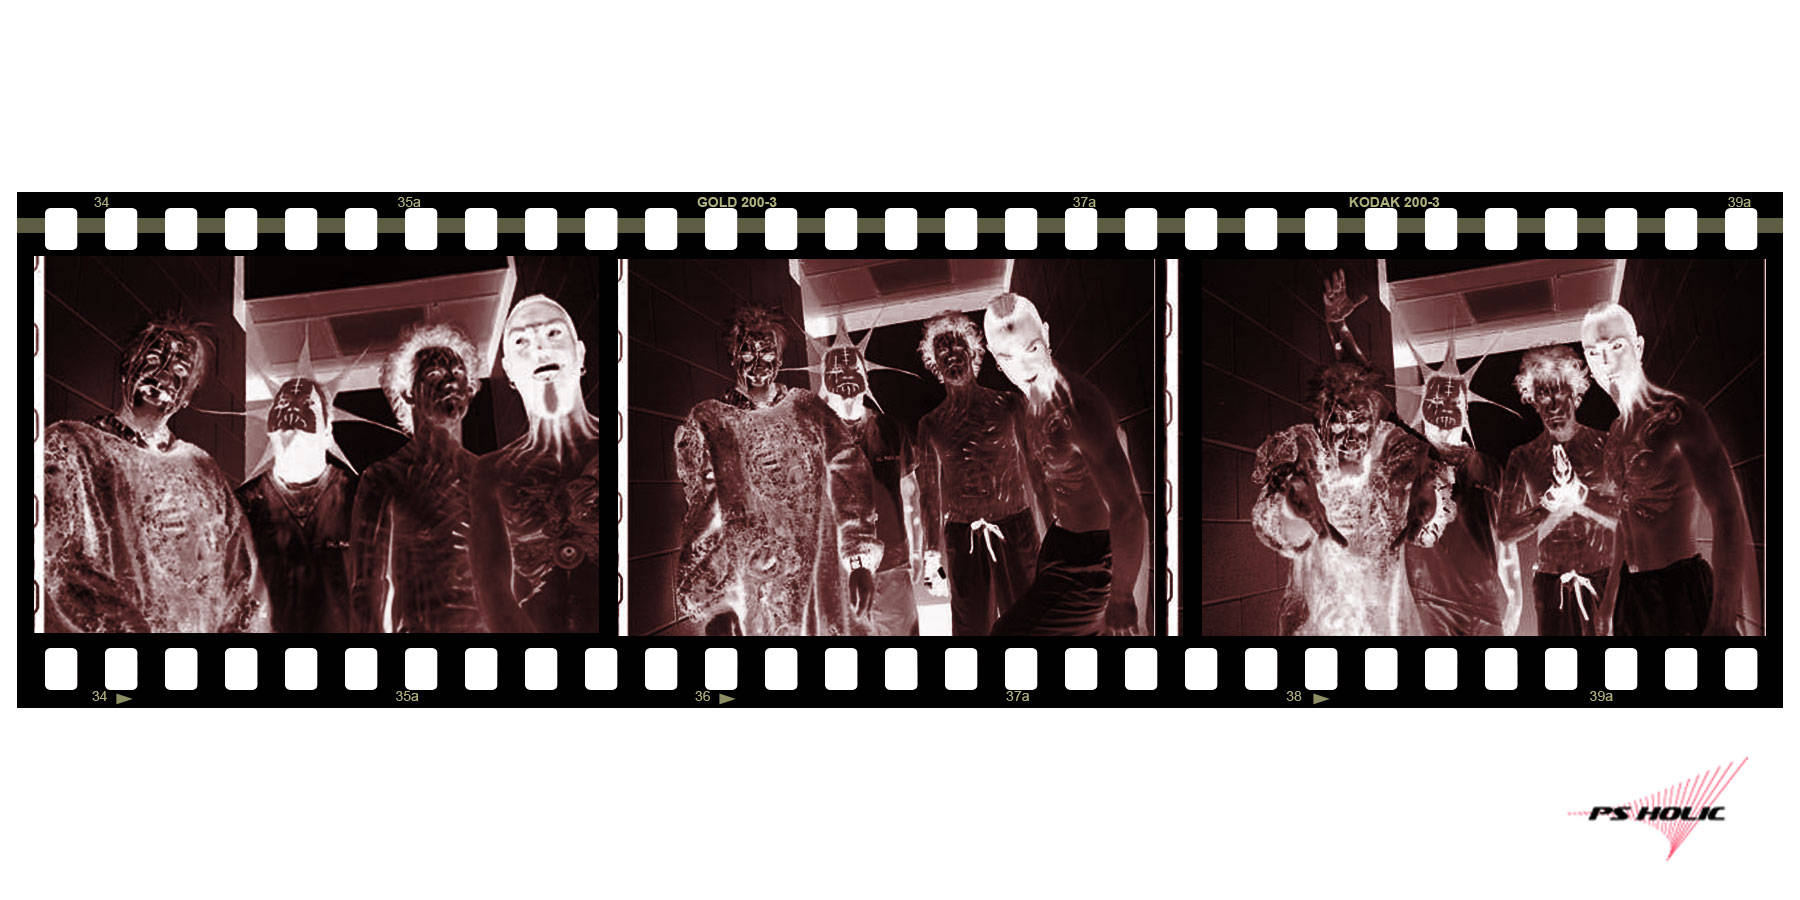
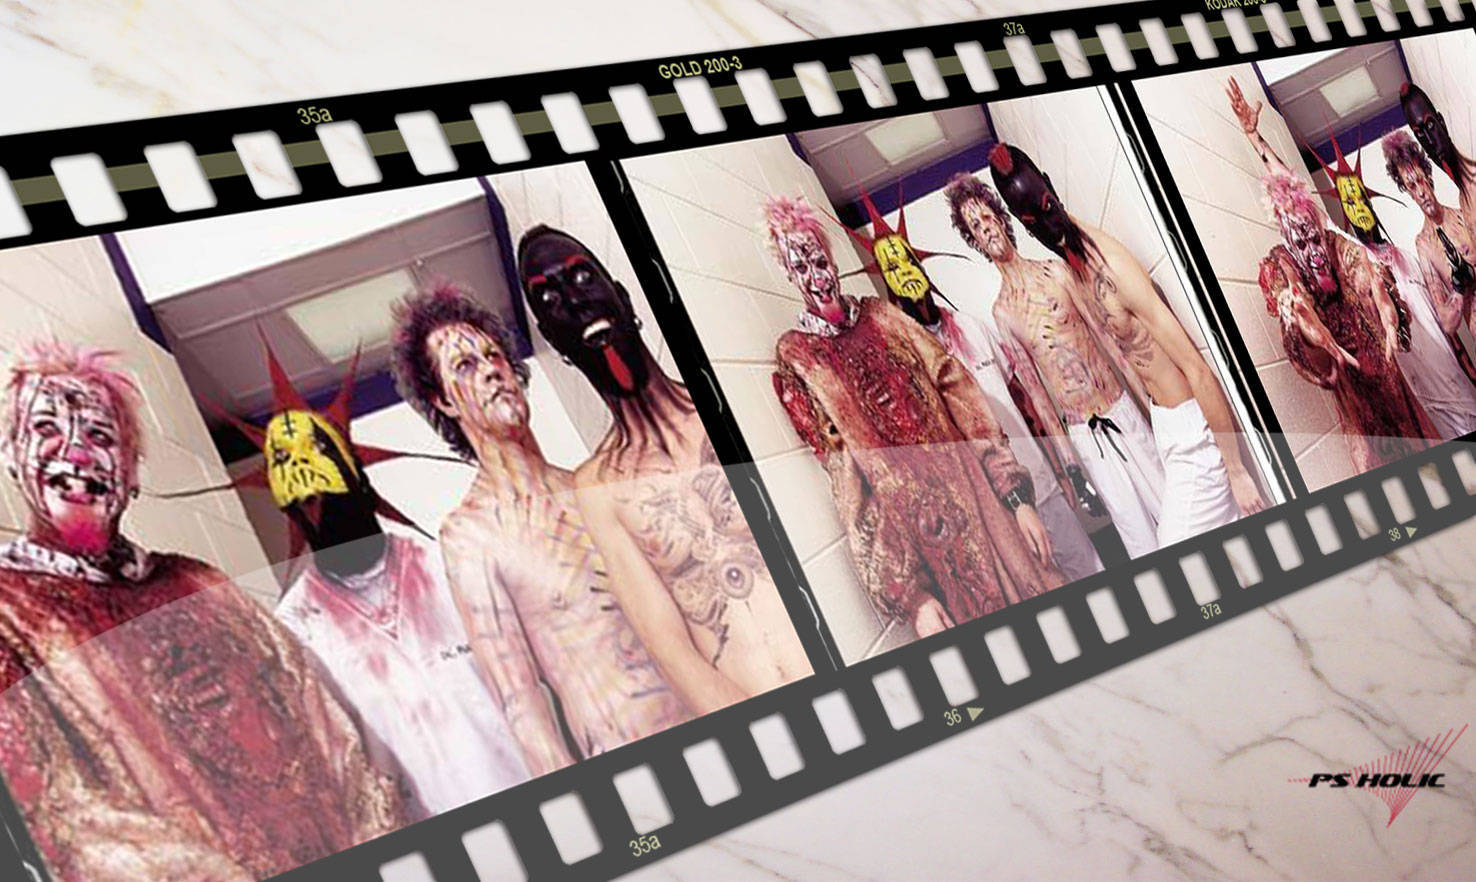
Now we are ready to insert our photos and we need them to be imported beneath the Film layer.
Click and drag the image into your Film by considering that the Move (V) tool selected.
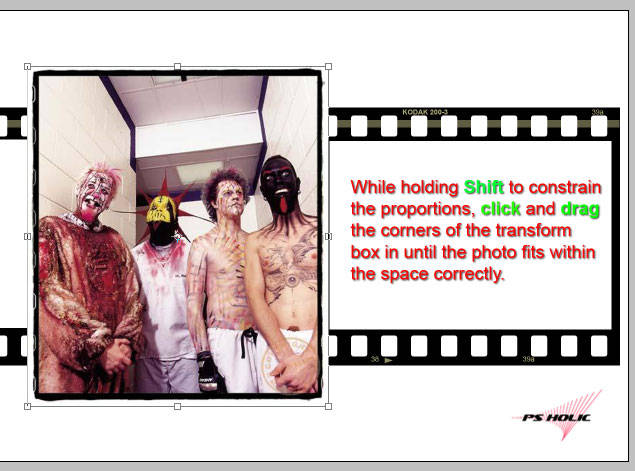
Press Ctrl+T to invoke the Free Transform tool whenever your photo will be too large initially to fit inside. Add more photos as desired exactly the same way.
And voila! Our Negative Film is complete!!!
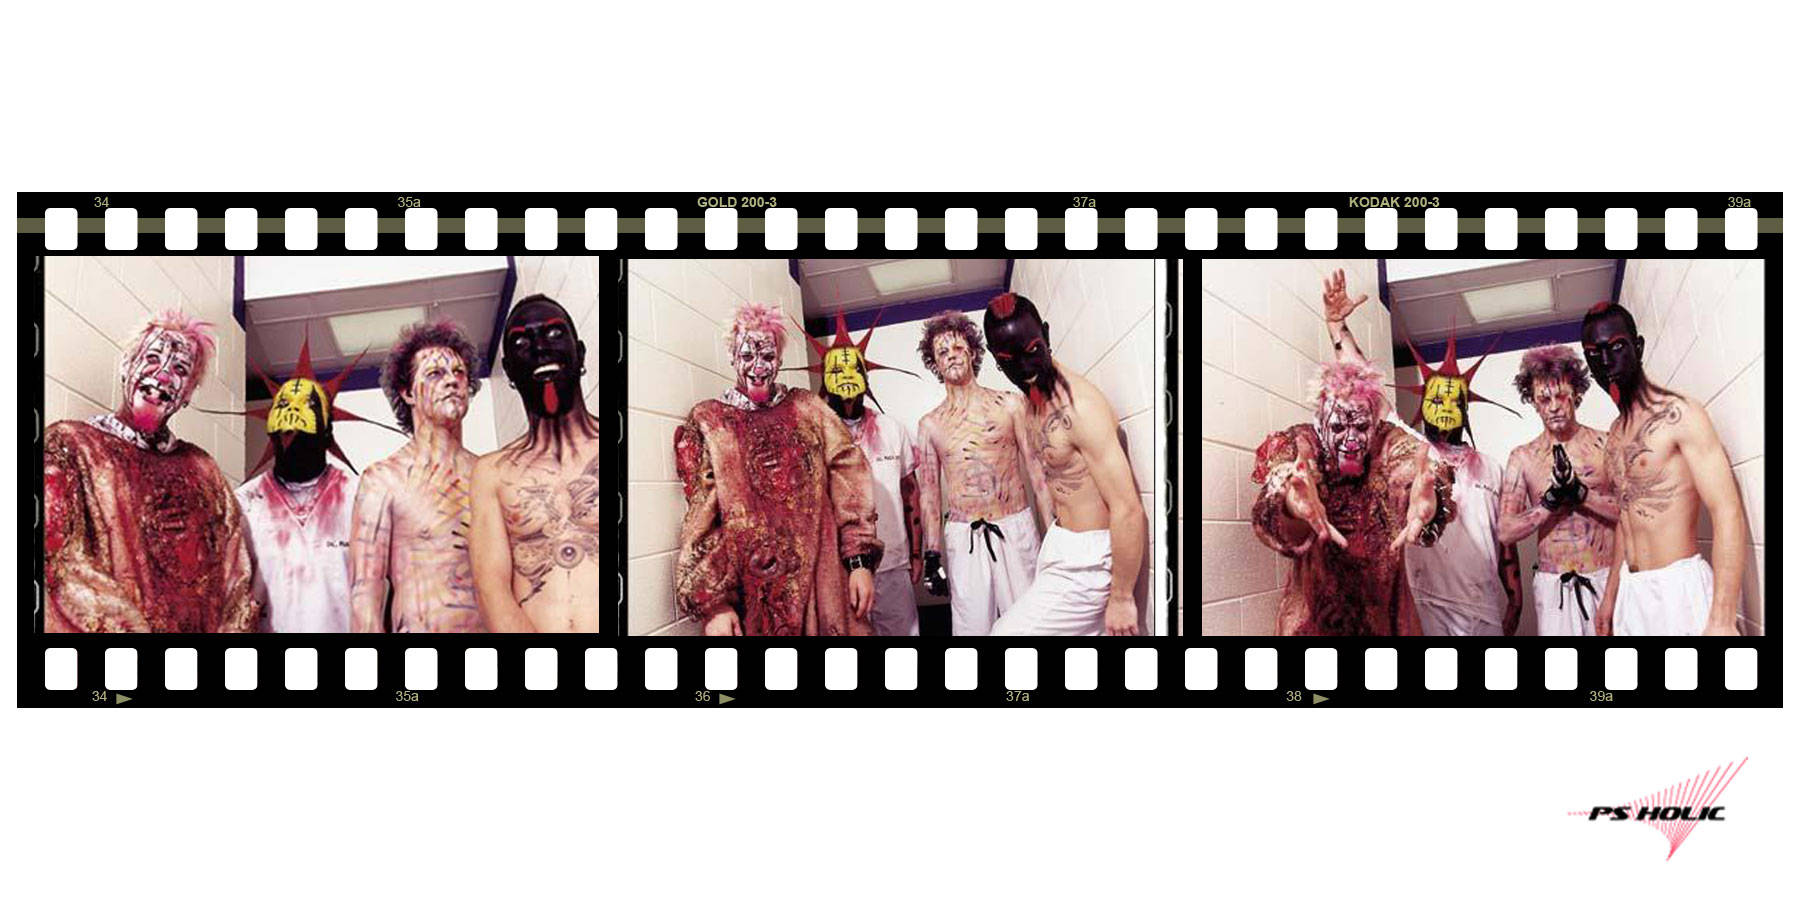


Keren uM...!!!
ReplyDeleteLangsung praktekin...!!!
Trimakasih sdah share tutorialnya...!!
Sukses slalu.
thank, for your visit my blog, nice fost, i like this.
ReplyDeletekeren...info yg menarik...
ReplyDeletesip kawand
ReplyDeletesejak ada CAMDY,negatif film suda menghilang.
ReplyDeletebahkan tempat cuci fotopun suda tak ada yang melayani kamera jaman dulu :(
*xixi..komengranyambung*
bagus gan,keren bangeed igh*teutep gen gue bilang keren hasil akhir dari foto foto itu ;)
aku kemaren malah scan negative menjadi positif
ReplyDeletehehehehe...
Wes efek2 negatif film gini emank serig di pake nie hhe.. Soalnya yg jadul2 lagi musim hhe...
ReplyDeleteSemangat n met aktivitas Sob......
terima kasih atas trik jitunya, bermanfaat untuk manmbahkan efek pada negatif fiLm.
ReplyDeletesemangat terus sob :)
ReplyDeleteMantab, kapan-kapan akan saya coba!
ReplyDeleteTutorialnya mudah dicerna, trims!
ReplyDeleteaduh...
ReplyDeletetutorialnya pake bhs inggris, jadi agak susah nih...
bikin versi indonesianya dong...
hai, hadir disni menyapamu, pa kabar sob?
ReplyDeletewawasan baru nih, gak nyangka kmu mmg profsional di bdng IT..
oh, ya sob.. follow balik yah, bwt ngerame'in blog newbie ini..he3
hebat hebat hebat :)
ReplyDelete@ pulsagram : wahhh... klu hrs 2bhs... repotnya bukan kepalang kang :(
ReplyDeletedulu juga dua di usahain mempergunakan 2 bhsa tiap tutorialnya keluar... tp krn saiia ngerjainnya sendirian, jd agak kerepotan...
@ Naruto Original Soundtrack : seperti yg pernah saiia informasiin, saiia sampe sekarang blm bisa ngedelete org2 yg saiia follow utk bisa memfollow org2 baru kang... any suggest?!?!?! mohon maaf dan pengertiannya kang :(
@ all : thank for all your great kind words guys :)
really appreciate it :)
sumpah gak bisa liat bro
ReplyDeletesoalnya inet lemot
gambar2nya gak kebuka semuanya,hehehe
speechless...
ReplyDeletesaya juga gk bisa liat nih... maklum internetnya yg murah :(
ReplyDeletePERTAMAX ne...hehhehehe...
ReplyDeletethx for sharing kawand....!!!
SALAM BERKAWAND
salam berkawand :)
ReplyDeletetips photoshopnya maknyuss....
ReplyDeletenumpang belajar yah
monggo kang monggo :)
ReplyDeletewah keren2 gan tutorialnya
ReplyDeletebtw. pertanyaan agan "bagaimana cara unfollow blog" silakan agan menuju "Dashboard" lalu cari "MANAGE" di bawah reading list ... ya di sana agan bisa melakukan unfollow
Makasih sharenya kang...mantap
ReplyDeletewidiiihhh... gila keren2 bnget tutorialnya . mau donk diajarin! hehe. i've linked you . link back please ;) thanks 4 the comment on both of my blog .
ReplyDeletedianaurora.blogspot.com
@ John Terro : saiia masih bingung kang :(
ReplyDelete@ Sudinotakim : makasii juga tuk kedatangannya..
@ DianAurora : it's done :)
yuhuuu hasil akhirnya menakjubkan,,,, (real pict)
ReplyDeletebanyak info2 menarik diblog ini.. Aku add follow no 172 yah sob.. :)
ReplyDeletethank you . link kamu udah aku pasang di Rain in Summer [dianauroradiaries.blogspot.com] . check di kolom 'blogger indonesia' dengan nama 'FCDB' . thank youuuuuuuuu ;)
ReplyDelete@ all : thnx for always coming and coming again here :)
ReplyDeleteterimakasih buat bagi2 ilmunya, mantab.... :)
ReplyDeletebtw. selamat gan ,,, akhirnya agan berhasil juga menemukan unfollow
ReplyDeletemantep sob keren, sory nih ya baru sempet mampir :)
ReplyDeletemantap, tutorialnya.... bikin tutorial macam gini, pasti repot karena musti menyertakan screenshot :)
ReplyDeleteSalam kenal,blowalking.
ReplyDeleteBagus sob tutorialnya
ReplyDelete@ John Terro : iia kang makasii infonya... akhirnya saiia bisa juga unfollow kang :) makasii kang iia :)
ReplyDelete@ four dreams : iia sama-sama kang :)
@ r10 : iia gpp kang... saiia suka ko' yang seperti ini.. makin mengasah kesabaran saiia :)
@ Mr.XXX : kang saiia ada pertanyaan kang mengenai Blogger wave di postingan akangnya yang OXIS :)
makasii kang FB uda mau berkenan mapir :)
ReplyDeletetrims infonya ne kawan...
ReplyDeletesalam kenal dan sukses slalu
salam kenal dan sukses selalu tuk akangnya juga :)
ReplyDeletekayaknya seputar tentang kamera nich,,
ReplyDeletengak mudeng saya nich BOSS,, lam kenal aja yach,,
ReplyDeletekeren dan mantaf nih gan
ReplyDelete@ Jabon : bgtulah kang... tp lebih kepada tutorial photoshopnya kang.. dan bukan mengenai kamera secara khusus gtu kang :(
ReplyDelete@ anak nelayan : makasii kang :) pake ikan apa kang nti mlm kita saur?!! huehhehehe...
saya suka mempelajari teknik gambar, trmasuk potosop, autocad, n coreldraw. Tp sayang bhsa inggris. Saya lemah bahasa alien. Wekeke..
ReplyDeleteoh my, what an interesting post and even more interesting blog :P
ReplyDeleteFrom now on, I´m gonna follow you :)
@ KANG uchiha : bhsa nya gag ribed ko' kang... cuma bhsa teknisnya photoshop... klu emang kita terbiasa sama menu2 photohshop juga saiia kira gag akan ada masalah :(
ReplyDelete@ Lichy : thank you dear... really appreciate it.. followed you back..
this is so typical...
ReplyDeleteis there any kind of negative camera film in positive way like that?
hell no... that was just a sample and lil' bit more expand trick :)
ReplyDeletei know exactly what you meant.. ofcourse a negative is negative.. and no need colors except black and white or something.. :)
This is SUCH a cool trick! I am loving your photoshop tutorials. You're a real pro!
ReplyDeleteiih, di gambar yg terakir tu, seerreemm ih.. hiiy sseetttaaann
ReplyDeletei do realy like this kind of trick...
ReplyDelete@ Holly : you embarrase me :(
ReplyDelete@ takuya : hiiiiiiiiiiiii
@ Learn more : thank you :) hope you'll back soon...
wow.. amazing :)
ReplyDeletemaaf saiia blm bisa bertandang ke tempat akang mba sekalian :(
ReplyDeletekeren designnya :)
ReplyDeletecanggih lu bos gambarnya
ReplyDeletemakasii kang :p
ReplyDelete