Here’s a showcase of free RSS icons you can use for your webblog, or if you are still using the typical RSS icon on your site, it’s probably time to change. Full list after jump.
1. Open your new blank documen 500x500 with white BG... Click Rounded Rectangle Tool (U) from your flying menu on the left corner, set like my pic said :
Orange color for the icon, produced from the #d9600f of your foreground colour, press and hold shift, draw a shape as big as the document like mine above!
2. Press Ctrl + J or right click the shaped layer and choose duplicate layer from the little menu to duplicate the shaped layer, now you should have 2 layers in your layers window.
Make sure you have the top most layer selected then go to the Menu and choose Edit > Free Transform or just press Ctrl + T... now change the settings for the width and height to 97 and hit enter
3. Right click the top layer and choose Blending options click Gradient overlay and use settings given below
Do not forget click on stroke and use the following settings :
4. Next we're gonna make a white logo inside the Orange container.. you guys can use your own style to do this, i use an Elliptical Marquee Tool (M) to get the first step on creating that white thing inside...
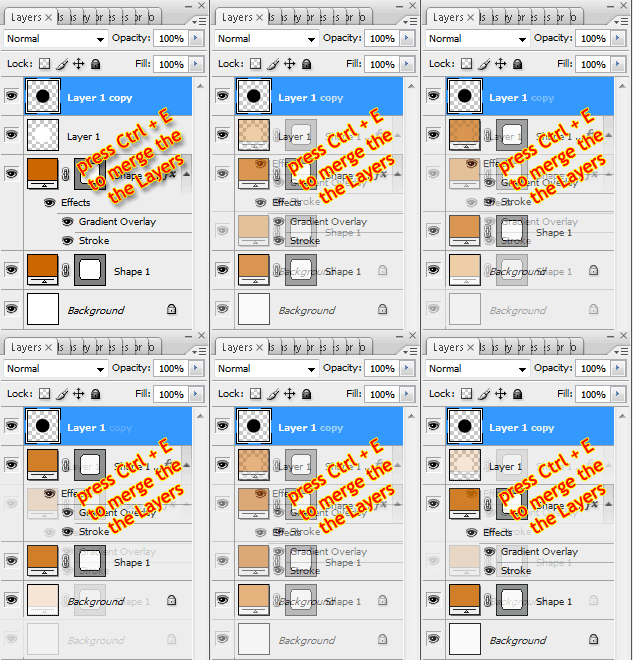
Double it and fill it with Black (#000000), make the Black circle more little than the white one, you could use Ctrl + T or whatever you've done.. got it?!?! After give the Black color on it, merge that both Layers, Layer one with Layer One Copy... that it!

5. Here i choose Magic Wand (W) or again and again, you can choose other option like
6. Make that circle a part! Use the help line or you can go to menu View > Show > Grid if your eyes have no ability to fix it from the center to the lower part of the logo... Make it quick, select Rectangular Marquee Tool (M) to make this selection...
That's why i told you that you should use the help of this grid or even the blue line from the top and the left of your stage. OK... you've got the selected area, press Delete.. T
7. To get the second 1/4 white circle, use your own imagination... Done!?!?!? OK... here you can use other tools to explore how magic photoshop is like i use to say in other PS trick... so c'mon, choose your tool, here i use Custom Shape Tool (U) with this parameter...
8. Lick Ctrl + T to make your white logo bigger than that OK?!?!?
Now you have your own RSS feed icon which is vector meaning you can resize it without losing quality.
oOOoPPsss.. don't go anyway, 'coz we have one thing to do, but... i'm not gonna tell you that it's a must... it just an optional thing, you can in or out of this... To make the icon a bit more interesting I've added a glossy shine... so if you would like to do the same, follow along with the next step...
9. Press ctrl + click the middle layer with the right hand like i show you with this image below to create a section around it...
10. Create a new layer then fill it with White (#FFFFFF)
Isn't that easy?!?!
11. Now select the Pen Tool (P) and use the following settings, make sure you have Paths selected..
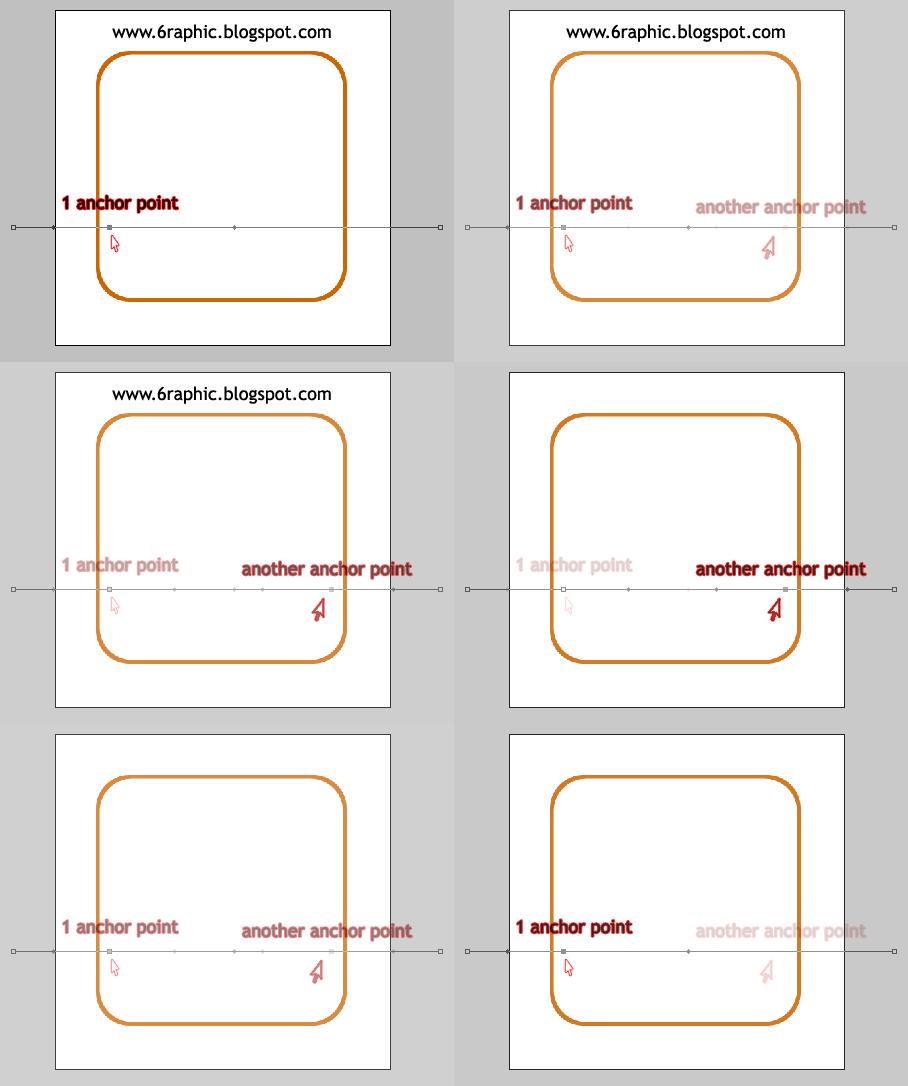
Select the Direct selection tool (A) and right click the line and choose Add Anchor Point.. create two Anchor Point on it like the .gif image shows you

Now back to the Pen tool (P) again and close the path
Now right click the path and choose Make selection from the little menu which appears...
So, now you should have a selection... go to the main menu and choose Select > Inverse or press Shift + Ctrl + I to inverse the selection... make sure you have the white fill layer selected which should be the top most layer, than Press Delete from your PC...
and hit Ctrl + D to deselect the section now your image and layers window should look like mine below... Press Ctrl + D to deselect the selection, turn the Opacity down to about 25 for this layer... That's IT!!!
Now you should have something like the final image, here's mine...! What about yours?!?!?!?!
View Indonesian version here!
Related Post :


bang ulung ya..namanya familiar banget di cirebon..tapi ga kenal sih..
ReplyDeletebtw salam kenal..
anak cirebon juga ?
I like this tutorial, thanks very much
ReplyDelete:) Thanks :)
ReplyDeletewah... feednya kerennn... :)
ReplyDeletesangar boz feed nya tapi sepertinya susah banget... butuh waktu lama nih..
ReplyDeletetapi tetep nice info..
ajiiiiibbbb...
ReplyDelete@ anggi : sangar??? weww....
ReplyDelete@ all : thnx for comin'...
huaaaa... postingan dikau kerenz2 amat sih... nanti sayah coba aaaahh.
ReplyDeleteada postingan tentang bikin tanda quote untuk postingan ga?
Hi,
ReplyDeleteThank you so much for all your tutorials they really gave me a new outlook on the possibilities of Photoshop when it is used right.
Thanks alot and keep up the good work.
breath taking :(
wow wow keren kebetulan saya juga lagi belajar2 potosop nih....
ReplyDelete@ Quinie : ko' sekarang gk pernah muncul ??? hiks hiks hiks . . . kmn aja siiii..???
ReplyDelete@ bhell : my pleasure Sir :)
@ NeoComps : thnx brow :)
@ bayu nugroho : makasih kang.. sama-sama belajarlah kang :)
this is so creative steps i've ever see :)
ReplyDeletethank you for this :)
The amount of steps you jump is imense. How do you go from 7 to 8? On a pic you have two circles, on the next you have the two parts neatly cut making the feed logo finished. Maybe it's magic.
ReplyDeleteThen at least three menus appear in pics without you saying how to get them.
As a tutorial this is terrible.
and you are..?!?!?!
ReplyDeletei'm glad if you do so :)
ReplyDeletethank you for coming ;)