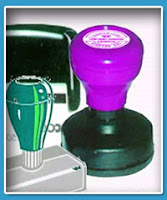
 1. Choose the Key T to activate your Type Tool (T).
2. Pick a Red color for the Foreground. Why RED? You'll gonna find the answer in just a minute. Type your word there, any word. LUNAS for example.
3. Create a New Layer. As I am big Photoshop fan, I really love their keyboard shortcuts, use this to get your New Layer >>> (Shift + Ctrl + Alt + N).
4. Pick Rectangular Marquee Tool (M) from the flying menu, then draw a selection around the area that you would like turn into your edges box.
5. On the Menu, select Select> Modify> Contract . Contract Selection box will appear, fill in the value of about 13px . Adjust the font size you in words Addons hull earlier. Then do not forget to press Del on your PC. Look what the purpose of all this?
6. Flatten Image, but before that, let the Background Layer in your Palette Layer unvisible . Click the eye icon on your Background Layer in the Layers Palette. Notice the picture before the flatten/merge down and afterwards.
OK.. writing steps have been completed, now we will try to write it like a real stamp.
1. Open a picture (the important is, choose a great picture with a great texture there in). Examples of images that you can use as in the image below...
I use one of them. Drag hull writing we have just created to the image of our choice. Enable Layer of our choice. REMEMBER, Layer images of our current selection!
Press Shift + Ctrl + U to change the selected images into Black & White (Desaturate).
2. Now switch Layer Lunas. You can match the text to resize it. Already? In the Layer palette, (active in full Layer) instead Blend Mode it from Normal into... Darken.
Alas! The options you can use other than the Darken, Color Burn, Darker Color, Multiply, Screen, Color Dodge, Linear Dodge, Overlay, Soft Light, Difference, Exclusion is good as well, and Color. Explore the suitability of the colors your self. I choose Darker Color as an experiment this time.
3. Merge Layers. Activate Magic Wand Tool (W) . Click on the red area. Now you understand why the red color that we use from the beginning been ?!?!?
4. Copy and Paste the selected areas on a new worksheet and .. voila! You DONE!
This is the worst language selected that I've ever use for this sort of blog post.. So Sorry for that!
Inspired by MbahDewo.


Very good tutorial; I want to learn making this!
ReplyDeletego ahead then ma'am :)
ReplyDeleteHebat... sekarang jd master tutor. LANJUT OM!!!
ReplyDeleteHEHE-HEHE TRIMS sekali sudi baca puisi MBAH BUDI ANDUK :DDD
ahh si akangnya bisa ajja nii.. kembali kasih kang :)
ReplyDeleteharus pelan2 saya belajarnya neh Mas karena masih oon suroon (ikut istilah KangBoed) untuk menggambar di komputer ini. Dari dulu gak bisa2 he he. Tks
ReplyDeletewah mantap neh omm
ReplyDeleteHuaaaaaaaaaaaaaaaaaaaaaaa...mantep deh...
ReplyDeleteDari dulu pengen banget buat ginian....
Thx buanget :D
Sorry juga nih baru bisa mampir :D
Owh..ya, blog saya beberapa minggu ini untuk sementara emang di moderasi dulu komennya :D
good..good.. tapi kenapa contohnya harus tulisan LUNAS sih? *pertanyaan gak penting, gak usah dijawab hahaha*
ReplyDelete@ arkasala : saiia juga pelan-pelan kang :( takut salah
ReplyDelete@ Jidat : moga bermangpaat :)
@ Zippy : iia, saiia baca di mbahdewo juga ada akang zippy di postingannya dia.. makanya saiia jadi kepingin buat yang satu ini :) gpp kang di moderasi, yang penting nya'nyoi... :p
@ ocky fajzar suryani : abis dari sumber aslinya tulisannya lunas sii ky, di Indonesia emang ada 'classified' atau apa gut..???! eheheh...
@ all : ini merupakan racikan saiia sendirim penyederhanaan dari yang di tempatnya mbahdewo, silahkan utk yg kebetulan gag bisa ikut di sini, buka linknya tuh di akhir postingan ada :)
lunas wes saya... kekeke
ReplyDeleteiia om lunas... xixixixixix...
ReplyDeleteoalah jadi ber-crack yah lunasnya :P
ReplyDeletemaaf nie kang baru mampir..biasalah masih sibuk jadi petani ngurus sawah dan bayar cicilan utang sana sini :D baru sempet pirrr mampir dimari :D
oce deh sukses ama tutor sotosop dan MMOnya :D
MMO apaan bli?!?!?!?
ReplyDeletekeren sob makasih infonya ya
ReplyDeleteterimakasii udah mampir kang :)
ReplyDeleteWow! I would try this with my photoshop... Looks cool.. Thanks for the info.
ReplyDeletemampir sehabis pulang kampung
ReplyDeletebikin stempel muka bisa juga kan yah oom hehehe
ReplyDeleteLuna ki sopo oom? bukan luna mayah to?
ReplyDeletewuih keren sob aku datang sob !!! ijin sedot ilmunya ya sob
ReplyDeleteLUNA kui yo LUNA-KAL SICH LUNA-MPAR AJA
ReplyDeleteLUNA-SIB moga beruntung dapetin LUNA-MAYA kalo gak dapetian dia
LUNA-NGIS dech,,,,,wkwkwkwkwkkw kiding
ooo..photoshop toh. kirain cara bikin stampel sendirinya versi asli.
ReplyDeleteboleh deh dicoba
mantab nich, sayangnya aq g bisa bahasa inggris kawan
ReplyDeleteSip... :D
ReplyDeletehehehhe
keren-keren... bisa dicobainn nih...
ReplyDeletepas banget lagi perlu hehehe....
ReplyDeletewow,,i never think to use photoshop to make a stamp,,,thank's bro'
ReplyDeleteP.S..
nice song
^_^
thnx for the song... it belongs to kapanlagi.com :p
ReplyDeletenyoba dulu nih
ReplyDeletestep by step..
BIkinin tulisa RIA dunk ;)
ReplyDeleteberarti kita pake background apa aja ya bang buat latar nanti gambar yang kita tempel itu? hhmm... coba ah... ;p
ReplyDelete