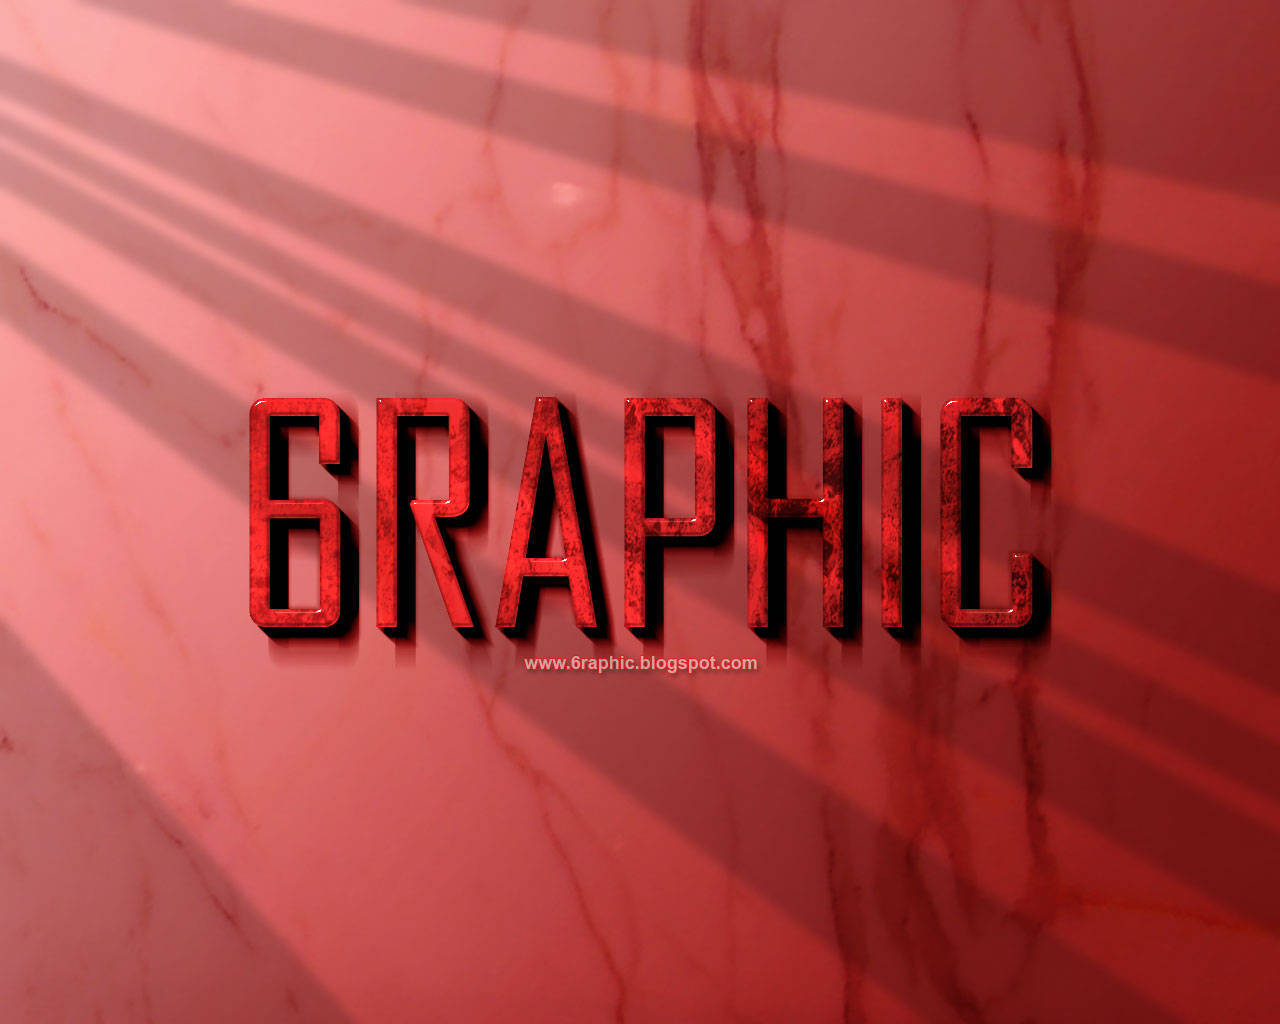
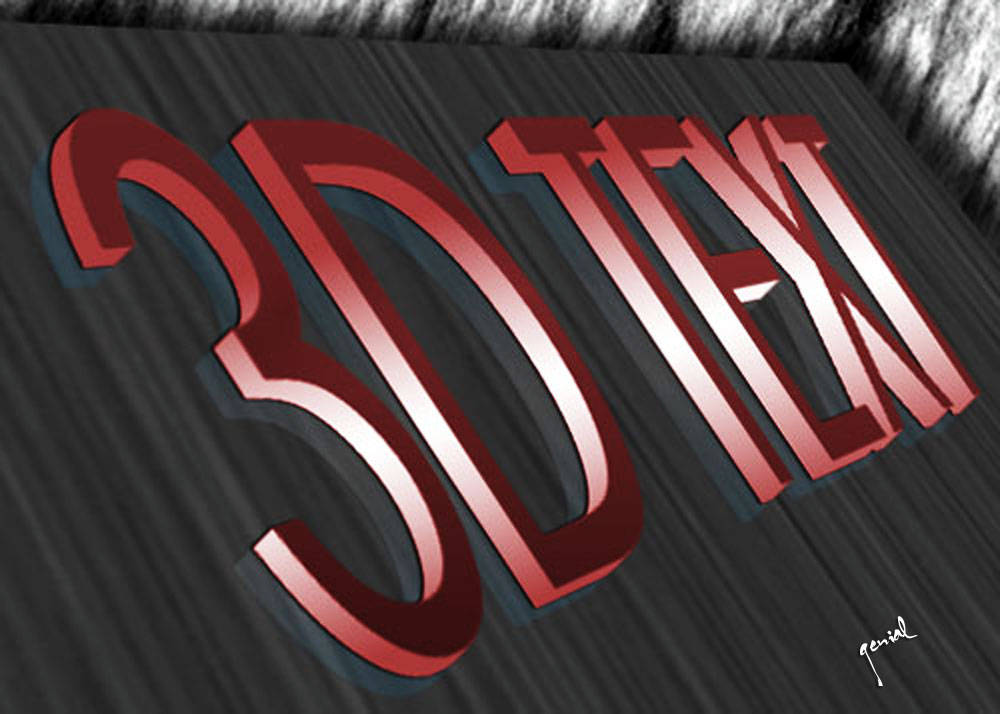
Howdy... :) May I introduce you, a friend o'mine who gave me this crazy idea. I decided to post it here. Known as a resto named Cippes, located at Jababeka area. Muhammad Sholeh, as the graphic designer of this 3D stuff, allowed me to put the artwork after I repaint it with my favo photoshop.
I think that was a creative process that gets you using your crazy brain. Imagine this! The workflow for creating it involves taking no photographs at all. The author just do some capturing the amazing moment only with his eyes and his brain. 3D images without the need for 3D software.
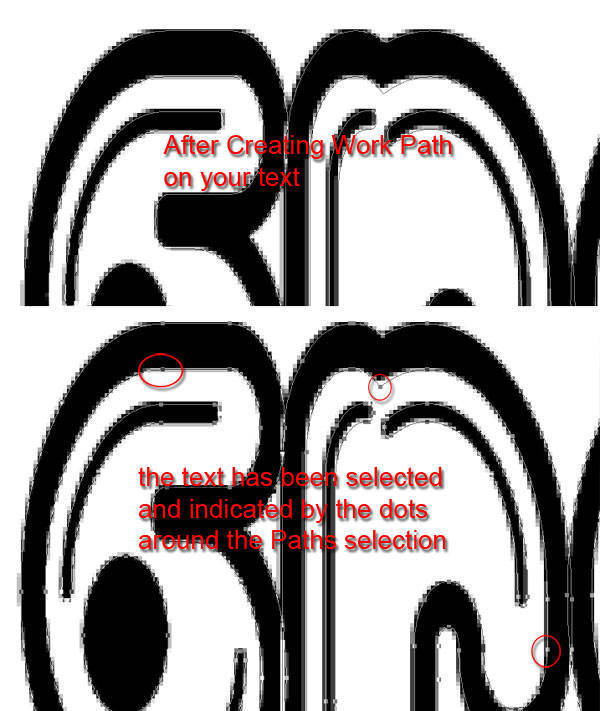
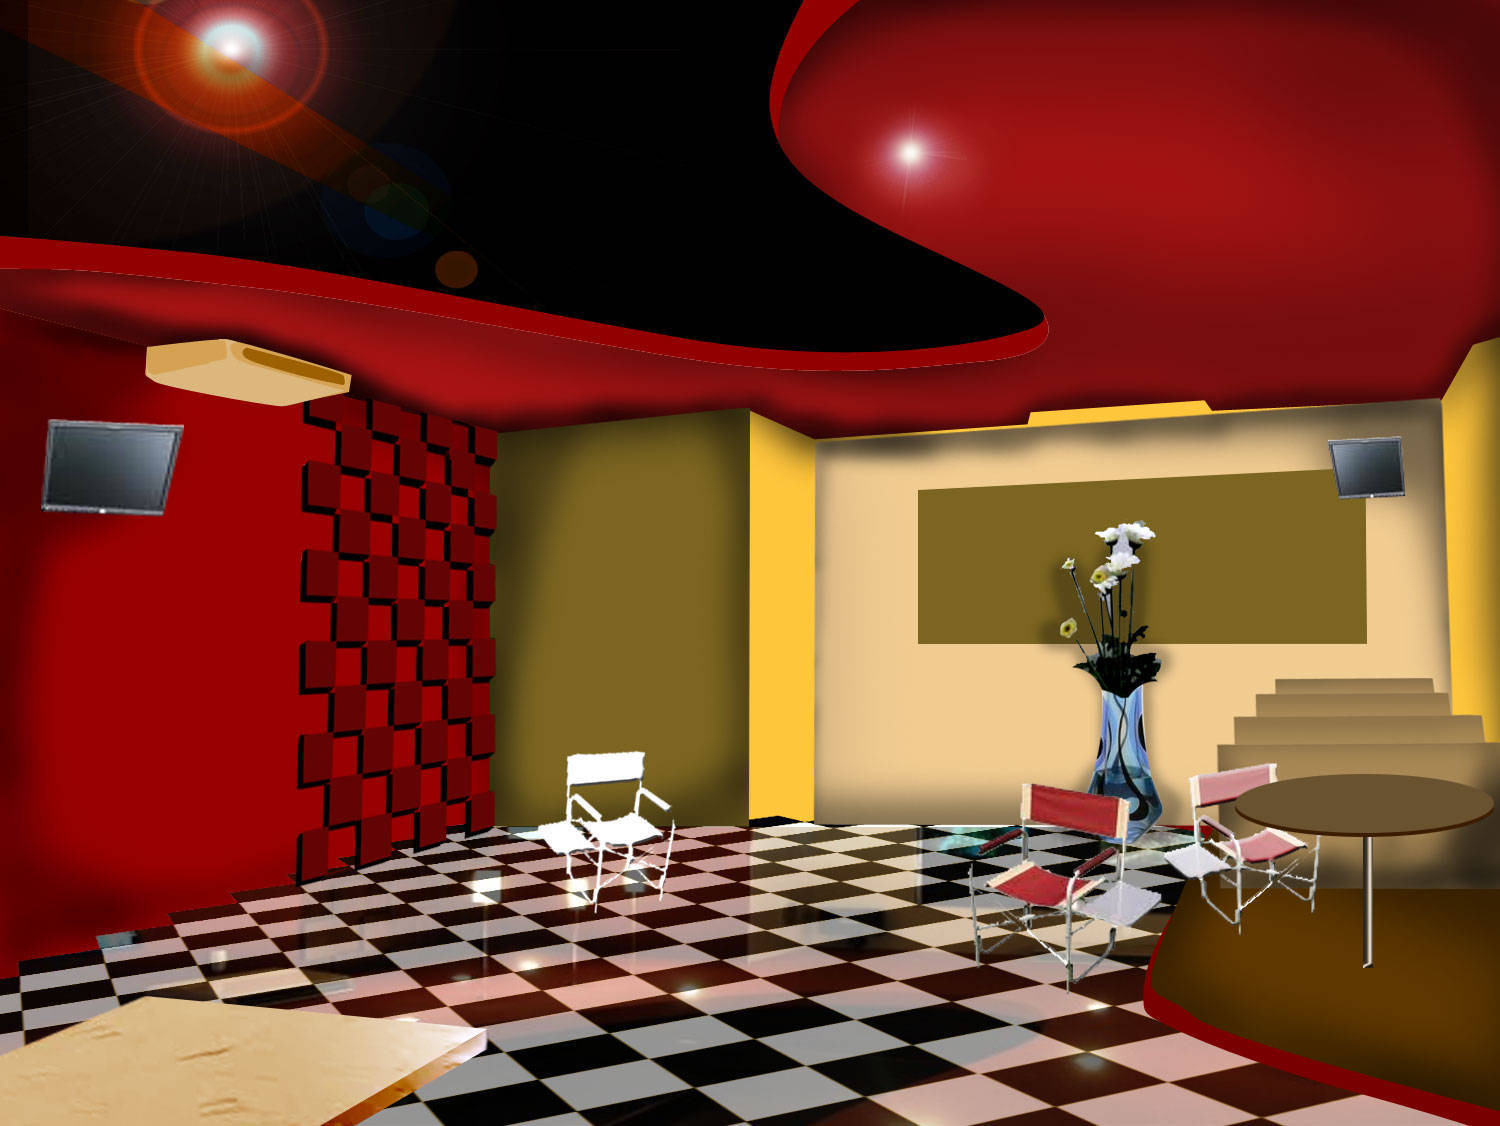
Let's take a look first at the image he's creating.
Good job, your work is done Cing! And for y'all guys.. Write down anything you like to your creative advertisement design. Use your software well, but also use and explore your crazy innovative brain.
See you at the next tutorial.


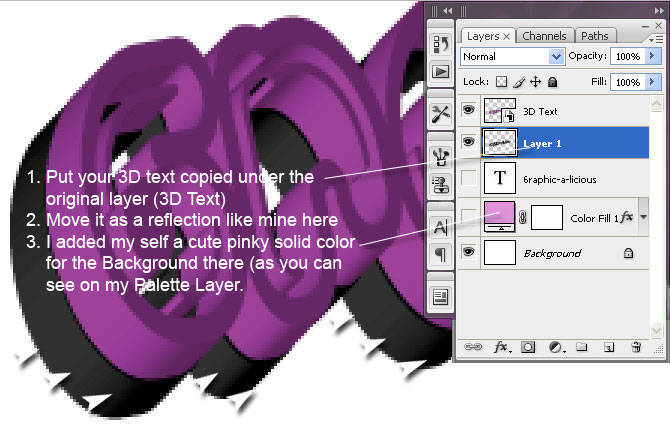
 This time.. I will be.. a little different than usual, but still with my favorite software,