
 Around these days, I notice, that there's so many professional portrait photography shots. Television, magazines, and even in peoples homes. You might think most of it is taken down from camera professional taking amazing pictures but the real thing is that it actually comes from a damn combination of heavy and huge make-up and post processing things.
Obviously, when it comes like this, (huge make-up and bla bla bla before the camera, pink) You would easily think that you look silly in some way but guys, when the pictures come back you would absolutely look great. Smoothing the colour tones and covering skin blemishes, and amazingly, Photoshop can do that.

So many areas of portrait retouching you can expand but in this tutorial I will be just concentrating on cleaning up and softening the skin with the easiest way I know using the Smudge Tool.
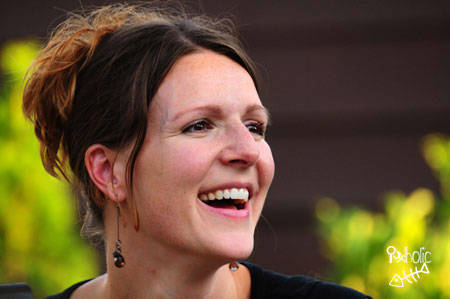 |
| Source ; sxc.hu/photo/1141475 |
First Step
Open your image. Correct the levels of it. I'm not gonna complicated your day by arranging levels adjustment, shadows, or anything. Here I just want you to correct the level of the image by using the Auto Level Adjustment or simply press Shift + Ctrl + L from your PC.

Step Two
Remove the imperfections area you want on face such as spots and skin blemishes. You can use the Cloning (S) and Healing Brush (J) tools.


Step Three
If you've done by that two tools, now you can start cleaning it up by the 'main course' of this tuto tool, Smoodge Tool (R). Before that, for better result, Sharpen your image first, go to menu Filter > Sharpen > Sharpen, do this step twice by easily pressing Ctrl + F from your PC to reload the last effect you used, taht was Sharpen.
Now, call up your Smoodge Tool (R) and set the mode to Normal and set the strength in about 30-40%. Start clean the face by this tool. Easy.. easy.. calm down.. you got it!

Use these settings carefully and finish your scratch the paint over the skin, and, voila, you're DONE!!!
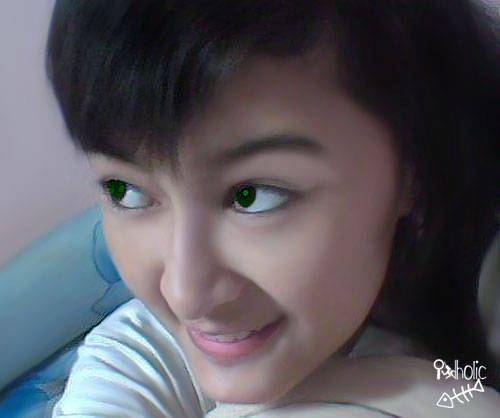
Result
 |
| Click to enlarge! |
Excite a schadenfreude and watch it slobber


Wow. Luar biasa sob, Ajarin donk sobat...
ReplyDeleteHebat banget.HAsil akhirnya begitu mulus
ReplyDeletetrims tipsnya.teknik yang jarang di posting selain disini
ReplyDeletesip tutornya sob
ReplyDeleteAllohu akbar!
ReplyDeletewow, luar biasa...
ReplyDeletekayak sulapan, bisa berubah
ReplyDeletebisa ngecoh nih kalo potonya buat nglamar sesuatu
ReplyDeleteentah kerja entah apa
salah link duh
ReplyDeleteWah aku Juga Freelance Graphic Designer Sob.....tp kLo Photoshop aku jarang pake aku lebih sering pake CorelDraw maklum Kliennya pada lebih suka Format .CDR hhe........Keren tutoR'y.....Sukses Sob....Aku Follow nie Sob(DJ-Site)...D'tgu Follow balik'y..........
ReplyDeletekeren ^^
ReplyDeletecantik hasilnya :D
ReplyDelete……………………………
……………………………
……….ooooO…………..
………..(………)………..Ooooo……
…………..)……)………..(………)………
…………..(_…)…………..)……)……….
……………………………….(_…)…………..
genapin doang drong....
ReplyDeleteskalian buang peju goreng jajajajajaaaaaa hahahahaaaa
Hi This is true! I too wondered how so many professional photographers nowadays!! haha! Adobe does help ehh!!
ReplyDeleteBtw i wanted to ask you for some more site names like the one you told me earlier...[got a few good sw from there...] where I can get serials.. i am searching for nsf [lotus notes recovey sw... seems stellar has one whch maybe working for me.. but too costly... maybe you know something?
have you tried this one?!?!?!?
ReplyDeletecool tricks :)
ReplyDelete