
 Mesdames Monsieurs, BONJOUR! Our goal for this tutorial will be creating a denim textured patch (from Photoshop Texture bank) with simple stitching, to draw a realistic what we called Levi's pant entirely from a few artistic filters, Wind and a few basic layer styles.
Mesdames Monsieurs... There are some really nice tricks along the way,
Let's get started!
First thing first is create this simple denim background. Open your New Blank Document. This will be 700x500 at 72ppi. That's quite enuf. Create a New Layer, and from the main menu, go to Edit > Fill which will bring the Fill dialog box up.
You can Short it cut by pressing Shift + F5 from your PC.
Choose Pattern, once it's selected, click OK.
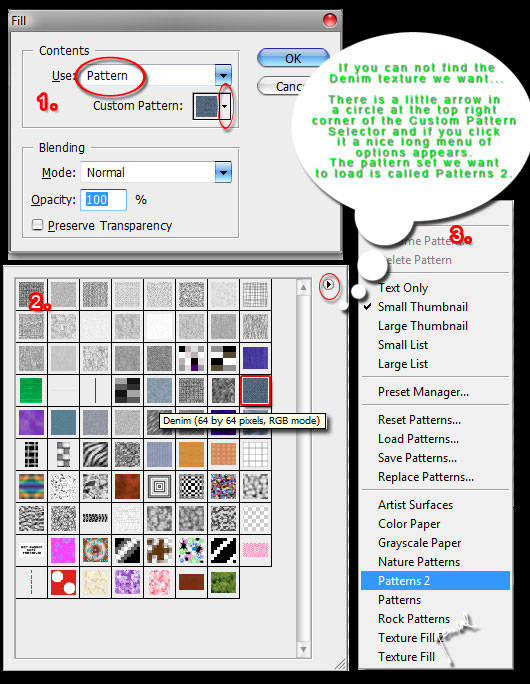
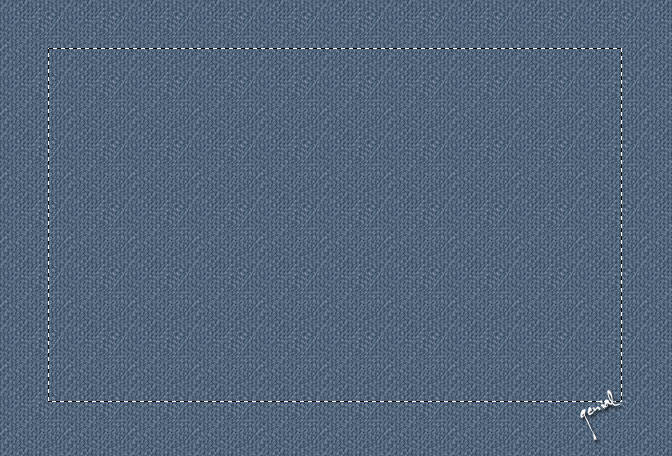
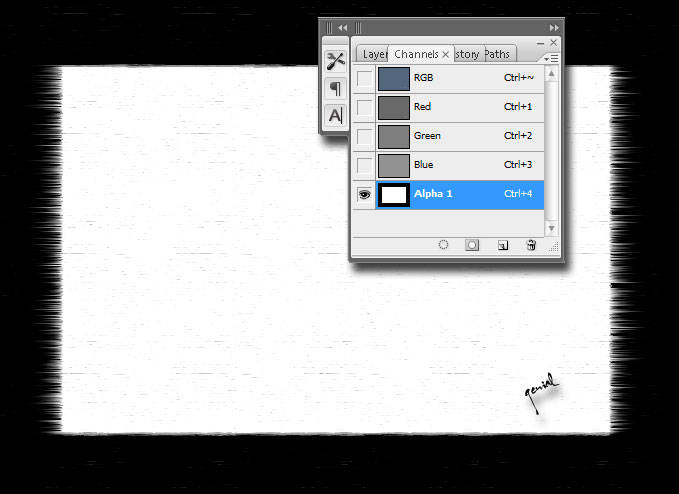
Mesdames Monsieurs, from your PC, press your M key to call the Rectangular Marquee tool up, make a slection like this :)
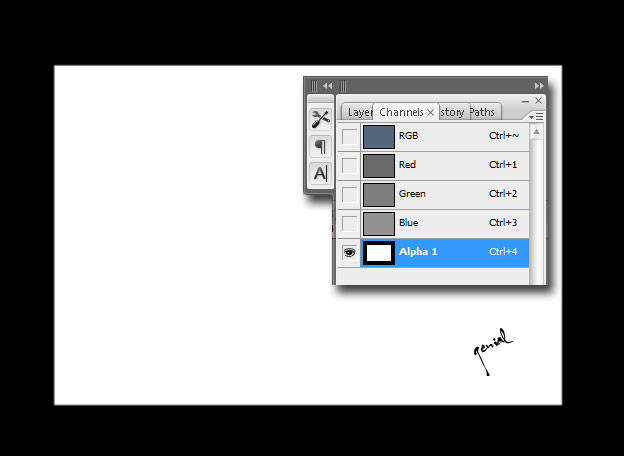
Now switch over to Channel tab in your Layers Palette Mesdames Monsieurs, hit the little button at the bottom of the Channels palette to Save the Selection As Channel. Activate your new Alpha Channel, press Ctrl + I to Inverse the selection, then hit Ctrl + D to Clear the selection
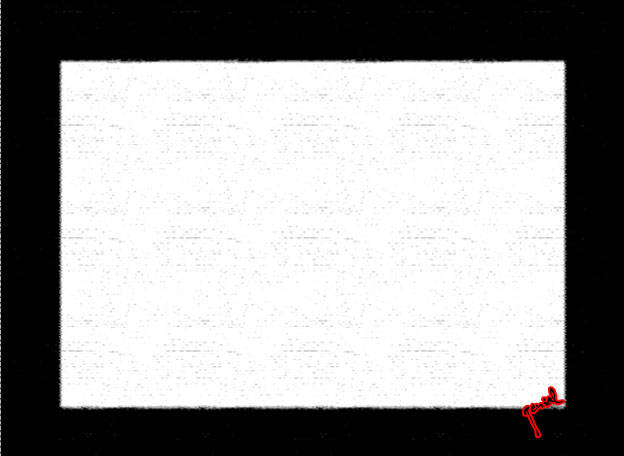
Now we are going to add some Grunge look for our Denim. From the main menu, go to Filter > Sketch > Conte Crayon with the default setting, which is..
Foreground Level : 11
Background Level : 7
Texture : Canvas
Scalling : 100%
Relief : 4
Light : Top
Take a look at the image you've created a moment, give it a break.. After a higher realism on your smoke variation, go to Menu Filter > Stylize > Wind and choose Wind and From The Right and click OK. Repeat that step except this time choose it opposite -whisch is- From The Left.
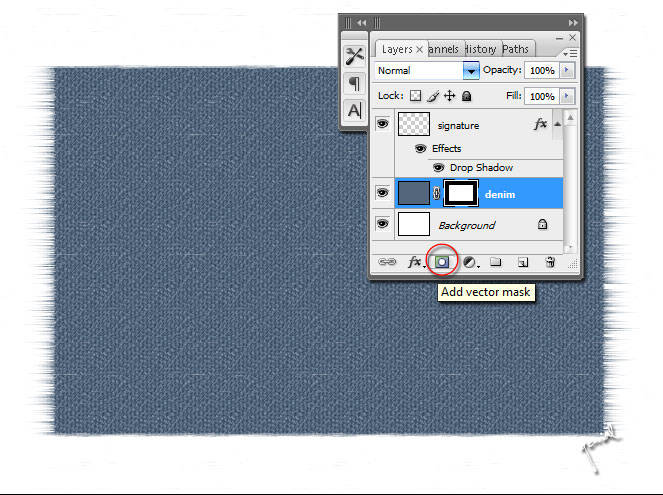
Ctrl + Click on your Alpha 1 Channel to Load the Seletion, press Shift + Ctrl + I to Inverse the Selection. Click your RGB channel, switch back again to your Layer. Don't STOP.. With the Denim layer selected, add a simple Layer Mask by choosing the Create Layer mask icon from the bottom of your sweet Layers palette.
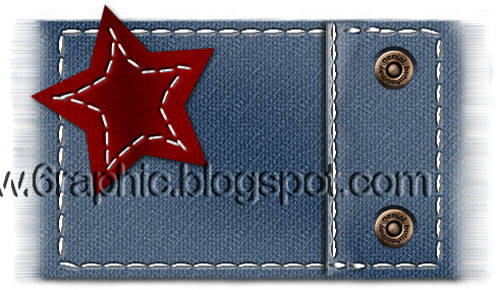
GOSH!!! If Mesdames Monsieurs followed along like a good little monkey, ooOoPppsss.. then your Denim Layer should now look like this.
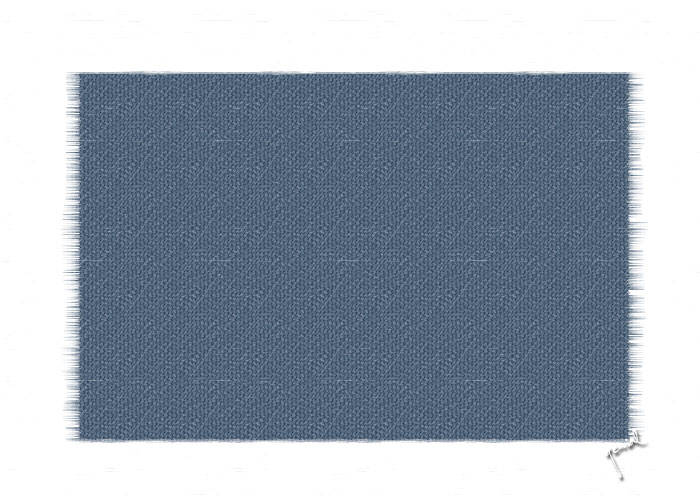
Add some black brush thing to paint the Right and Left edges of your Denim down where the wind filter blows to get the more realistic look from the piece o'Levi's s***!!!
Make sure when you do that painting black brush thing, the Layer Mask is still selected Mesdames Monsieurs.
Mesdames Monsieurs... don't forget to always adding a slight drop shadow to this layer (Levi's/Denim layer in this case). Set it Blending Option with;
Drop Shadow checked
Blend Mode : Multiply
Opacity : 60%
Angle : 120
Use Global Light : Checked
Distance : 2px
Spread : 0%
Size : 3px
Layer Knocks Out Drop Shadow : Checked
Just leave the Contour Quality and Anti-Aliased with Noise as the Default.
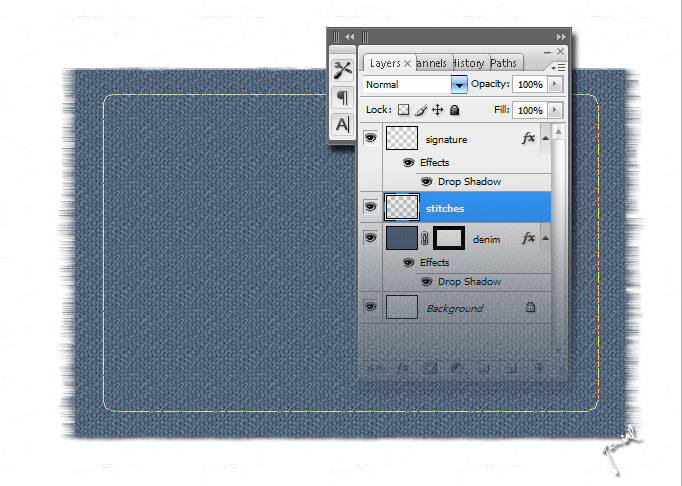
Done??!?!? It is time to add a higher realism stitches by introducing some Brushes Option from Brushes Preset (F5). I told you this, experimentation is very very very important in graphic design. OK, to execute that, you should first...
Create other New Layer, name it Stitches. The shortcut to do that is Shift + Ctrl + N. After that, switch your tool to Rounded Rectangle (U), Radius 10px. Drag your mouse to draw this..
Switch your tool again from Rounded Rectangle into Brush (B), fill it with White Color, then hit F5... Take your eyes carefuly on this setting..
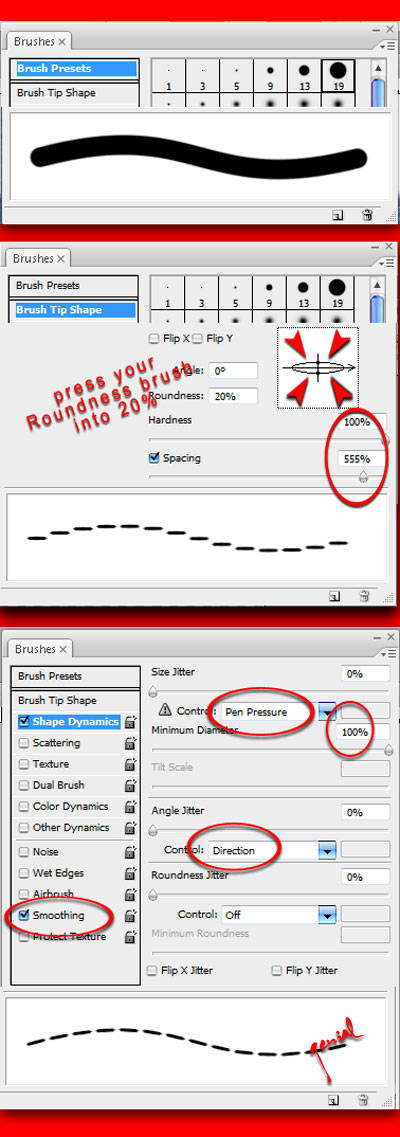
Kinda mess or something...?!?!? What's the purpose exactly from that image? Just read along, than you'll find out. The brush is all set up clearly with White Color, for the Brush Preset, you can choose the size in between 13-19. Mine is 15. Mesdames Monsieurs.. you can absolutely press now the P key to invoke the Pen tool and make sure to Right-Clicking your Rounded path, choose Stroke Path from the Pop-up menu came out, then choose Brush. Leave the Stimulate Pressure Unchecked.
Viola!
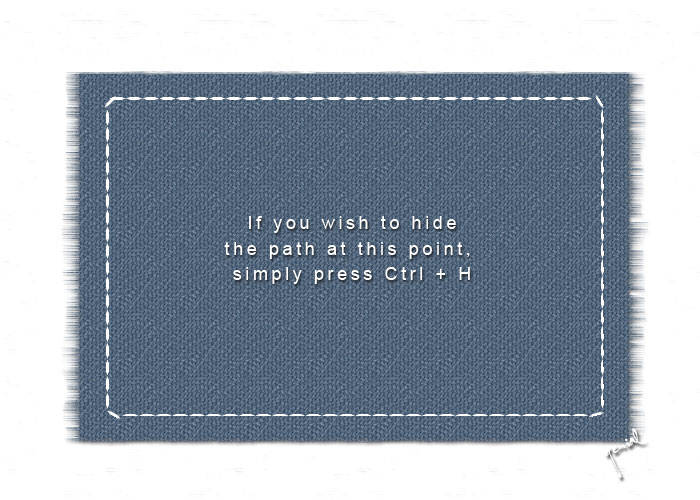
What a clever technique to create stitches, ain't that right?!?!? To this Stitches layer, you can add a Bevel and Emboss layer style with the following setting ;
Bevel and Emboss checked
Style : Pillow Emboss
Technique : Smooth
Depth : 151%
Direction : Up
Size : 5px
Soften : 0px
Angle Shading : 120
Altitude Shading : 30
Use Global Light checked
Gloss Contour : normal (#1 from Pop-up)
Anti-alised : Unchecked
Highlight Mode : Screen, White
Opacity : 40%
Shadow Mode : Multiply, Black
Opacity : 40%
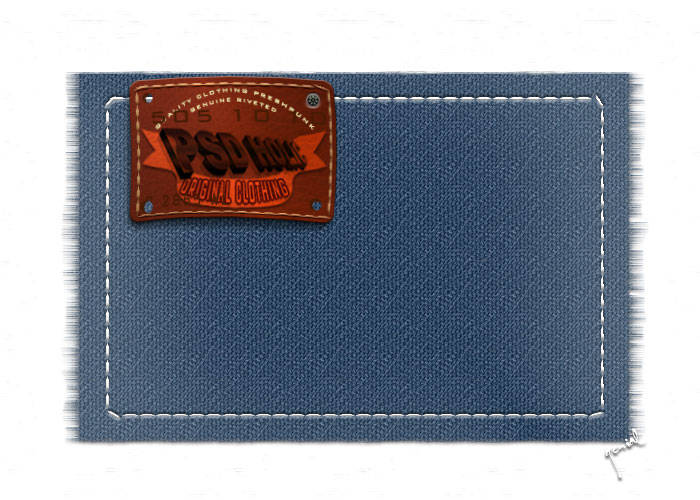
And then.. to tone down the stitching a little bit, drop the Stitches layer Fill opacity down to 65-75%.
Finaly, back to your Denim layer, select it, and add a Satin layer style to give this Levi's a realistic tonal variation with this following setting :
Satin Styles checked
Blend Mode : Color Burn, black
Opacity : 17%
Angle : 19
Distance : 131px
Size : 125px
Contour : the the Half Round (#7 from the PopUp box)
Invert : Checked
Anti-aliased : Unchecked
result
So... Mesdames Monsieurs, this is YOUR site as well, so if you have massive constructive suggestions or deliciouse critisizm or even feedback or anything or something or whatever on how we can improve it for you (except for the size of each image ofcourse, lmao), please please please let me know! I would do my best to keep up!
Your Ads Here!


wow, perlu di coba nih, thanks
ReplyDeletekeren
ReplyDeletesalam hangat dari blue
hebat...hebat...hebat...hebat...
ReplyDeletejago bnget sich edit foto
@ all : terimakasii atas kehadirannya... saiia ada pertanyaan mengenai blog ini... apakah ketika proses loading page terjadi... muncul pop-up yg meminta skript utk di hentikan (karena error) or something?!?!?!
ReplyDeletedear my friend genial...maap baru sempet bewe...aq kena phk nih...jadi agak ngawur postingnya....telefon seluler n telephone cellular kan saudara kembar? :) LOL
ReplyDeletehehe, levisnya merk genial...mmh, kenapa ga kang? buat dunk...
ReplyDeletemakin keren aja blog ini, maafin...lama ga berkunjung kesini kang, sempat kehilangan jejakmu..semangat trus ya?
wahhhhh aku mau dong diberi celana jin
ReplyDeletetapi yang aseli ya
hehehehehe
kak gen kerennnnnnnnnnn.... huhuhuuhhu bisa gitu yah.. ck ck ck .. Tia nga abis2 na kagum ma hasil karya kakak deh... bisa mirip banget ma asli na
ReplyDeletePS : sekalian Tia mo nyambung silaturahmi yg dah lama hilang**jiahhh paan coba** beberapa bulan lalu tia nga OL coz ada tehnical problem xiixixixi...
sukses tyus ya kak... makasih dah sharing ilmu na :D
canggih nih yang satu ini :(, gak tau mesti bilang apa lagi :(
ReplyDeletemas gmn cara buat logo di corel draw....
ReplyDeleteajarin dong...........
bikannya sama aja?!?!?!
ReplyDeletemakasii kang mba' iia uda bersedia mapir di sini :)
ReplyDelete